
My home needs more artwork. But I’m broke, and my drawings look like the work of a particularly untalented 3-year old.
Also, I really like copper.
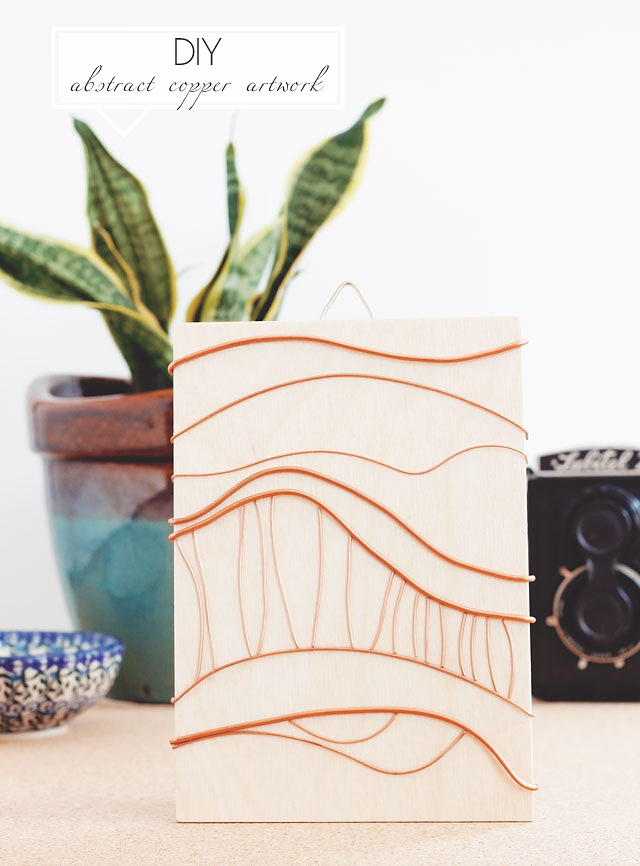
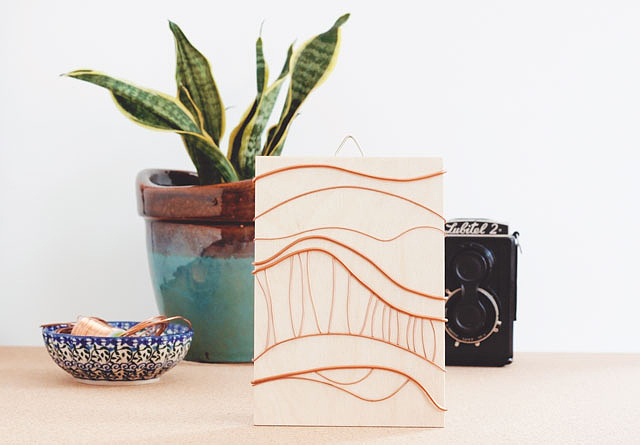
The obvious solution to these dilemmas: DIY Abstract Copper Artwork. Custom inexpensive art, drawing skills not required. Woo!
What You Need:
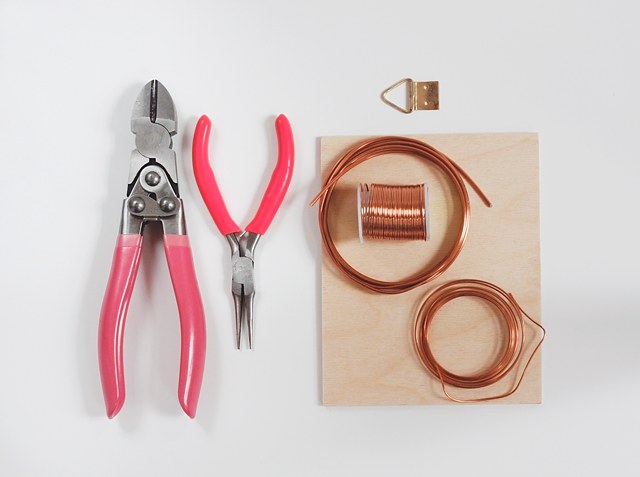
- copper wire in different gauges/thicknesses
- 1/8″ thick sheet of balsa wood, cut to the size you want (mine is 5″x7″)
- fine sandpaper (not pictured)
- wire cutters
- small pliers
- E6000 Spray Adhesive (not pictured)
- triangle hanger, or other picture-hanging hardware
What You Do:
Lightly sand the balsa wood to smooth it up a bit (not pictured). You don’t have to go crazy with this, just get rid of any rough spots on the wood. Make sure to wipe it down afterwards so you don’t glue sawdust to your artwork.
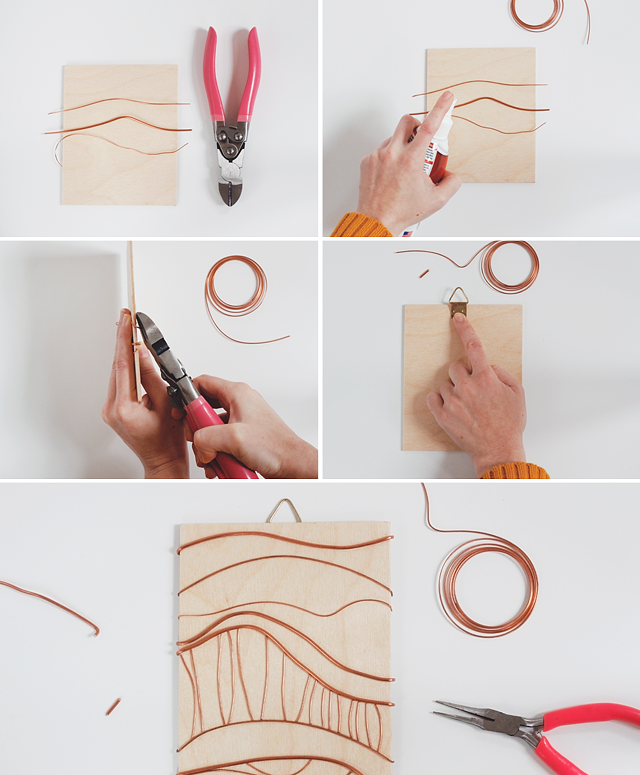
Begin cutting lengths of wire and laying them on the balsa. The wire pieces should be longer than the balsa wood by roughly 1/4″ on each side. Using the small pliers or just your hands, bend the wires into abstract curves or whatever shapes you want. Have fun! Just try to keep the wires mostly flat so they can be attached to the wood.
Grab the E6000 bottle, give it a good shake (per the instructions on the back), and begin adhering wire pieces to the wood. I found it was easiest to work with 3-4 pieces of wire at a time. Spray a heavy coat of glue on the wood itself, and on the wires. Don’t worry, this stuff dries completely clear! Position the gluey wires onto the gluey wood. It will take about 30 minutes to begin setting—it’s best to leave it alone during this time.
Once the wires have set enough to stay in place, add another batch of 3-4 wires. Continue to work in this way, cutting, shaping, and gluing, until you are happy with your piece. Allow to dry completely overnight.
After all the glue has totally dried, gently bend the excess wire over the edge of the balsa and snip off the ends. This prevents the ugly snipped bits from being visible from the front of the piece. Be careful as you bend—lightly use your hand to hold the wires down from the front while bending the wire with your other hand (the glue holds well, but it’s not cement you know).
Flip the balsa wood over, and, using the same glue method as above, adhere the triangle hanger to the back of the wood. Since it takes a while to dry, you can tape the hanger down with masking tape so you don’t have to hold it in place the whole time.
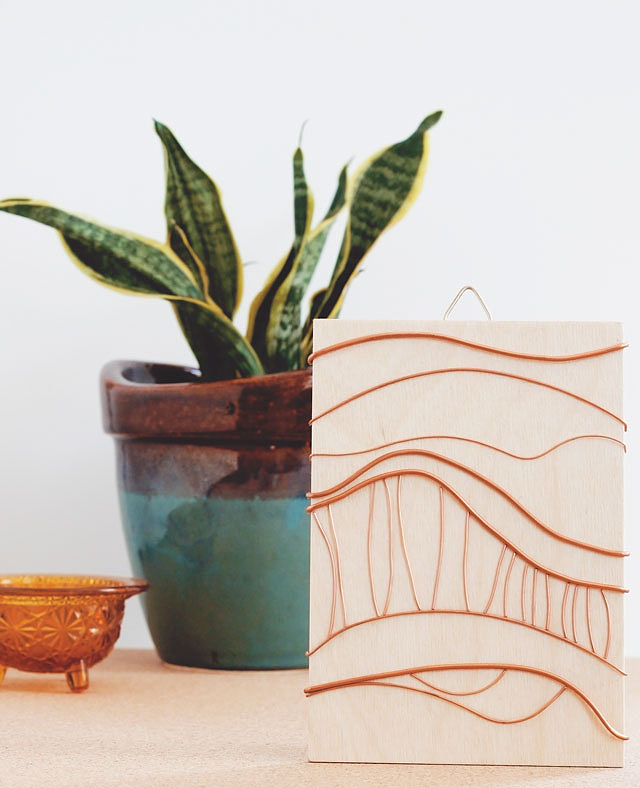
And that’s it! Your fabulous artwork is ready to hang. This is a super versatile project due to the ease of working with the wire. You could make geometric shapes (triangles!), or even wire words. I decided to just let the copper guide me. That is officially the most ridiculously artsy-fartsy phrase I have ever uttered.
Bonus picture: Champ was curious what was going on behind all my propped-up pieces of foam board, so Alan gave him a birds’ eye view of my photoshoot. Look at his little face!
What do you think, readers? Are you inspired to make your own DIY abstract copper artwork? Do you ever make art to hang instead of buying it?

……………………………………
This project was featured on Curbly!


I certainly am meow.
Champ! You’re online! How are you accessing the internet while sleeping curled up on the couch!
This is so pretty! I’d love to try this out sometime. I love making my own wall art. If I don’t make it, it’s usually real cheap and from Goodwill!
-Becca
Ladyface Blog
Thank you! Goodwill art is the best, especially funky old cross-stitch patterns. 🙂
So cute! I love the different materials used- very different than the usual DIY project
-Courtney
Thank you, Courtney! The materials are very inexpensive too. 🙂
Ooh that’s beautiful! I love the idea to write out words- lots of possibilities there! I would love to link to your how-to if you didn’t mind.
Thank you Rachel! Yes, you are welcome to link to my projects–but thanks for checking! That is very thoughtful. 🙂
Great job!
Thank you!