DIY

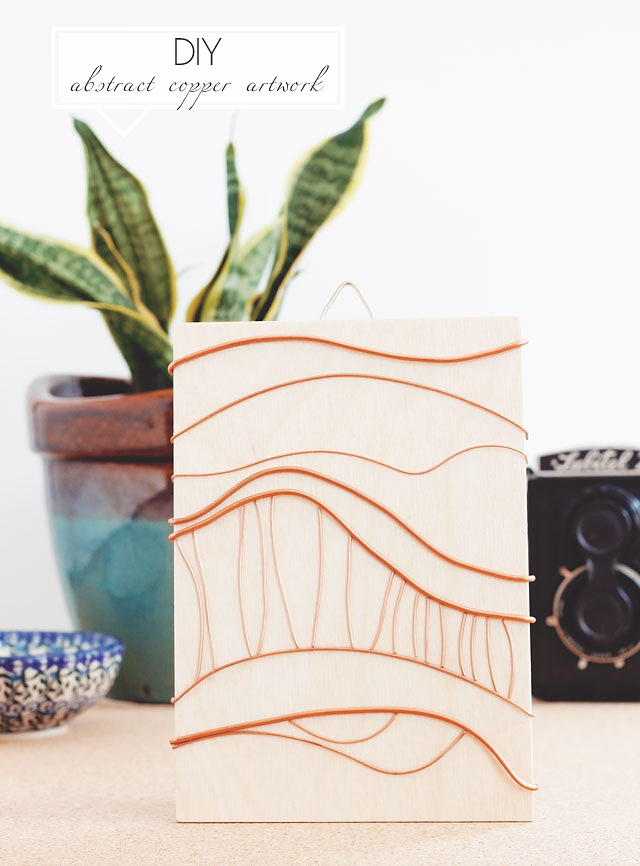
DIY Abstract Copper Artwork

09.09.13

My home needs more artwork. But I’m broke, and my drawings look like the work of a particularly untalented 3-year old.

Also, I really like copper.

The obvious solution to these dilemmas: DIY Abstract Copper Artwork. Custom inexpensive art, drawing skills not required. Woo!

DIY Abstract Copper Artwork || Jade and Fern

What You Need:

DIY Abstract Copper Artwork || Jade and Fern

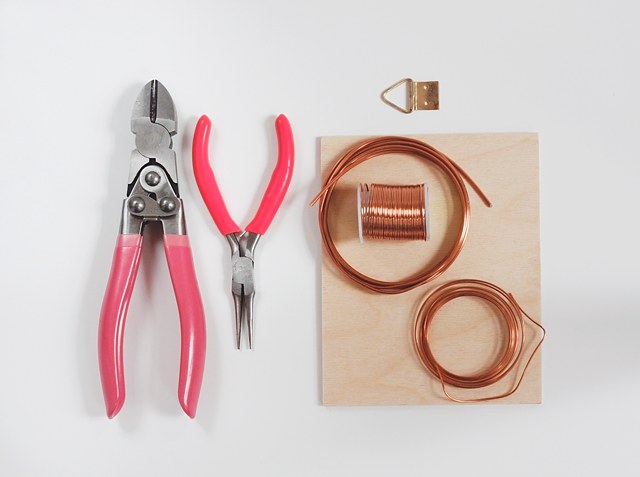
  • copper wire in different gauges/thicknesses
  • 1/8″ thick sheet of balsa wood, cut to the size you want (mine is 5″x7″)
  • fine sandpaper (not pictured)
  • wire cutters
  • small pliers
  • E6000 Spray Adhesive (not pictured)
  • triangle hanger, or other picture-hanging hardware

What You Do:
DIY Abstract Copper Artwork || Jade and Fern

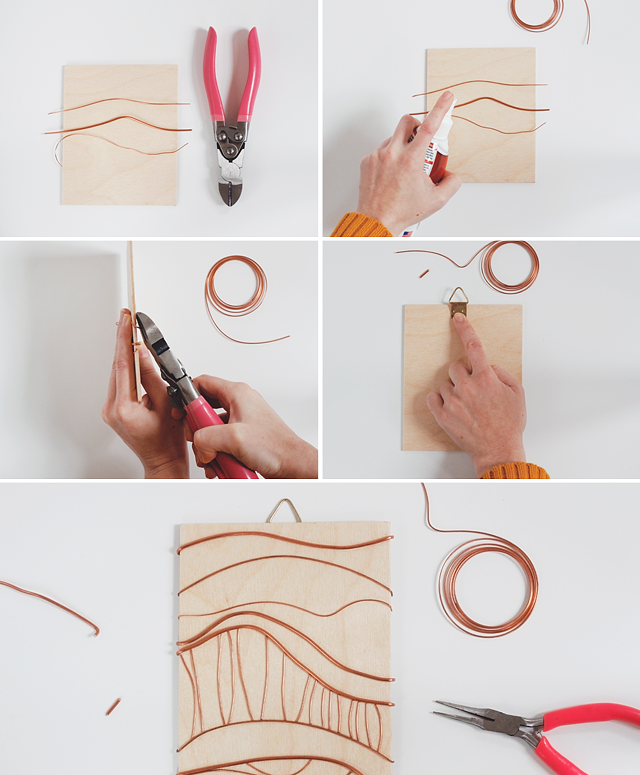
Lightly sand the balsa wood to smooth it up a bit (not pictured). You don’t have to go crazy with this, just get rid of any rough spots on the wood. Make sure to wipe it down afterwards so you don’t glue sawdust to your artwork.

Begin cutting lengths of wire and laying them on the balsa. The wire pieces should be longer than the balsa wood by roughly 1/4″ on each side. Using the small pliers or just your hands, bend the wires into abstract curves or whatever shapes you want. Have fun! Just try to keep the wires mostly flat so they can be attached to the wood.

Grab the E6000 bottle, give it a good shake (per the instructions on the back), and begin adhering wire pieces to the wood. I found it was easiest to work with 3-4 pieces of wire at a time. Spray a heavy coat of glue on the wood itself, and on the wires. Don’t worry, this stuff dries completely clear! Position the gluey wires onto the gluey wood. It will take about 30 minutes to begin setting—it’s best to leave it alone during this time.

Once the wires have set enough to stay in place, add another batch of 3-4 wires. Continue to work in this way, cutting, shaping, and gluing, until you are happy with your piece. Allow to dry completely overnight.

After all the glue has totally dried, gently bend the excess wire over the edge of the balsa and snip off the ends. This prevents the ugly snipped bits from being visible from the front of the piece. Be careful as you bend—lightly use your hand to hold the wires down from the front while bending the wire with your other hand (the glue holds well, but it’s not cement you know).

Flip the balsa wood over, and, using the same glue method as above, adhere the triangle hanger to the back of the wood. Since it takes a while to dry, you can tape the hanger down with masking tape so you don’t have to hold it in place the whole time.

And that’s it! Your fabulous artwork is ready to hang. This is a super versatile project due to the ease of working with the wire. You could make geometric shapes (triangles!), or even wire words. I decided to just let the copper guide me. That is officially the most ridiculously artsy-fartsy phrase I have ever uttered.
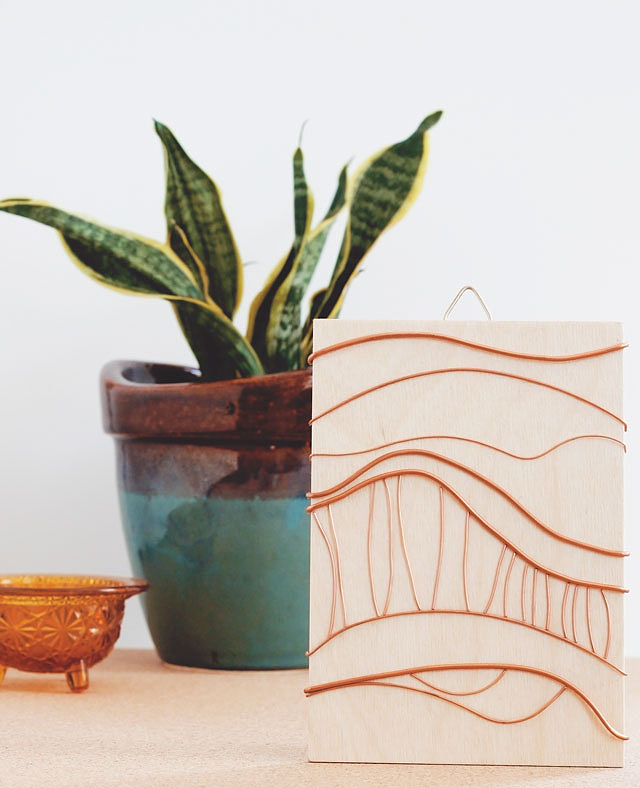
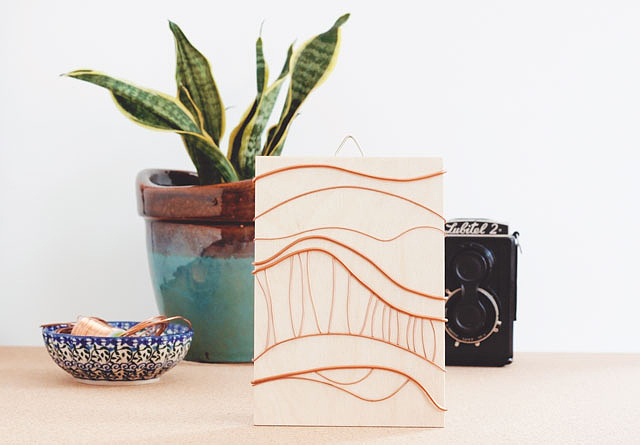
DIY Abstract Copper Artwork || Jade and Fern

DIY Abstract Copper Artwork || Jade and Fern

Bonus picture: Champ was curious what was going on behind all my propped-up pieces of foam board, so Alan gave him a birds’ eye view of my photoshoot. Look at his little face!

What do you think, readers? Are you inspired to make your own DIY abstract copper artwork? Do you ever make art to hang instead of buying it?
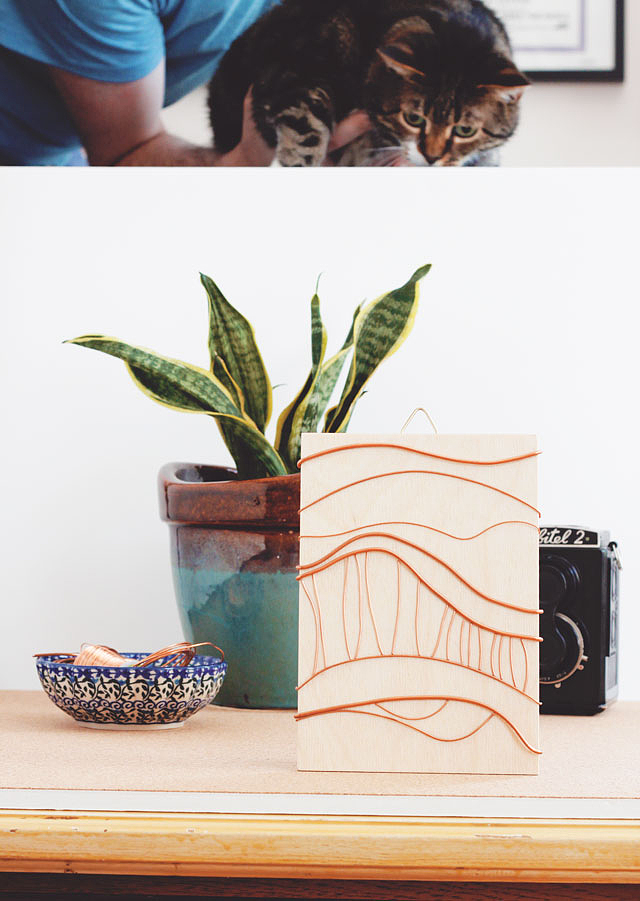
DIY Abstract Copper Artwork || Jade and Fern

……………………………………

This project was featured on Curbly!


Food

Top 5 Vegan MoFo Bloggers

09.06.13

It’s September and that means kinder temperatures, leaf peepers invading New England, pumpkins, and Vegan MoFo!!!

For you non-vegans, or vegans who live in an internet-less cave, Vegan MoFo is an annual blogging event and it is indescribably delicious. Participating bloggers share their favorite recipes and food stories on a near-daily basis, leading me to near-daily ravenous cravings. It’s a good time.

In honor of the first week of Vegan MoFo, here are my Top 5 Vegan MoFo Bloggers, in no particular order:

Top 5 Vegan MoFo Bloggers || Jade and Fern

» Vegan Yack Attack

Jackie is dedicating her MoFo to vegan mac ‘n’ cheese recipes. Really original, awesome mac ‘n’ cheese recipes. Need I say more? But in case you’re not convinced, here is a Vanilla Fig Cake.

» Oh She Glows 

Many of you vegans probably know Angela’s blog featuring healthy, yet paradoxically delicious recipes, such as the Vegan Enchiladas with Cilantro Avocado Cream Sauce and the pictured Ultimate 4-Layer Vegan Sandwich. The mere mention of the word “avocado” throws me into Pavlovian salivation. For you cookbook collectors, Angela is publishing!

» Seitan is my Motor

Full disclosure: I’m a little biased towards this blog—much of it is devoted to veganizing German cuisine. Have I mentioned I’m originally from Germany? Well now I have. For this year’s MoFo, Mihl is veganizing classic German desserts. YUM. Also, she takes requests! The dumplings in the photo above are her veganized version of Dampfnudeln, requested by yours truly.

» Hell Yeah It’s Vegan!

Look at those chocolate curls. LOOK AT THEM. How could I not love this blog? I can’t eat chocolate because it give me headaches (is that the cruelest thing or what?), but I can live vicariously through pictures like this. And Claryn has a bazillion other fantastic recipes: the Overnight Breakfast CasserolePumpkin Agave Muffins, and Reuben with Corned Beef Seitan particularly make my mouth water. I really shouldn’t be writing this blog post before lunch, my hummus sandwich will sadly disappoint.

» Luminous Vegans

This one’s still new to me but I’m already in love. I made the Natural “Artificial” Strawberry Milk the second it was posted and it is amazeballs. Ketty started off her Vegan MoFo with this easy and divine cashew cheese. She also writes a lot of reviews of vegan restaurants, and has a whole page dedicated to resources for vegans. And, um, Baked Peaches with Coconut-Vanilla Cashew Cream. !!!

Now that I’m officially REALLY EFFING HUNGRY, I’m gonna go grocery shopping. This Luna Bar just isn’t cutting it. Don’t forget to check out the Vegan MoFo blog to learn more about Vegan MoFo and see a complete list of bloggers.

Happy eating!

Read Watch Listen

Playlist Volume 1

09.05.13

[8tracks url=”http://8tracks.com/veggiemar/ladyface-blog-music-swap-2013″ width=”640″ height=”640″ ]

One of my go-to bloggers, Becca of Ladyface Blog, recently hosted a real, old-school, snail mail, mix CD exchange. I was pumped to participate—making mixes has been a passion of mine since I learned how to record songs off the radio with my cassette player. The youth of today will never understand the tragedy of a radio dj cutting off the end of a song with mindless jabber.

Fortunately or not, depending on your audio preferences, making a music playlist has gotten way easier with digital music. This is the mix I made for the swap, and I thought I’d share it with you all.

Are any of you into making mixes? Do you remember the thrill of receiving a mix CD from your high school crush? Do you live in High Fidelity?

DIY

DIY Pencil Case Project for BuzzFeed!

08.30.13

Guys. BuzzFeed—BUZZFEED—asked me to come up with a project for them.

!!!

I kinda lost it. And then I said yes obviously I will do that yes. And then I had to keep it a secret from Blogland for over two weeks and it was really hard.

And then I saw that they used my picture for the thumbnail on their DIY page and I kinda lost it again.

BuzzFeed Screenshot of Jade and Fern Pencil Case Project After tweeting about it while grocery shopping Thursday morning (literally, in the produce section of Trader Joe’s), I recovered my wits and realized I can finally share this project with you since it’s published and on the web forever and ever. Secret no more.

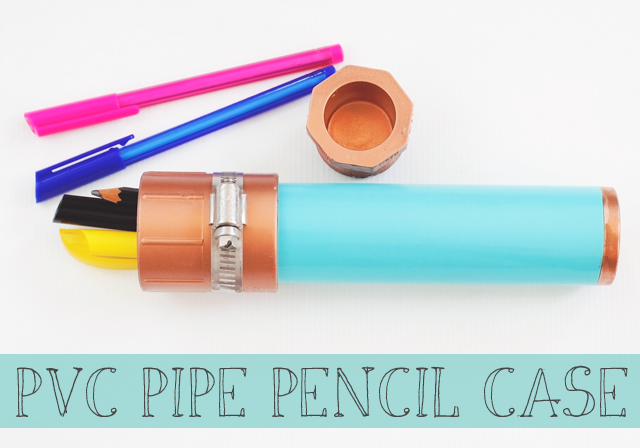
So here it is! My pencil case!

PVC Pipe Pencil Case DIY || Jade and Fern

I’m not gonna lie, this project took some work. Not the actual making part, that was easy. But conceptualizing it.

When I first thought of using PVC pipe to make a pencil case, it seemed a genius idea. Unfortunately, plumbing pieces don’t always want to be used for craft projects. And sometimes when you make something that looks cool in your head, it ends up looking like something…inappropriate…in real life. I’m not gonna go into that part.

I touched EVERY. SINGLE. PLUMPING. PART. in the Home Depot before finally finding the right ones. (Thank you, Melanie, for your invaluable help through that experience. Our hands will never be truly clean again).

Luckily for you makers out there, I’ve got it figured out and you can just waltz in to a hardware store, pick up the pieces from the materials list, and get crafting. You know, if you want to make this project. Which you know you do.

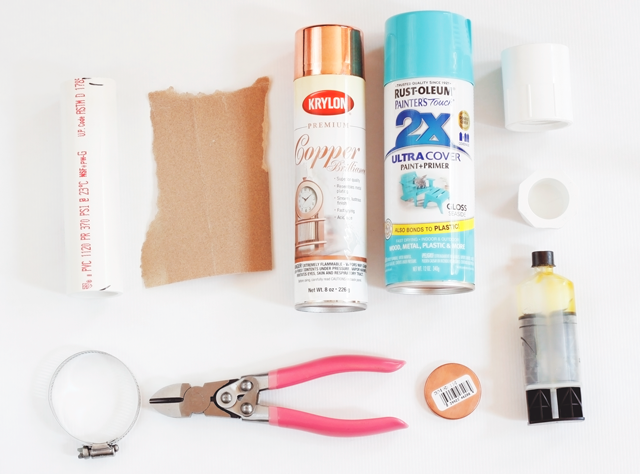
WHAT YOU NEED:

  • 1.25” PVC pipe, cut to 6” long
  • 1.25” copper test cap
  • 1.25” female adapter, with corresponding 1.25″ plug
  • 180 grit sandpaper
  • copper spray paint
  • second spray paint in color of your choice
  • quick-set epoxy
  • hose clamp (optional)
  • wire cutters, if using hose clamp

PVC Pipe Pencil Case DIY || Jade and Fern

WHAT YOU DO:

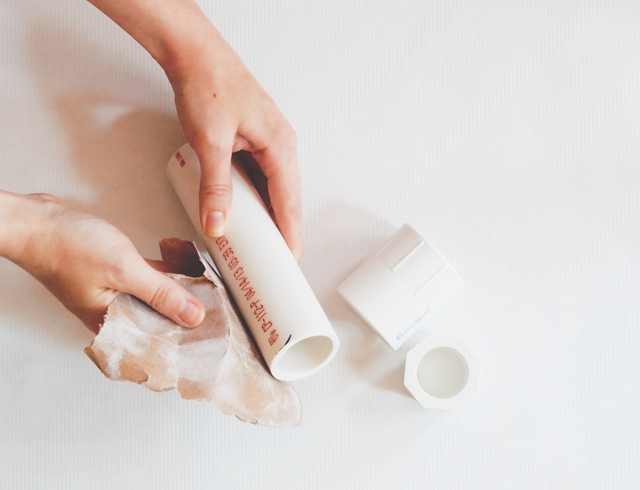
Gently sand the pipe, male adapter, and plug to prepare them for painting.

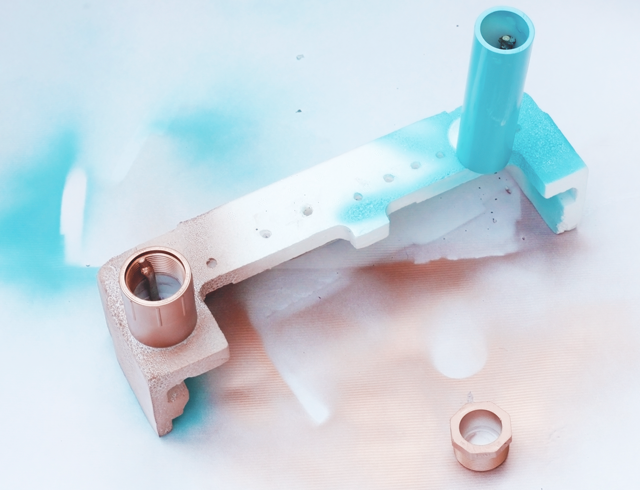
PVC Pipe Pencil Case DIY || Jade and Fern Following the instructions on your spray paint cans, paint the male adapter and plug with copper paint and the pipe in another color. You will need several coats to cover all the plastic. Allow the pieces to dry 24 hours before moving on to the next step.

PVC Pipe Pencil Case DIY || Jade and Fern Attach the male adapter to one end of the pipe, pushing it down as far as it will go. It will be very snug—if you have trouble, try gently tapping it with a hammer (place a towel between the adapter and the hammer so that you don’t scratch the paint).

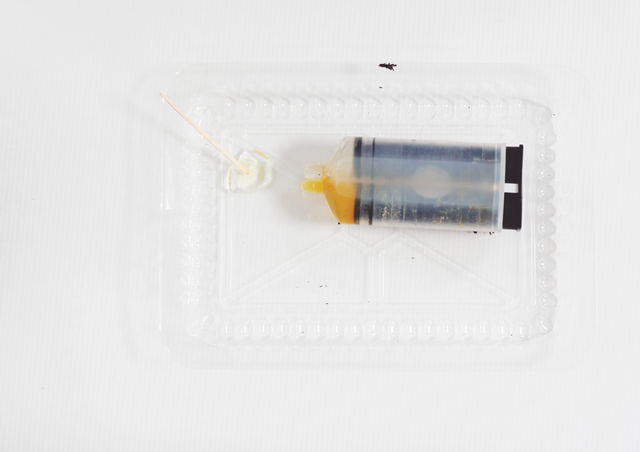
PVC Pipe Pencil Case DIY || Jade and Fern Mix together equal amounts of quick-set epoxy using a toothpick or wooden stir stick.

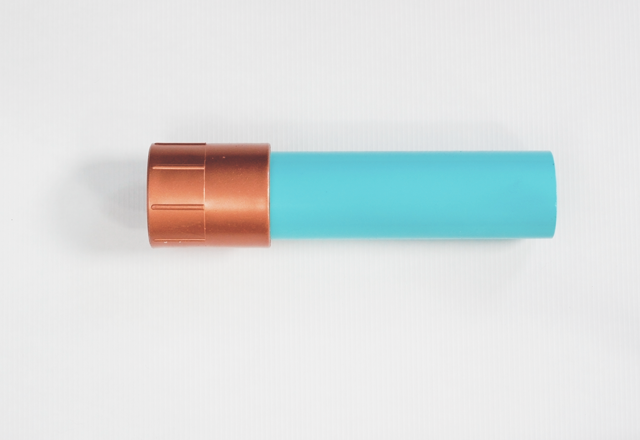
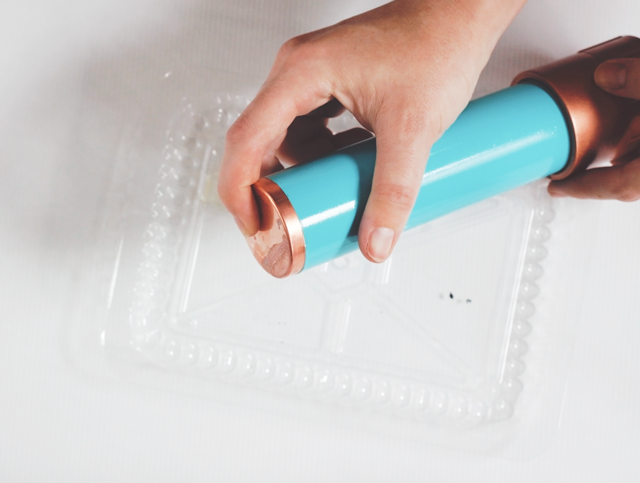
PVC Pencil Case DIY || Jade and Fern Using the epoxy, glue the copper test cap to the end of the pipe. Wipe any excess epoxy away immediately. Hold the cap in place until the epoxy has set enough for it to stay put on its own. Allow to dry according to the instructions on the package (usually overnight).

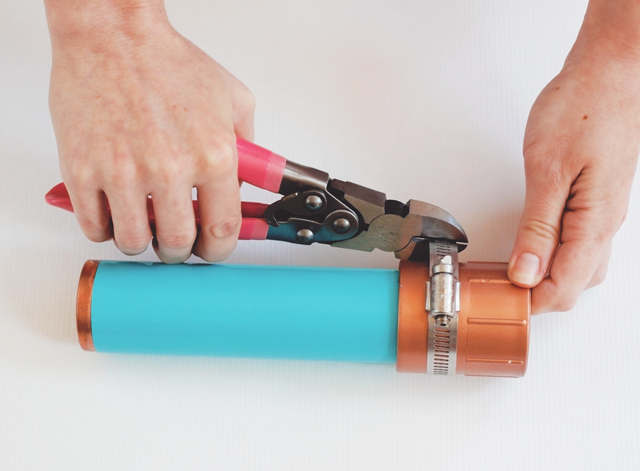
PVC Pencil Case DIY || Jade and Fern Slip the hose clamp over the male adapter and tighten into place, then trim off the excess with wire cutters.

PVC Pencil Case DIY || Jade and Fern

Screw the plug to the male adapter (this will be the removable cap).

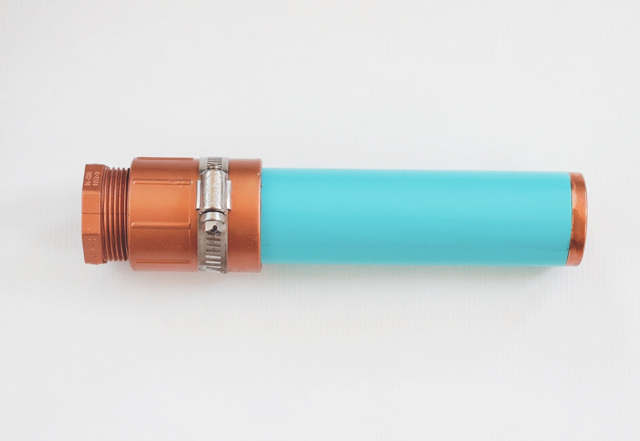
PVC Pipe Pencil Case || Jade and Fern

That’s it. See how painless that was? As a bonus, it kinda looks like the handle of a light saber.

Be sure to hop over to the article on BuzzFeed to look at the other awesome projects that were created for this back-to-school feature!

And dear readers, thank you thank you for coming back here every day, pinning and sharing my stuff. You guys got me on BUZZFEED. You are awesomesauce.


My Home

The Kitchen and Hall

08.29.13

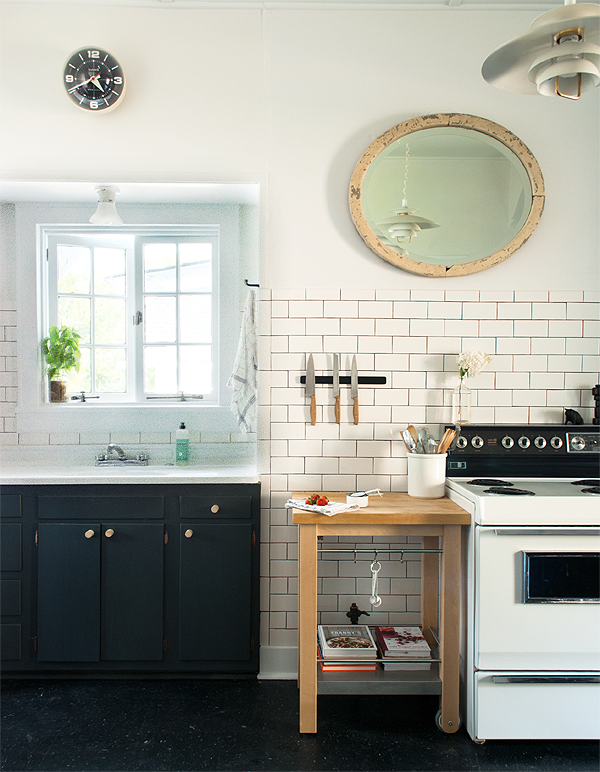
Behold, the kitchen of my dreams:

Daniel's Kitchen via Manhattan Nest Photo by Daniel of Manhattan Nest (only the best blog ever)

It’s light, bright, airy, modern, fresh, cozy, warm, and all the other good things that the kitchen in my life should be.

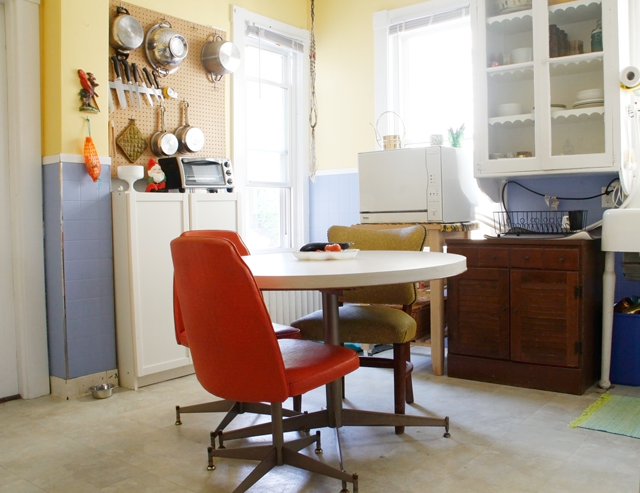
Back to reality. This is the kitchen I live with:

Kitchen || Jade and Fern

Not so much.

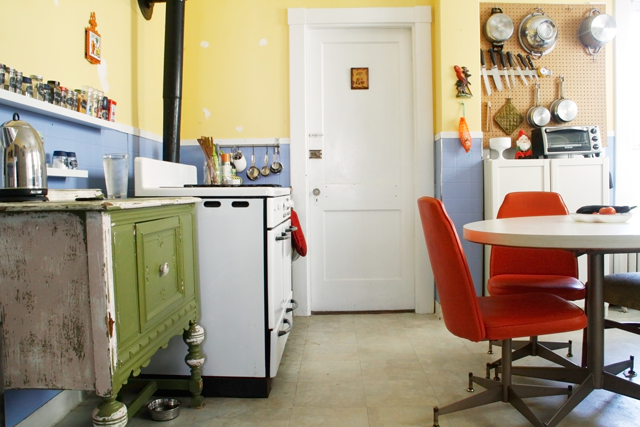
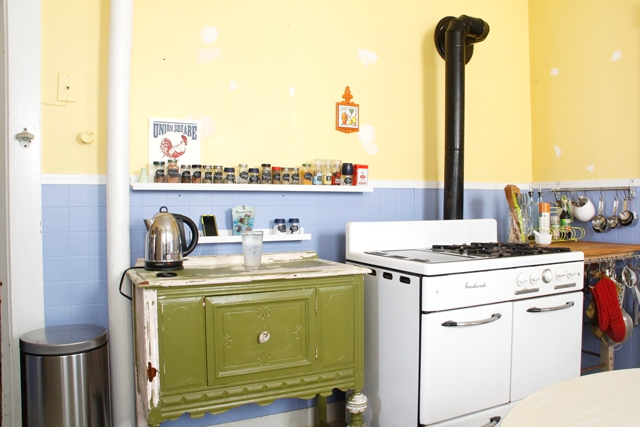
Now, don’t get me wrong, it’s got some great qualities. It’s big, for one. And it’s in our apartment that we love. It has relatively decent sunlight. There are cute period details, like great moulding and a vintage stove.

The Kitchen || Jade and Fern

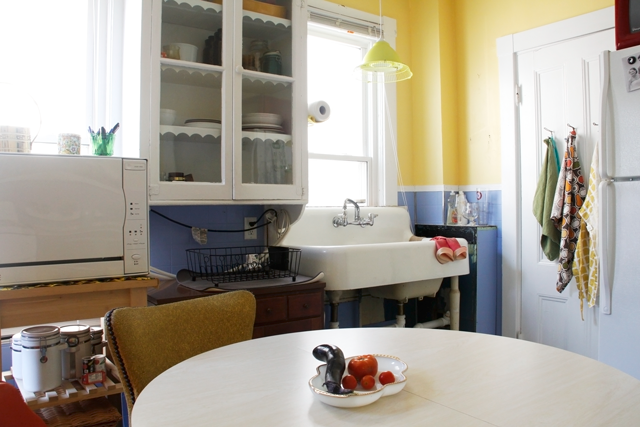
But…that blue. The yellow. The faux-tile “wainscoting” trimmed in strips of chrome-colored plastic. The extreme lack of cabinets (the only built-in one is that glass door upper). The alarmingly crumbly walls resulting in a large number of rough spackle jobs.

The Kitchen || Jade and Fern

The Kitchen || Jade and Fern

Yes, that sink is so charming and vintage and classic. But it’s also REALLY tall (I’m really not).

The Kitchen || Jade and Fern

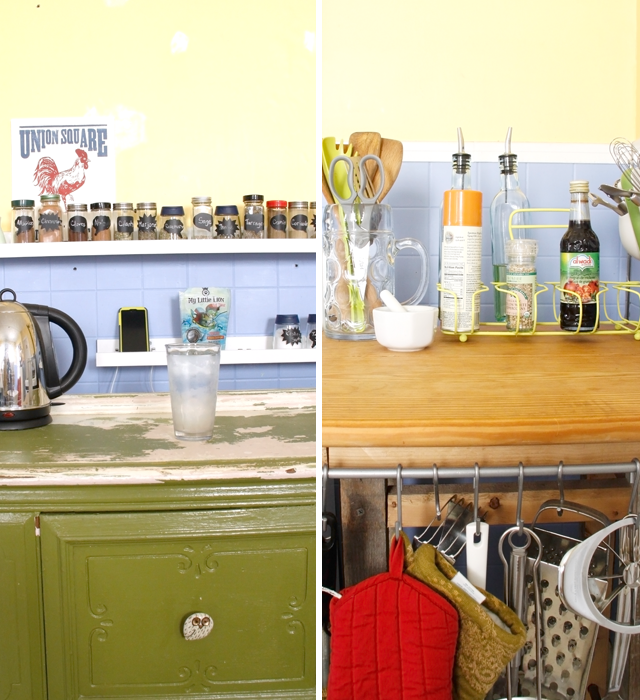
We’ve brought in tons of hanging storage, and several cabinet pieces like this buffet on the left (the half-removed paint job is a long story for another day). The butcher block on the right was leftover from a previous tenant, and I added the hanging rail for cooking utensils. Fun fact about our kitchen: we have only one drawer. Just think about that.

To be fair (to myself? to the apartment?), Daniel OWNS his home and kicks some serious ass when it comes to investing time and sweat into it. Yes, he did that in his rental as well, but I’m ignoring that for now.

The Kitchen || Jade and Fern

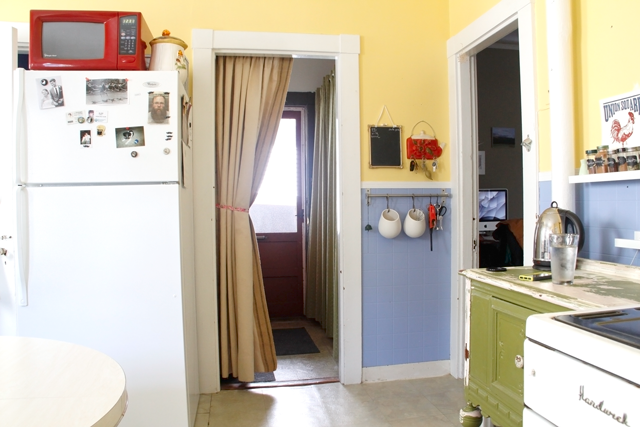
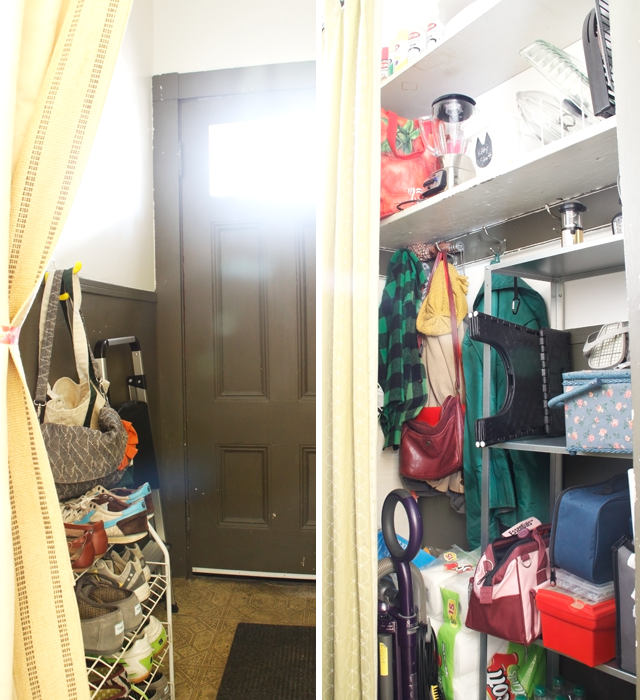
The left door above leads to the entrance to the apartment, and luckily there is a little storage area there hidden behind the curtain on the right. We’d be pretty screwed without it.

The Hall || Jade and Fern

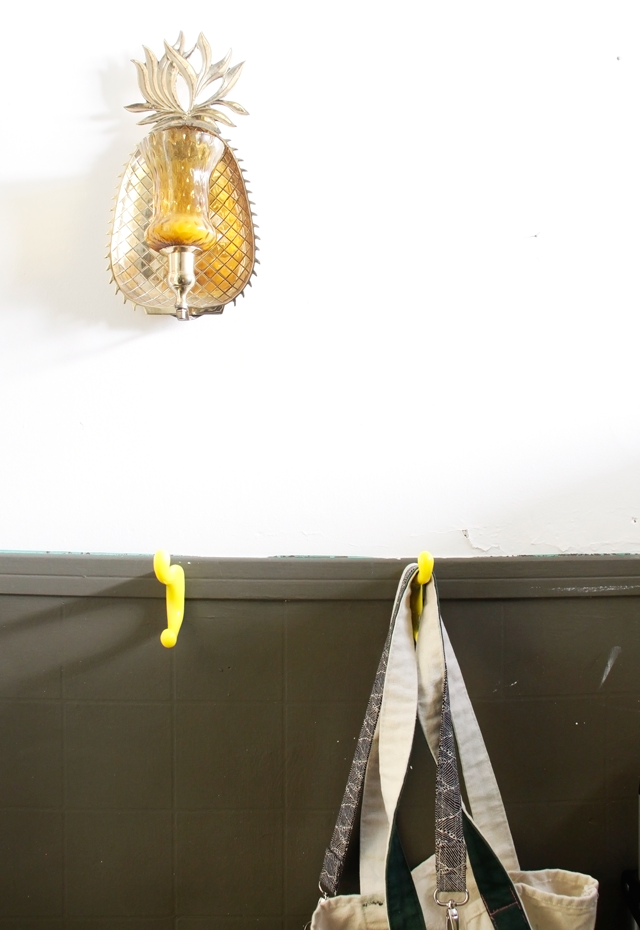
It’s jammed full but very practical. Still, that dark olive green? Not a terrible color on its own, but it’s way too dark for the space. We’ll get around to painting eventually, and after all this color overload I’m ready for white white white!

The Hall || Jade and Fern

Only one room left to complete my little house tour: the bathroom. Steel yourselves because it is UGLY.

What kitchen or storage woes do you have? What have you done about them?