Lately

Thoughts on a Tumultuous Friday

04.19.13

It’s been a devastating week here in the greater Boston area to say the least. As we hope for a safe and speedy end to the chase of the perpetrators of the Boston Marathon bombing, it seems entirely too frivolous to try to write a normal blog post.

Instead, I will leave you with this:

Wise Words from Gandhi

source: Apartment 34

May you all be safe and well. My heart goes out to all those directly affected by the bombing and its aftermath.

Lately

How I Spent Five Hours at Home Depot

04.11.13

Confession: I know nothing about making furniture.

This is particularly funny/sad because my dad is a Master Cabinetmaker AND an engineer.

But I’m not going to let little details like utter ignorance and lack of tools hold me back.

My fabulously ambitious plan:

Craft Table Sketch || Jade and Fern

Fabulously Ambitious Plan meets Delightfully Crappy iPhone Photo.

I desperately need a space for crafting that doesn’t involve me hunched over the coffee table while Alan is trying to watch soccer. So I am building a bookshelf with a drop-leaf crafting table. It’s going to be amazing! If I can ever figure out how to actualize it. Apparently trying to support the weight of a 25lb sewing machine on a drop-leaf without any sort of wood-joining knowledge is not so easy.

So yesterday I took a trip to The Home Depot, carting along my measuring tape and the above notebook with its scribbled sketches highly technical design plan.

FIVE. HOURS. LATER. I emerged with a glazed deer-in-headlights expression and some supplies.

How could it have taken you so long? you wisely ask. Aren’t you a DIY expert?

Ahem. No. But DIY is all about the spirit of learning and improvisation and leaving expertise out of it! Right??

It turns out that when you don’t have any vocabulary for hardware (doohicky doesn’t count), aren’t really sure how to construct what you need in the first place, and failed those Spatial Reasoning Aptitude Tests in elementary school, you end up resorting to an ongoing game of Charades to explain yourself. Or at least, you do if you’re me.

On the plus side, I learned how to navigate the gargantuan labyrinth that is The Home Depot, developed an intimate knowledge of where exactly the right casters for the right project are, didn’t get trapped in the paint aisle (my usual downfall in hardware stores), and met half of the employees on duty. Thank you, Peter, Angel, Keon, Robert, and others, for all your help and patience while I used my notebook and phone as props to literally show you my crazy idea!

On the down side, I’m still not really sure how the support component of the table is going to come together.

Clearly it’s time to consult my dad.

Do any of you have advice for a wannabe furniture maker? What hilarity has ensued in realizing your grandiose DIY dreams?

Inspiration

Make It Friday: Not-So-Hidden Inner Child

04.05.13

DIY Plastic Animal Roundup | Jade and Fern

One || Two

DIY Plastic Animal Roundup | Jade and Fern

Three || Four || Five

Anyone who knows me will tell you that I have a fondness for whimsical, animal-themed, bordering-on-childish accessories. In fact, I was recently on my way out the door when I realized that I had inadvertently worn my deer-print shirt, octopus necklace, and horse-print boots IN THE SAME OUTFIT. Don’t worry, I changed, even I’m not that crazy.

That being said, I heartily advocate nurturing your inner child. What else is going to keep us young? Nose jobs? Pfft. Plastic animals are way cheaper.

Here’s to a weekend filled with sun, warmth, laughs, and great DIY projects!

DIY

C is for DIY Color-Block Bookmarks

04.04.13

I wanted to accompany this bookmark project with a witty anecdote. You know, something like  how I’ve started using a Kindle because trying to read a 1,000 page hardcover fantasy novel while squeezed amongst commuters on the subway is laughably unrealistic, but e-readers are soulless and I miss using bookmarks. Something like that.

But I got so distracted playing with Photoshop actions for these pictures that my witticism completely abandoned me. Assuming I ever had any to begin with. Apparently my brain can’t handle creative writing and photo editing at the same time.

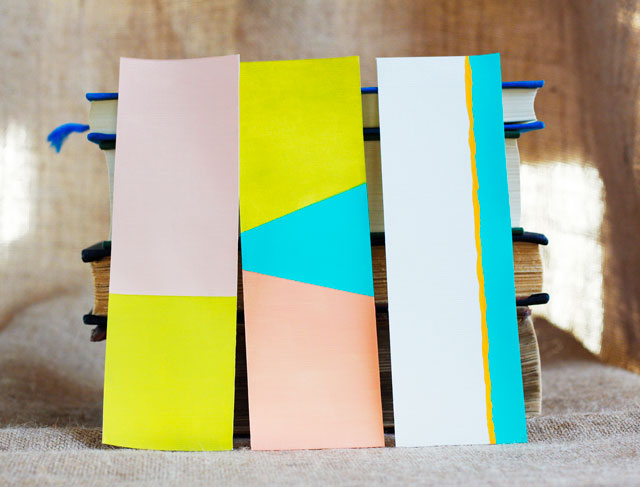
So, without any witty ado, I present: DIY Color-Block Bookmarks!

DIY Color-Block Bookmarks || Jade and Fern

DIY Color-block Bookmarks || Jade and Fern

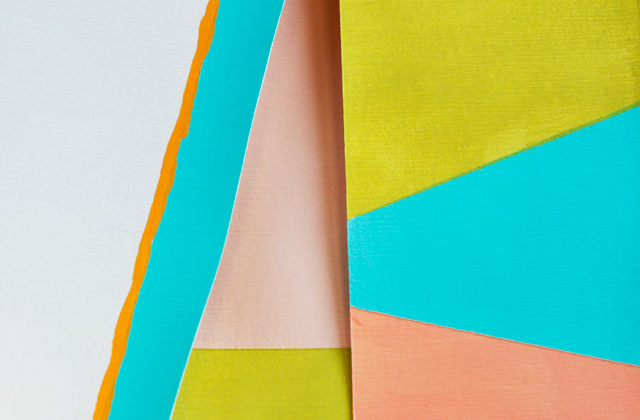
Feel free to bask in the glory of these little lovelies. Easy to make and lovely to behold, these colorful bookmarks will make your Kindle jealous while spiffing up those cheap paperbacks.

Before this turns into some sort of bookmark infomercial, let me dive into the project deets.

DIY Color-Block Bookmarks

What You Need:

DIY Color-block Bookmarks || Jade and Fern

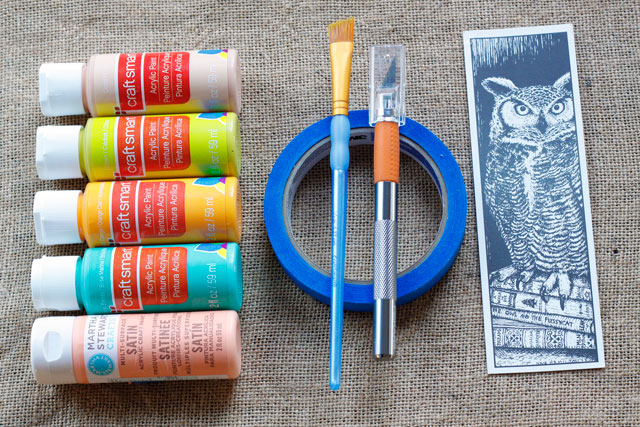
  • acrylic paints of your choice (used here: Craft Smart Acrylic Paint in Ocean Breeze, Light Orange, Coral, and Citron, and Martha Stewart Multi-Surface Satin in Wild Salmon)
  • cream or white cardstock
  • painter’s tape
  • brushes
  • craft knife or scissors
  • pencil
  • existing bookmark to use as a template

What You Do:

Trace a bookmark you already have onto the back of the cardstock and carefully cut it out. I say “carefully” because I don’t own a papercutter and have a heck of a time cutting straight lines without one. If you’re in the same boat, try pressing a ruler firmly against the line you’re cutting, and draw a craft knife blade against the edge of the ruler to keep the cut straight.

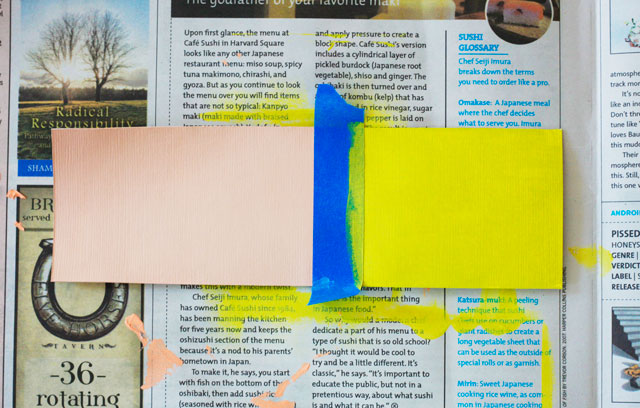
Then apply painter’s tape in whatever pattern you choose and start painting! Be sure to press down on the edge of the tape firmly so you get clean lines.

This is my first pass, after one THIN coat of paint. I recommend no more than two coats, as the cardstock seemed to get a little “overloaded” with more than that. Don’t forget to allow each coat to dry before starting on the next!

DIY Color-block Bookmarks || Jade and Fern

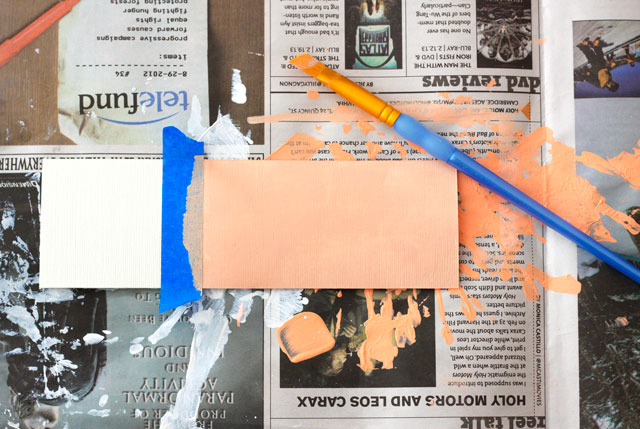
I used paints that I already had on hand, but if you’re going shopping for this project, go for the Martha Stewart Multi-Surface Satin paint. It was a lot thicker, but had a much smoother coverage.

After your second coat of paint has dried for a few minutes, gently peel off the tape. You want to peel it off at a right angle by pulling the tape down towards you, like so:

DIY Color-block Bookmarks || Jade and Fern

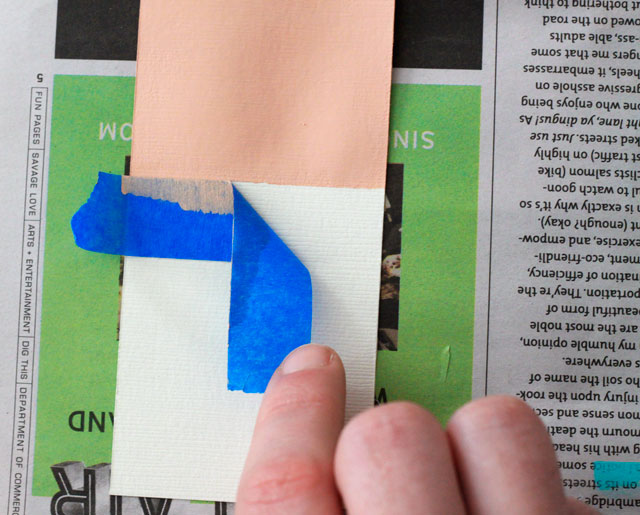
I’m no line-painting expert, but from what I’ve seen on Pinterest, it’s all about the right-angle peel. Thank you, Alan, for lending me your fingers for this shot.

Allow the first color to dry COMPLETELY, then you can tape up your lines for your next color. Here you can see I’ve painted one coat of the second color:

DIY Color-block Bookmarks || Jade and Fern

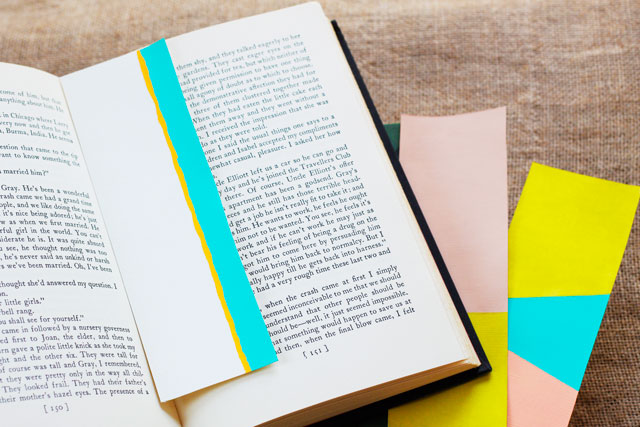
Once the second coat of paint is on, peel off the tape as before, and you’re done!

Have fun experimenting with the different shapes you can make to achieve a color-block look. On the third one I even free-handed the thin orange stripe (a surprising move for a perfectionist like me).

DIY Color-Block Bookmarks || Jade and Fern

DIY Color-block Bookmarks || Jade and Fern

What do you think of my pretty if not-so-witty project?

Please let me know if any of you plan to make your own bookmarks, I would love to see them!

____________________________________________________________

This project was included in: 

Merry Makes via The Merrythought

Inspiration

Make It Friday: Embracing Emerald

03.22.13

DIY Emerald Projects Roundup || via Jade and Fern

One || Two || Three || Four || Five

Back when I was a teenager, I was adamantly anti-trend. Well, except for seeing Titanic a million times and fawning over N’Sync. Then I got all rebellious and avoided trends like a cat avoids water.

But now that I’m a mature, sophisticated, classy late-20s gal, I know that enjoying something trendy is not the equivalent of the devil stealing a piece of your soul. And I am drooling over this new emerald trend.

In case you haven’t been trolling Pinterest for hours a day and therefore missed it, Emerald is Pantone’s Color of the Year. This is great for me, as I already have a few pretty green glass containers in my bathroom. See how trendy I am now?

Happy weekend!