
You guys, I’ve been dyyyyying to make a terrazzo tile project every since I saw Enthralling Gumption’s gorgeous tray. And then Fall for DIY’s soaps. And most especially, Ctrl + Curate’s earrings!
But first anxiety got in the way of all my crafting plans, and then it was time for holiday craziness, and somehow there’s always some reason for me to be behind, yada yada yada DIY TERRAZZO TILE ORNAMENTS.
Good things come to those who stop holding themselves back and just get to work. 😉
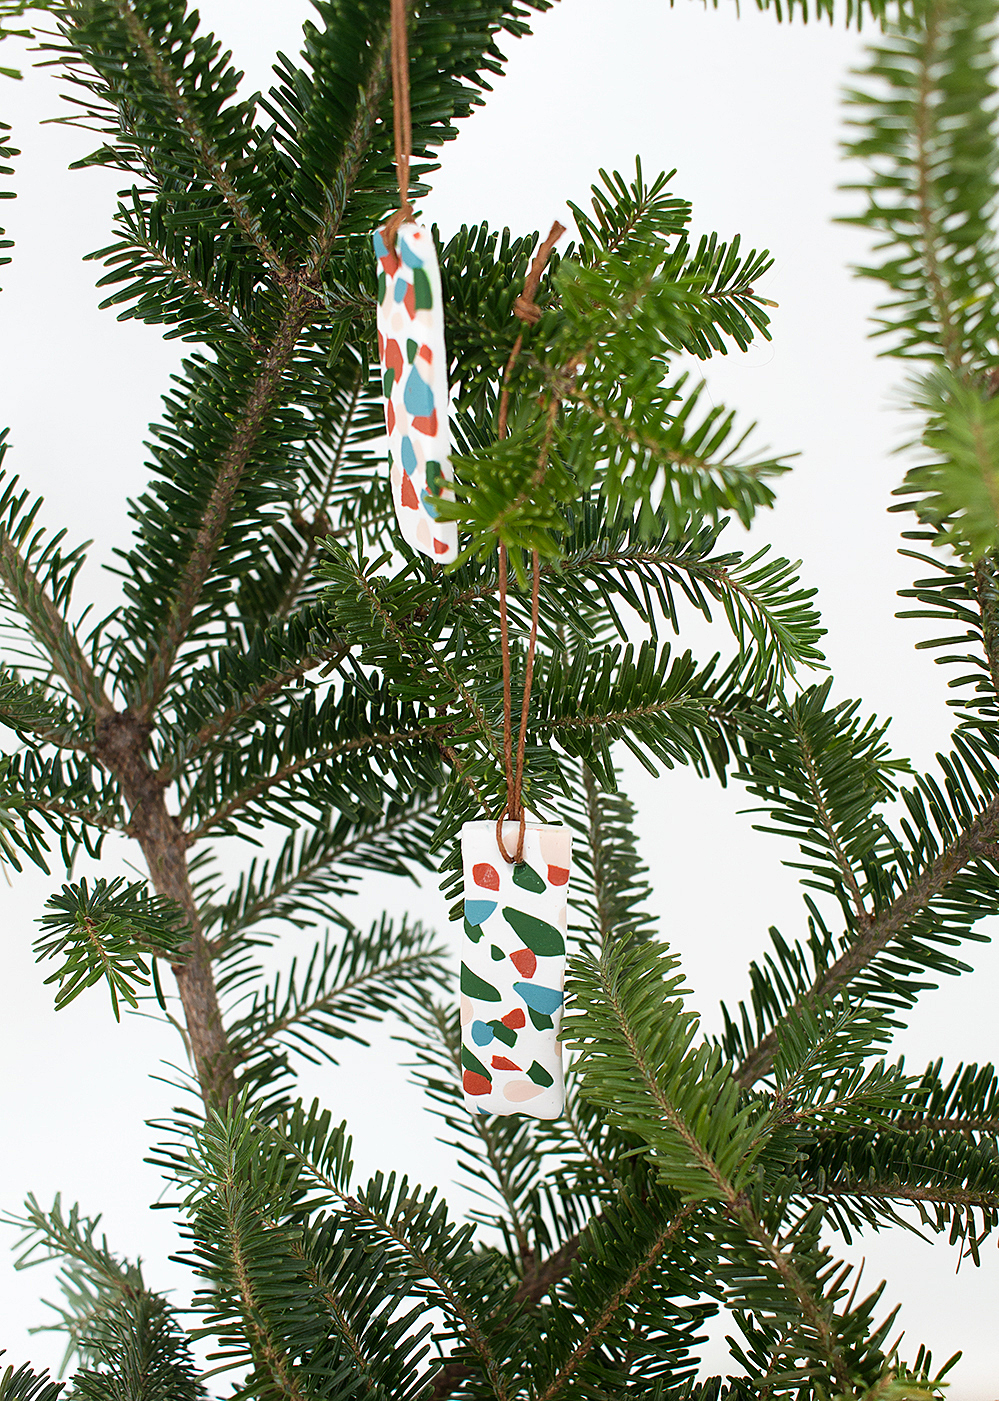
These little clay cuties are so easy. You can make them with any color combinations you choose to match your decor. And this craft is addictive. Seriously, if you don’t like the terrazzo trend, you may want to stay clear of the blog for the next few months because I’ve got more ideas to come.
(Please don’t actually stay away from the blog. That would make me super sad).
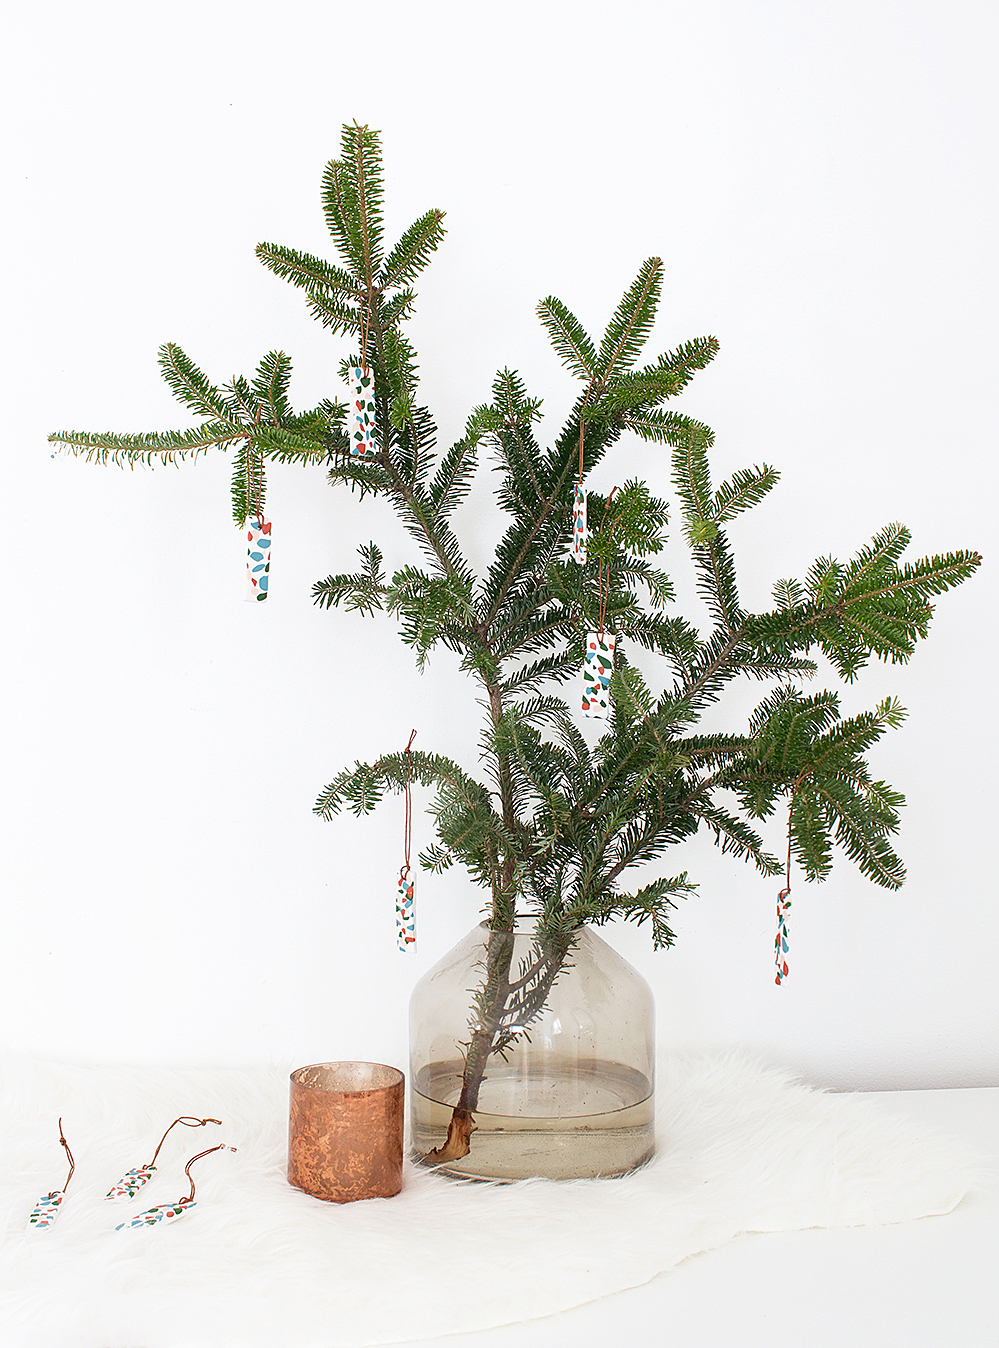
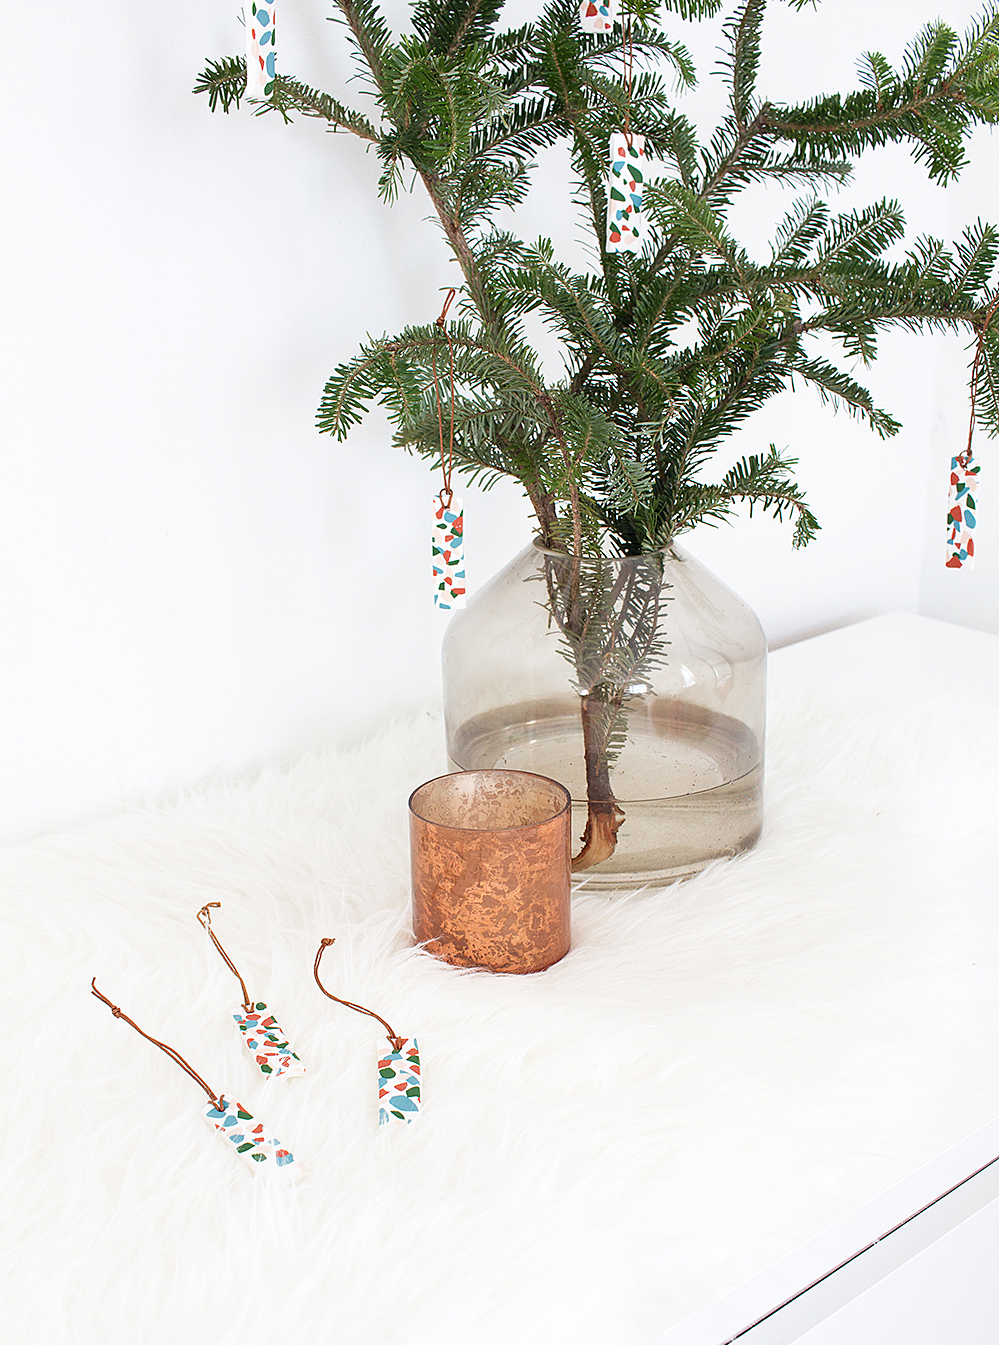
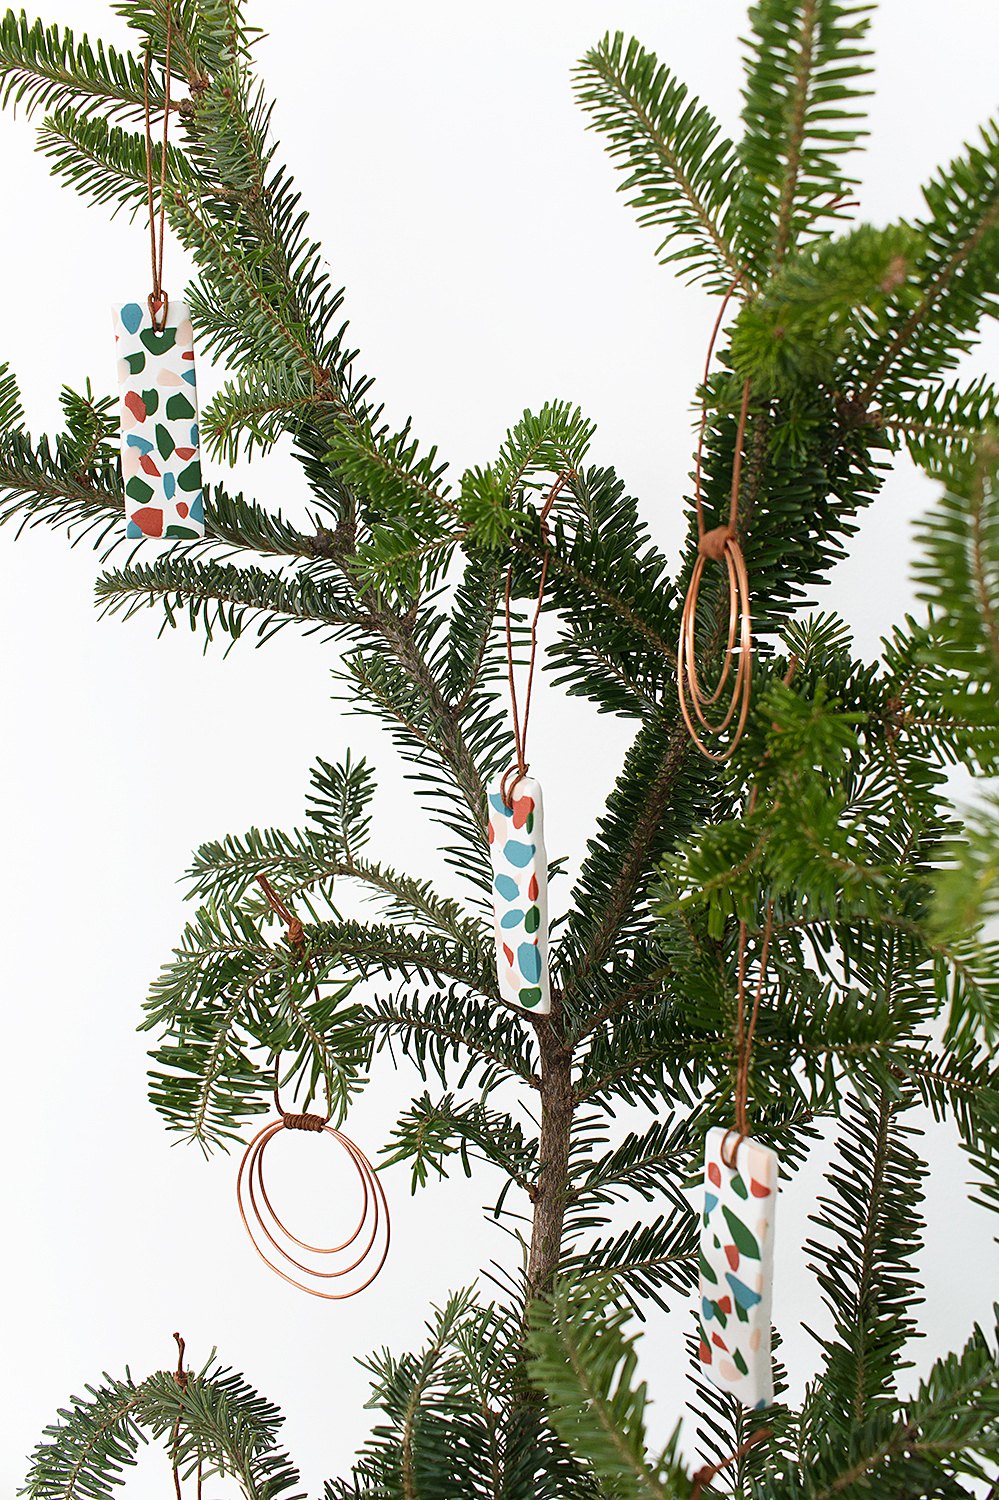
I’ve never had a Christmas tree as an adult, and because I’m preparing to move I still don’t have one this year (yes, moving, a story for another day!). But I wanted to at least bring in some pine branches and was inspired by this look on Apartment 34. The DIY terrazzo tile ornaments bring in a little color while still keeping the tree modern, and I think they’re in keeping with a Scandinavian — or at least Scandibo — aesthetic.

I know it’s late in the year to be posting a Christmas ornament DIY project (see reasons/excuses above), BUT — this ornament craft will only take you an hour for a whole bunch. And that includes the baking time, during which you can totally wrap at least two gifts, or watch half a Rick and Morty if you’re already done wrapping.
THIS POST USES AFFILIATE LINKS. THAT MEANS IF YOU PURCHASE USING MY LINK, I WILL EARN A SMALL COMMISSION AT NO EXTRA CHARGE TO YOU, TO HELP ME PAY BLOGGING BILLS. I ONLY LINK TO PRODUCTS I HAVE USED OR WOULD USE MYSELF, PROMISE!
DIY TERRAZZO TILE ORNAMENTS
SKILL LEVEL: So easy.
TIME: An hour for a whole bunch.
WHAT YOU NEED:
+ One large brick (8oz) oven-bake clay in white (I’ve used Sculpey the most so that’s what I linked to here)
+ Four small packs (2oz) oven-bake clay in different colors (for these ornaments I used Tranquility, Leaf Green, Beige, and Cinnamon)
+ parchment or wax paper to protect your work surface (don’t use newspaper, it will transfer onto the clay!)
+ a skewer or thin straw to punch a hole
+ cord or string for hanging
+ scissors
WHAT YOU DO:
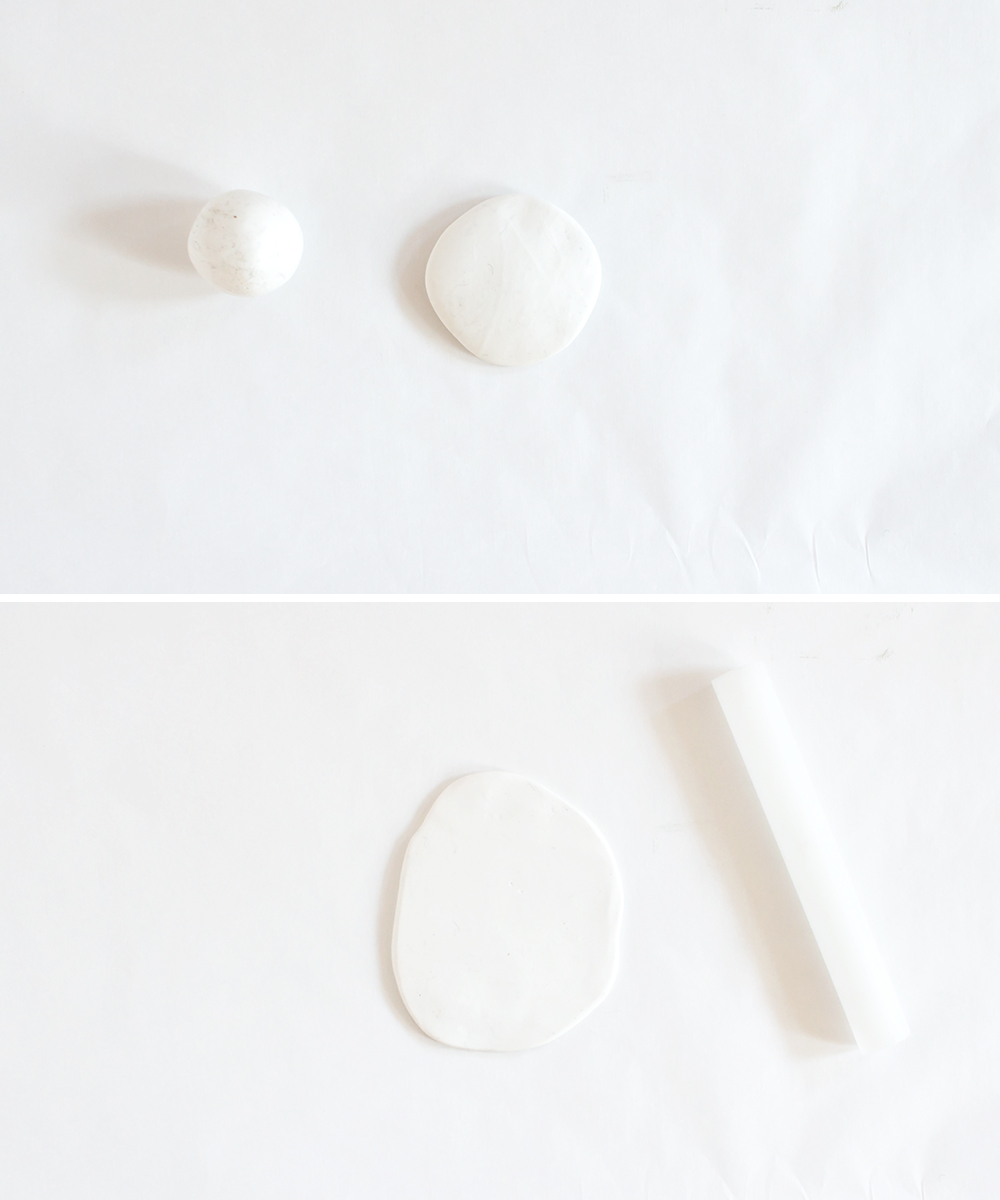
STEP 1: Break off a ping-pong sized chunk of white clay and warm it up in your hands. Roll into a ball and then flatten into a disc. Using the clay roller, roll out the disc until it’s a little larger than a credit card, and a little thicker than 1/4″.
STEP 2: Break off smaller pieces of your colored clay and roll those around to warm them up. Flatten slightly to make them easier to cut.
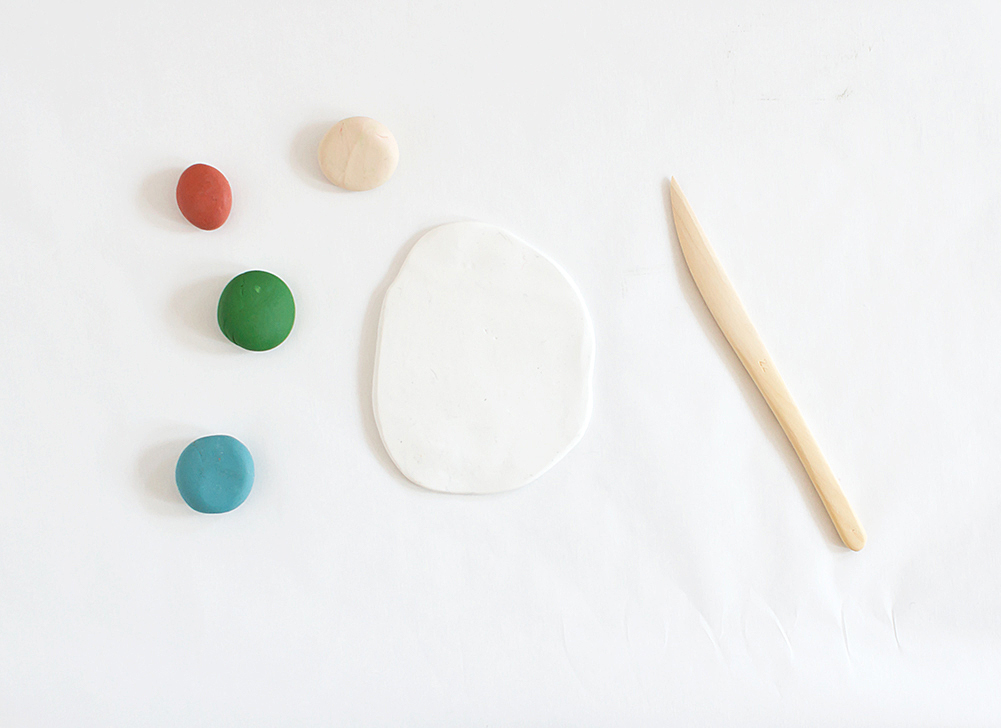
STEP 3: Now for the fun part — using the craft knife, cut slivers and chunks of colored clay in various shapes and sizes. If you need inspiration for how the shapes should look, try a Pinterest search for “terrazzo tile”. But don’t worry about being too accurate — just chop away to make irregular shapes.
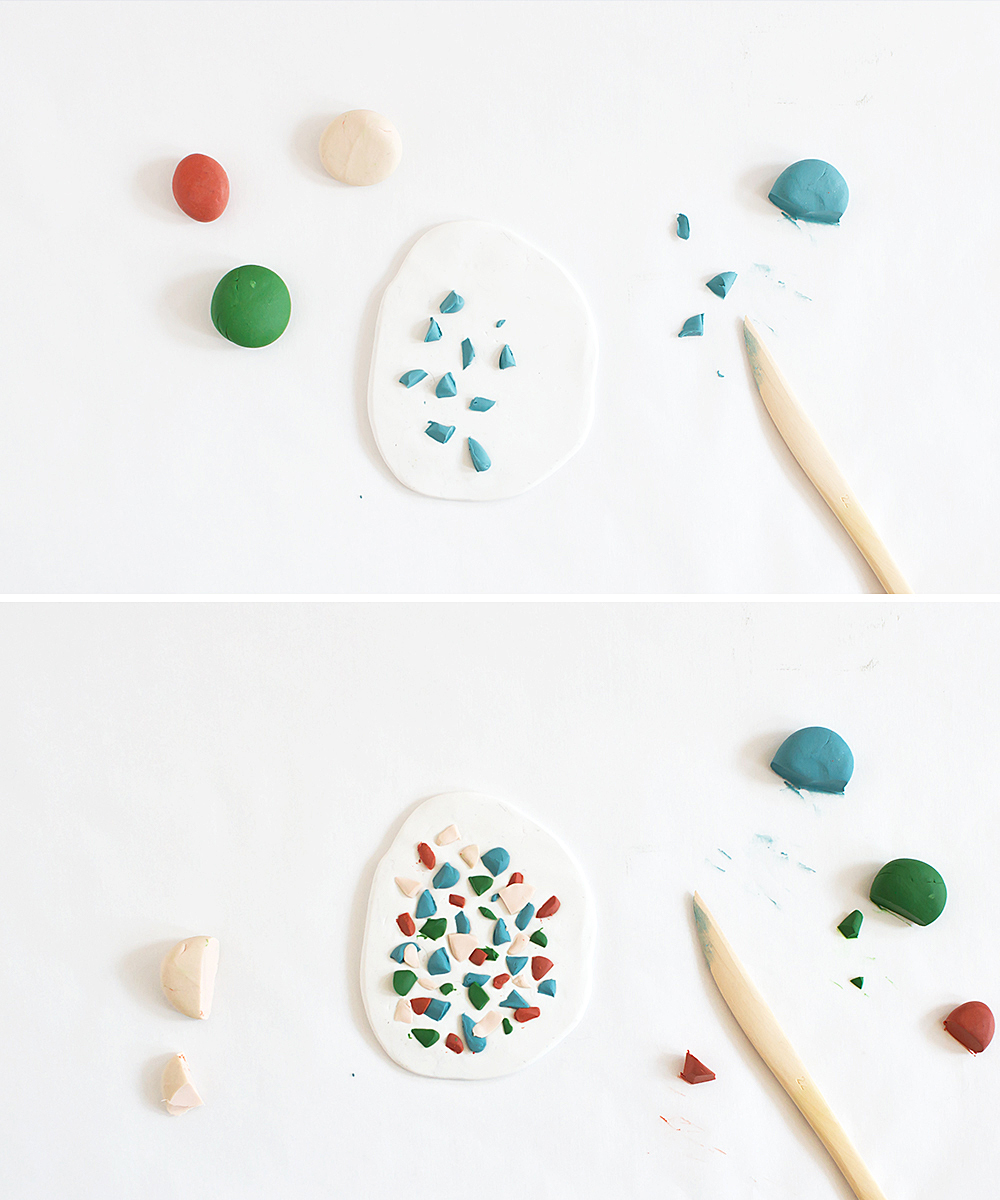
Working with one color at a time, place the pieces onto the white clay and press down slightly. You can layer different colors on top of one another, but don’t smoosh them or they’ll blend together.
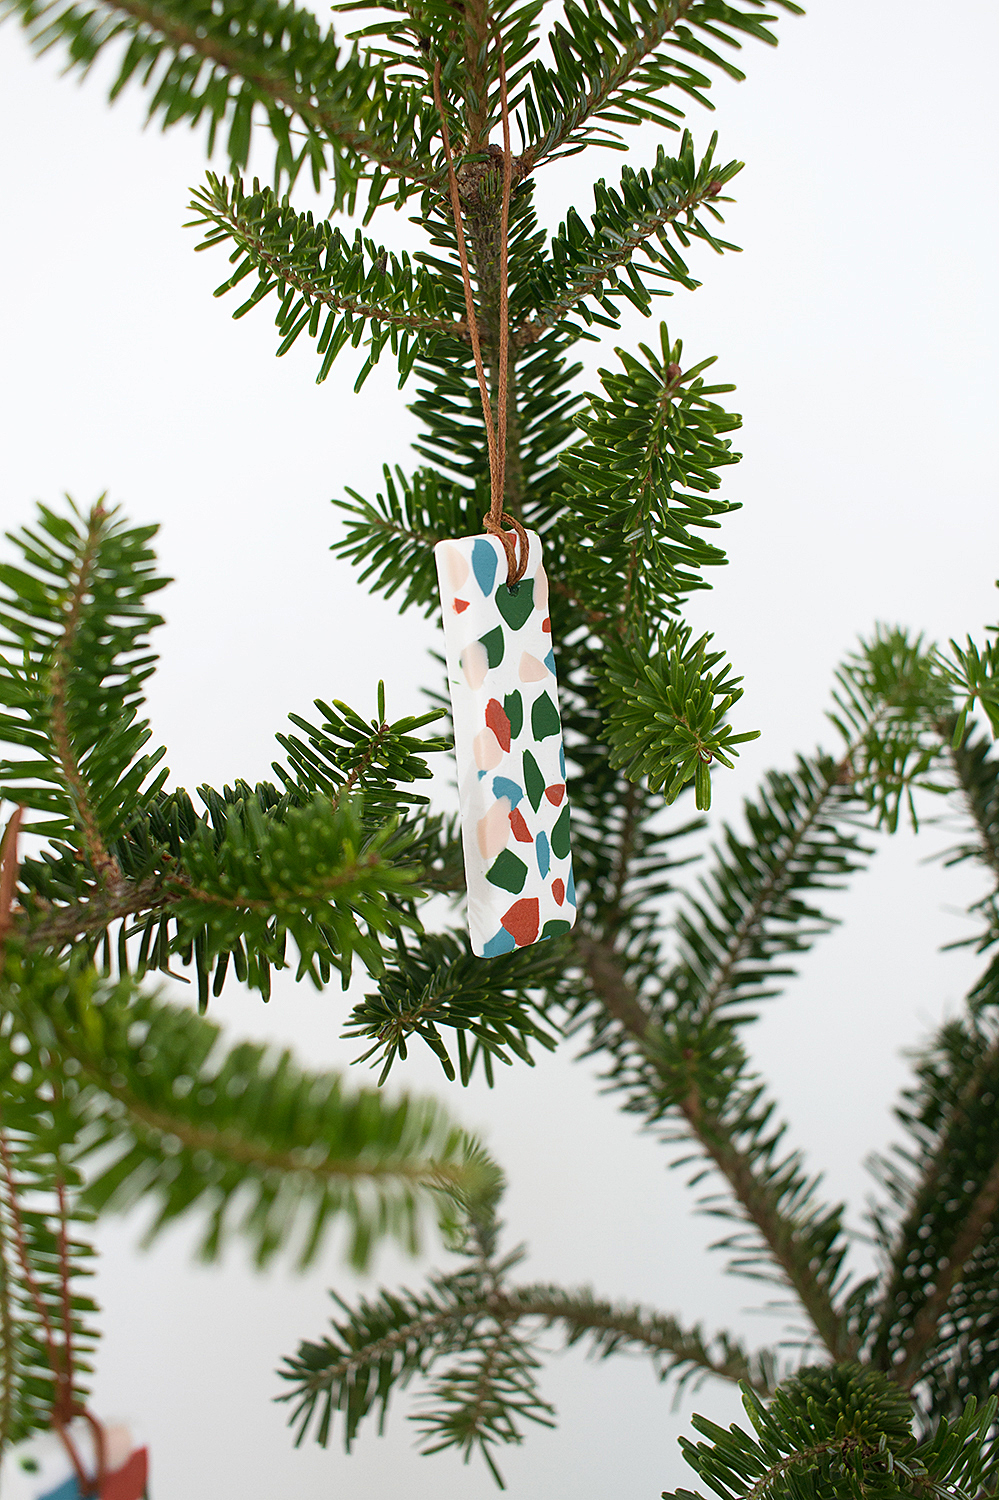
I knew I’d be cutting away the edges of the final piece to make the ornaments, so I concentrated the colored chips in the center of the white disc.
STEP 4: When you’re happy with how your tile looks, place a piece of parchment or wax paper on top and use the roller to gently roll all the colored pieces flat.
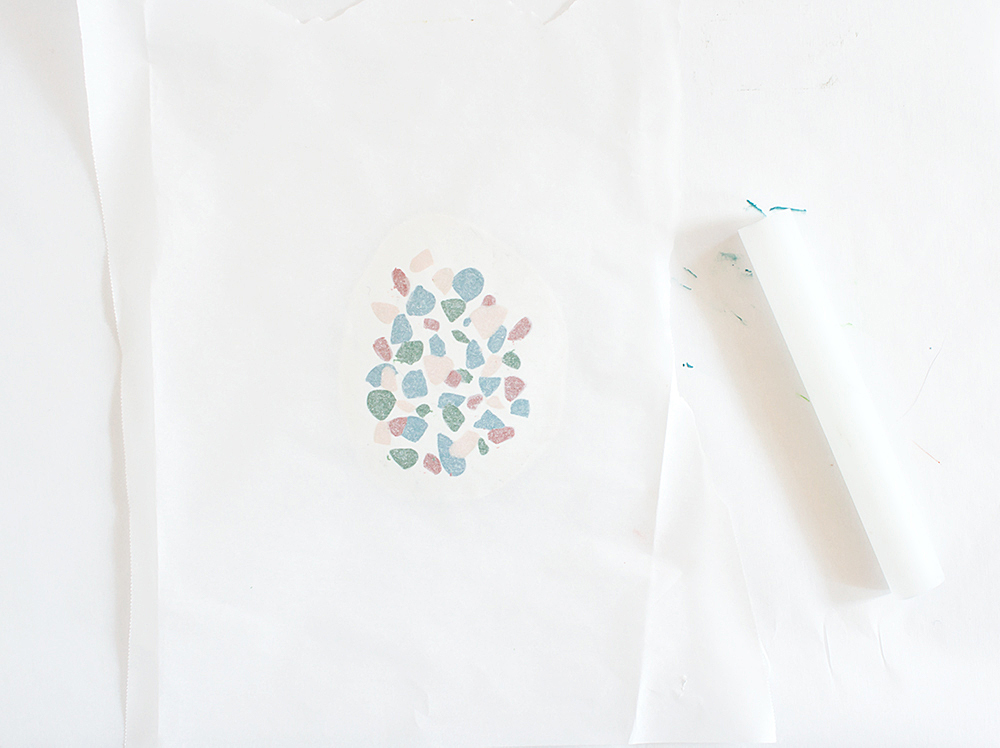
If this makes sense, try to roll down rather than out, so that you don’t stretch the shapes too much. You want to just gently roll so they are flattened into the white background.
STEP 5: Cut away the edges of the disc to make a rectangle, and cut the rectangle in half to make two pieces.
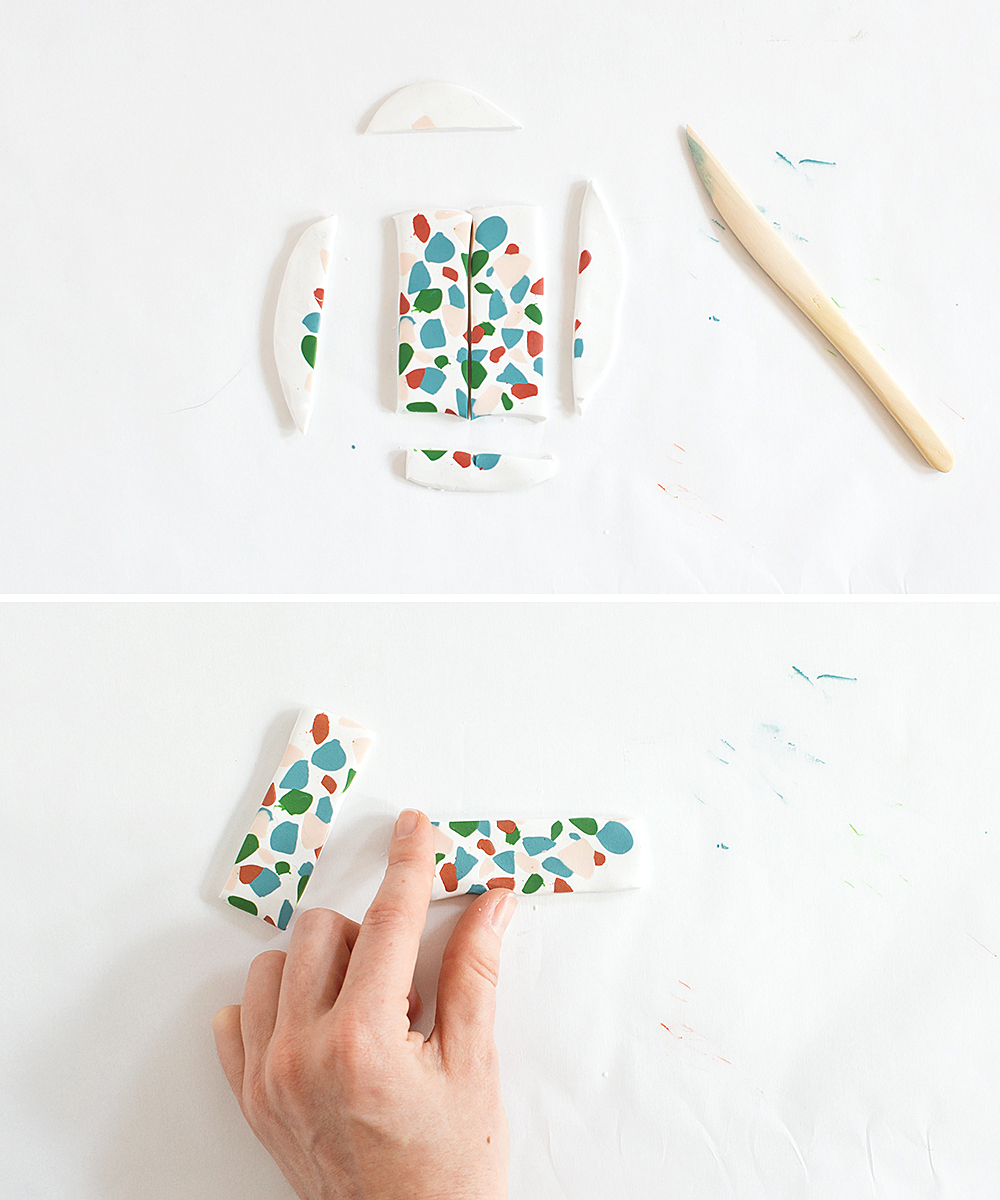
Smooth out the edges of the rectangles with your fingers and reshape if necessary. You might need to let the clay “rest” for a moment — when it gets warm from your hands, it’s harder to make crisp shapes.
STEP 6: Poke a hole near one end of each rectangle using a skewer.
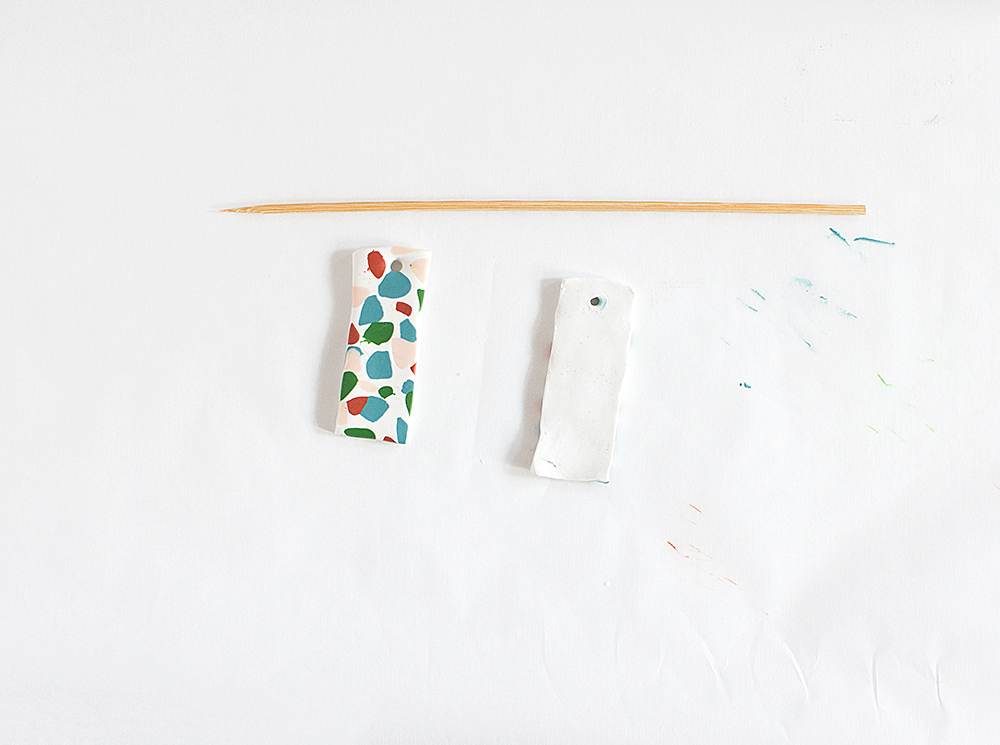
STEP 7: Bake the clay as directed on the package. I have a little trouble telling when polymer clay is “done” so I sometimes bake it just 2-3 minutes longer than the instructions say if I’m not sure. Check out this blog post for some polymer clay baking tips.

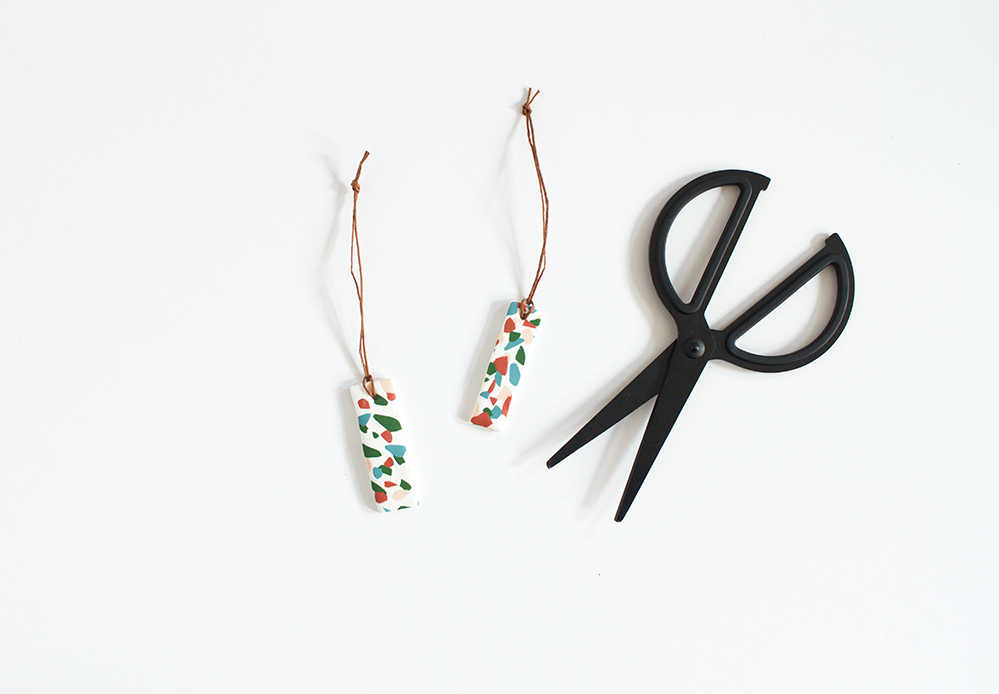
STEP 8: When your ornaments are cooled, add a piece of cord or string, and hang!

Have you been swept up by the terrazzo trend yet?
Stay tuned for one more holiday craft — those copper hoop ornaments! Did you think I could get through this season without a copper DIY?
1 comment on “How to Make DIY Terrazzo Tile Ornaments”