
THIS POST WAS MADE IN COLLABORATION WITH JOANN, BUT ALL IDEAS & OPINIONS ARE ENTIRELY MY OWN!
Terrazzo tile. It’s become more than a bit of an obsession. I’m at the point where I notice it EVERYWHERE. And I’m pinning it all the time. And I want to terrazzo all the things.
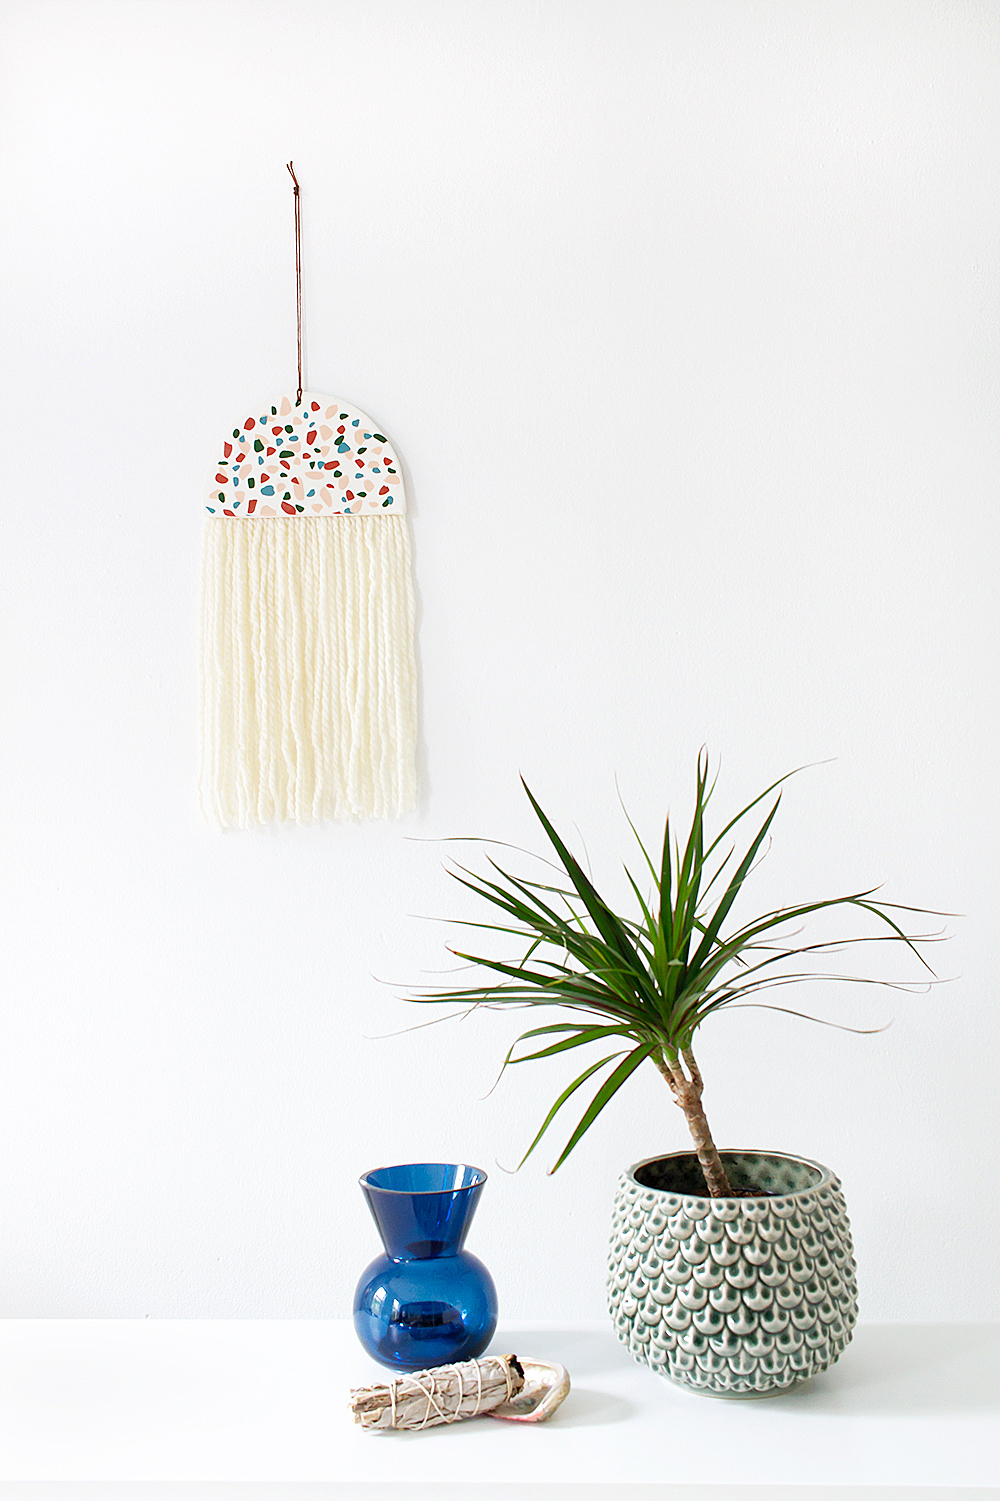
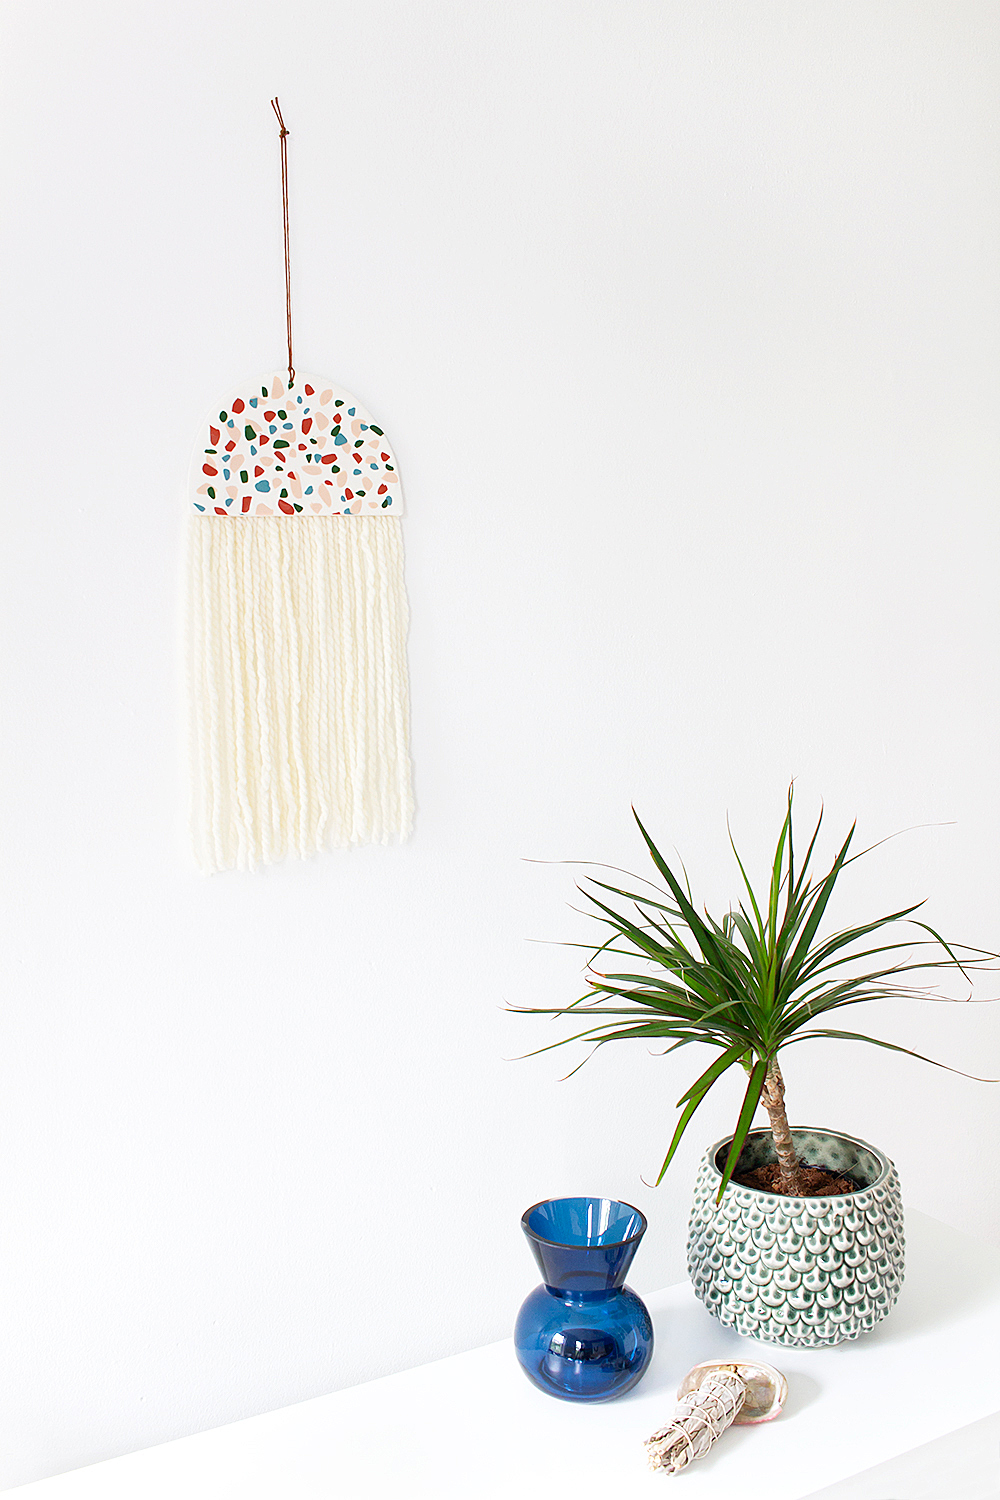
This is very good news for you, because it means I’ve got a number of terrazzo craft project ideas up my sleeve. Starting today, with this DIY terrazzo tile wall hanging that makes for some pretty snazzy wall decor.
And, it’s totally easy to make yourself!
Also, guys, exciting news! I’m partnering with JOANN — yes, the fabric and craft store we all know and love — for a couple projects. I’m really stoked to be able to work with them because it means I’ll be able to bring you even more modern craft project ideas. Huzzah!
Ok, now for this tutorial. Or you can also just skip to more pretty pictures, that’s ok too.
DIY TERRAZZO TILE WALL HANGING
Skill level: Easy peasy
Time: About an hour
WHAT YOU NEED:
+ four 2 oz packets of colored polymer clay (pictured here are Sculpey Tranquility, Beige, Leaf Green, and Sweet Potato)
*** Make sure you use the same brand of polymer clay throughout your project, as they all have different baking requirements! ***
+ clay roller (an empty wine bottle will do in a pinch!)
+ cord or yarn for hanging
+ yarn of your choice to make the fringe
+ scissors
+ hot glue gun and glue sticks
+ Other items: parchment paper, a skewer or toothpick, and of course: an oven!
WHAT YOU DO:
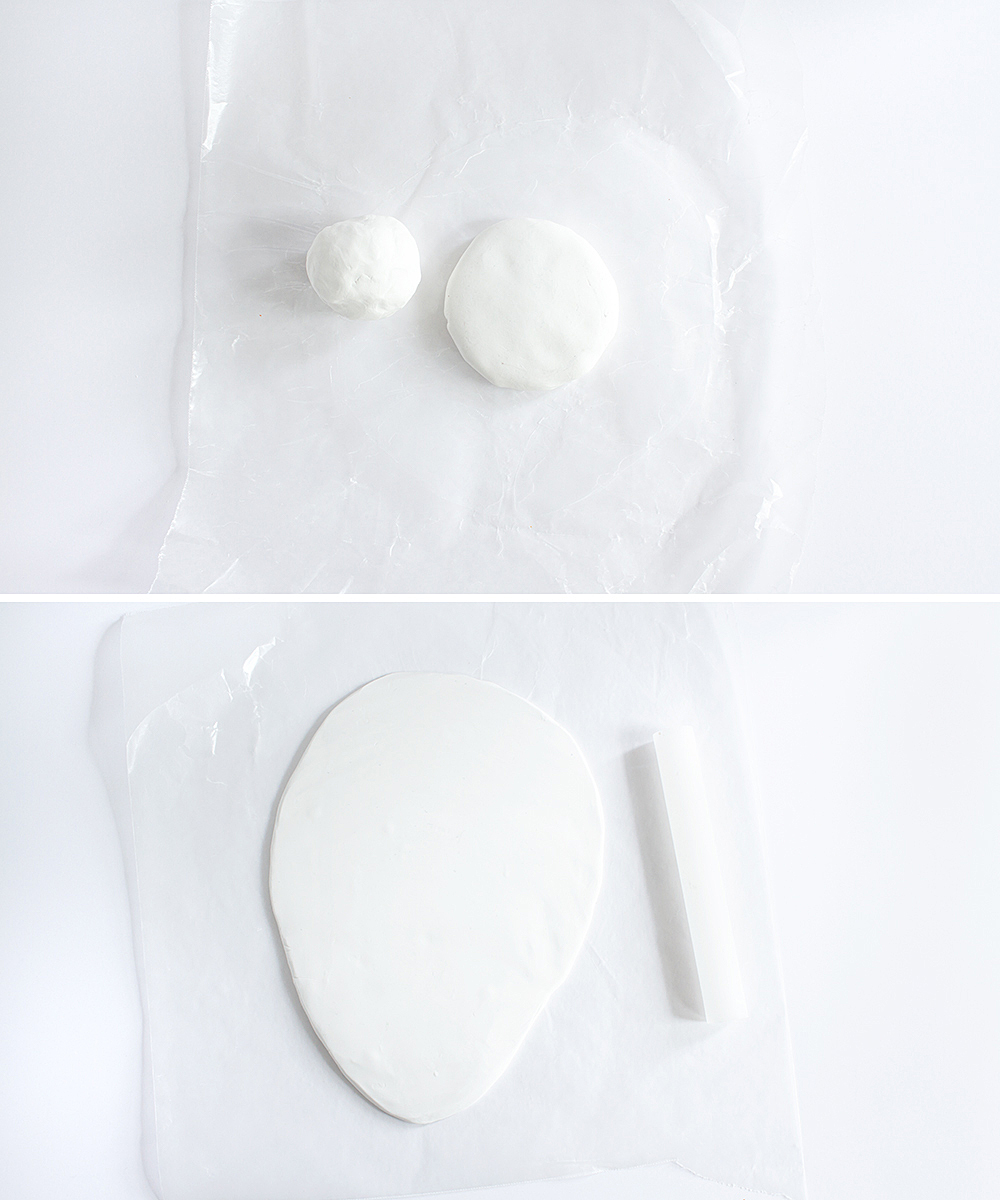
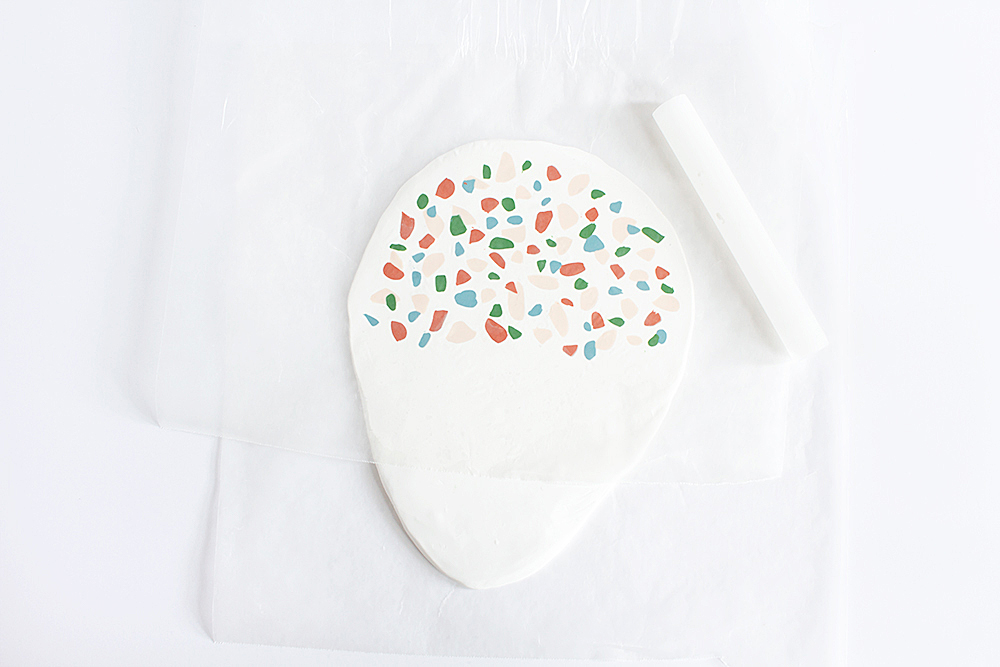
Step 1 — Warm the white clay in your hands so you can roll it into a ball. You will have to combine a couple packs in order to make the terrazzo tile base (my final piece is 4″ tall and 6″ wide).
Flatten the ball a bit, then roll it out into kind of an oval-ish shape that is a tiny bit thinner than 1/4″.
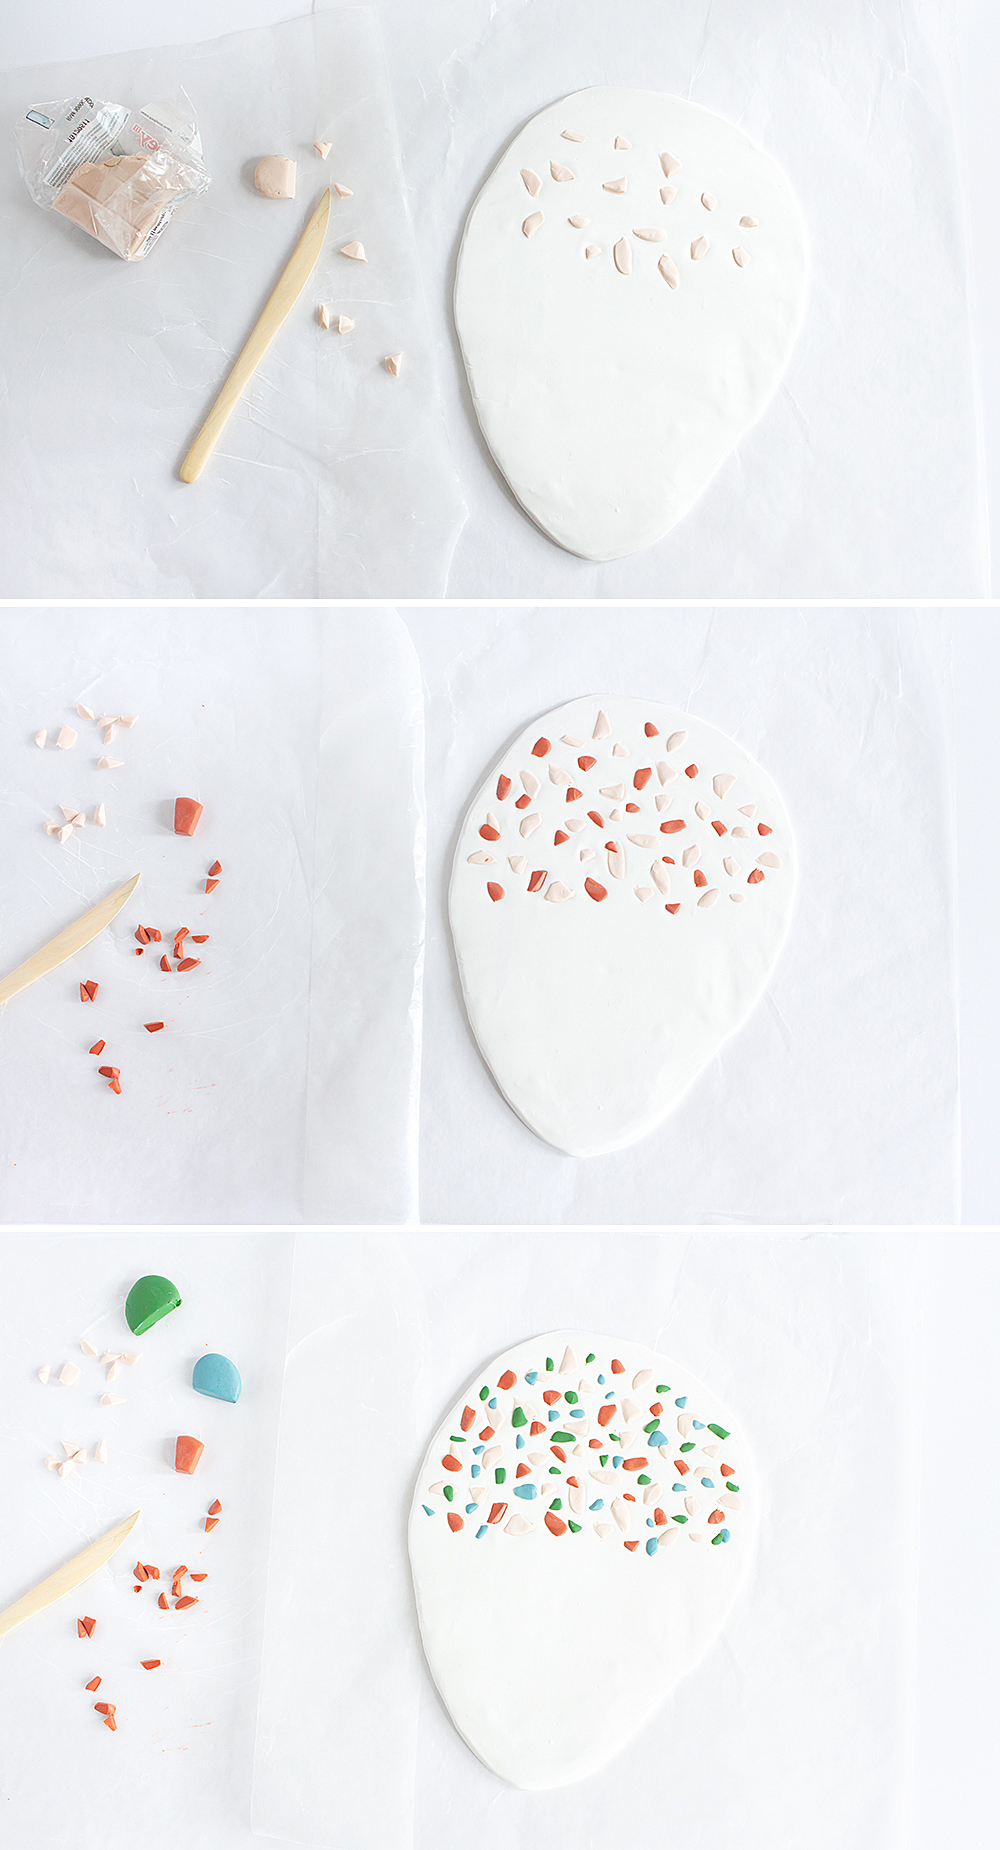
Step 2 — Starting with the lightest colored clay, pinch off a small amount, warm it in your hands, and flatten it until it is very thin. Then use a clay cutting tool to hack off irregular shapes. Don’t worry too much about getting exact shapes, random is better! Here’s some great images of real terrazzo tile for inspiration.
*** Work with the lightest color first, so the darker colors don’t transfer onto your hands and stain them! Or, you can be smarter than me and wash your hands in between different colors. 🙂
Flatten the clay shapes a bit with your fingers, then drop them onto the tile base. Again, think random! Press each shape into the white clay base just a little so it stays put.
Repeat with the remaining three colors!
Step 3 — Once you’re happy with your gorgeous clay terrazzo pieces, cover the whole piece with a piece of parchment paper and gently roll it out until the shapes are flattened and incorporated into the base.
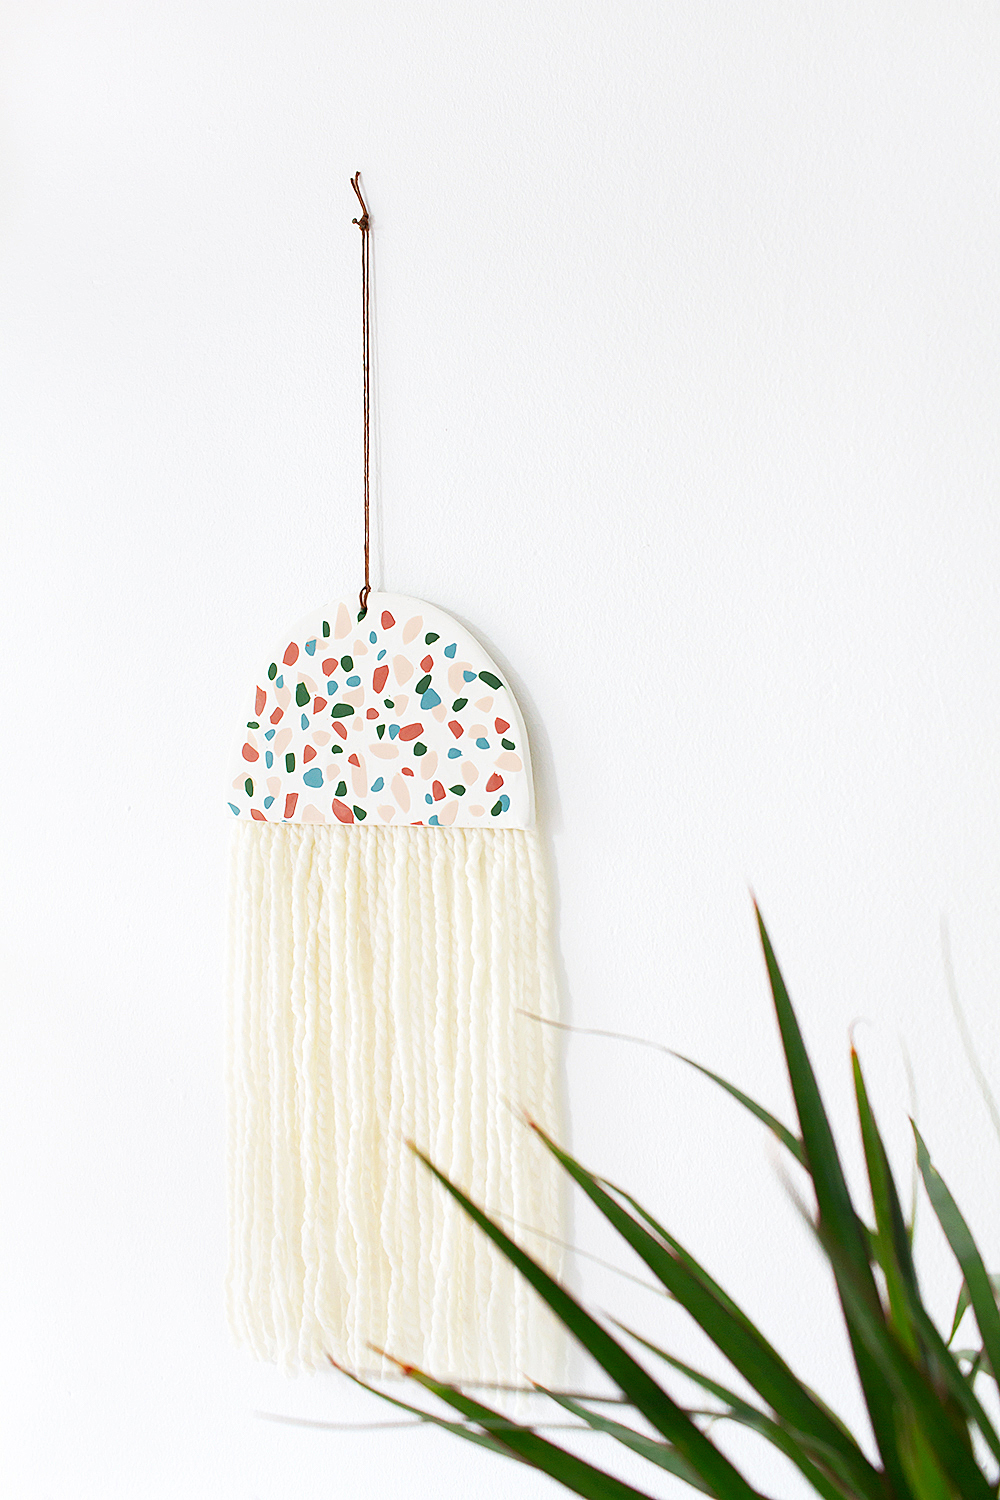
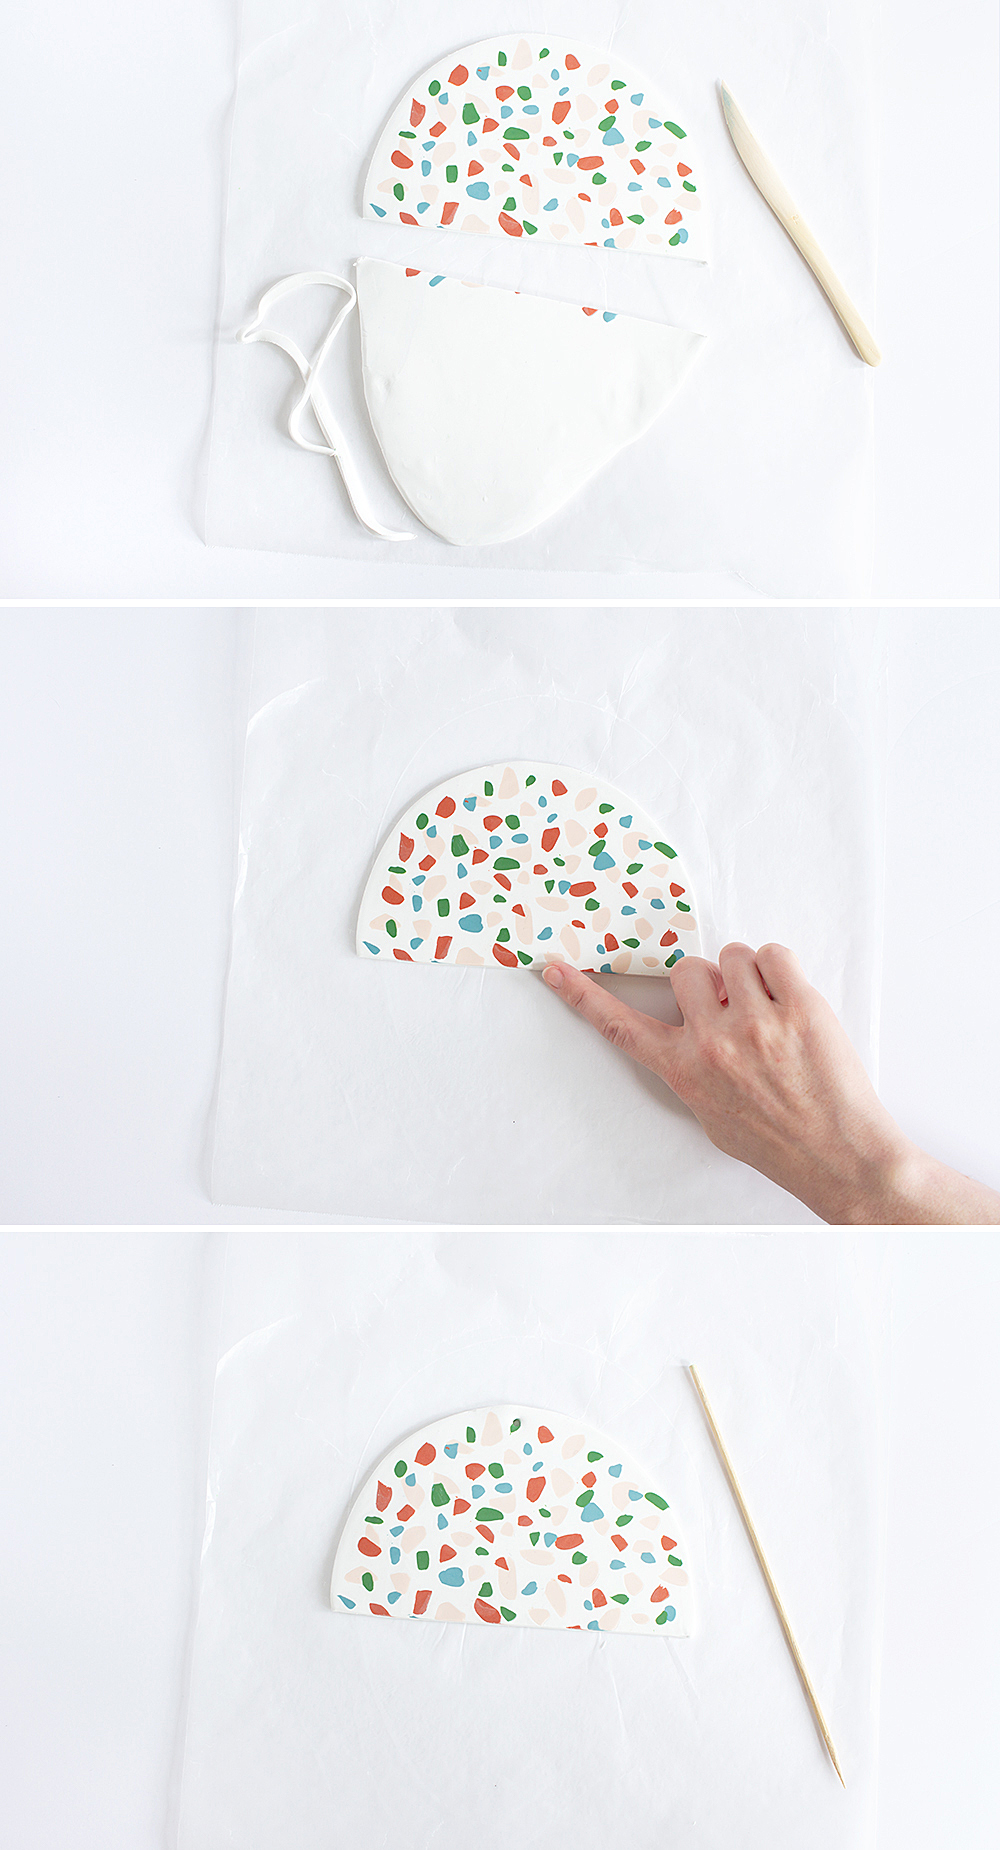
Step 4 — Now it’s time to cut out your tile! I decided to make a half moon, though of course you can make whatever shape you like. Use a clay cutting tool to cut the shape and trim away any excess.
Then, smooth out the edges with your finger. Also take this time to smooth and flatten any irregularities on the tile. And don’t forget to make a hole with your skewer or toothpick so you can hang your finished piece.
Step 5 — (not pictured) Bake your tile. Follow the temperature and time instructions on the package.
It can be a little tricky how to tell when polymer clay is “done.” I usually GENTLY press it with my finger (be careful, it’s friggin hot). It will be done when there is almost no give, though it will still feel soft and will harden as it cools.
When in doubt, err on the side of slightly overdone.
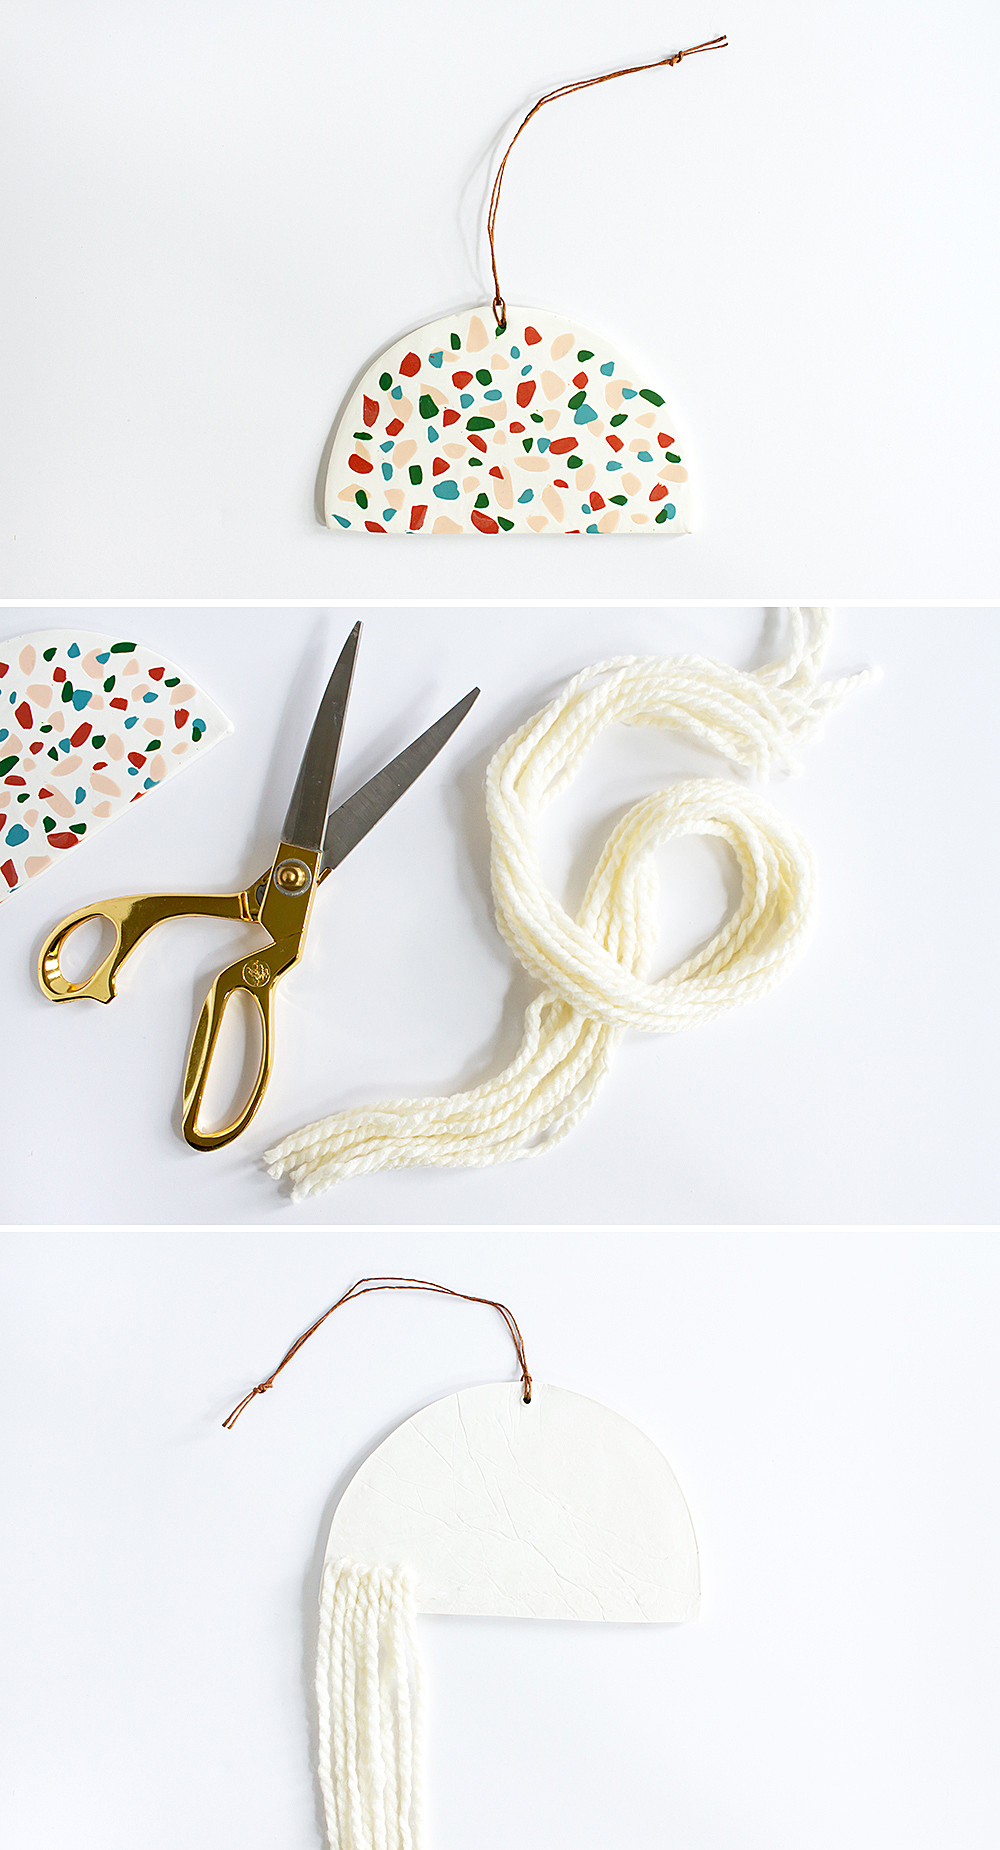
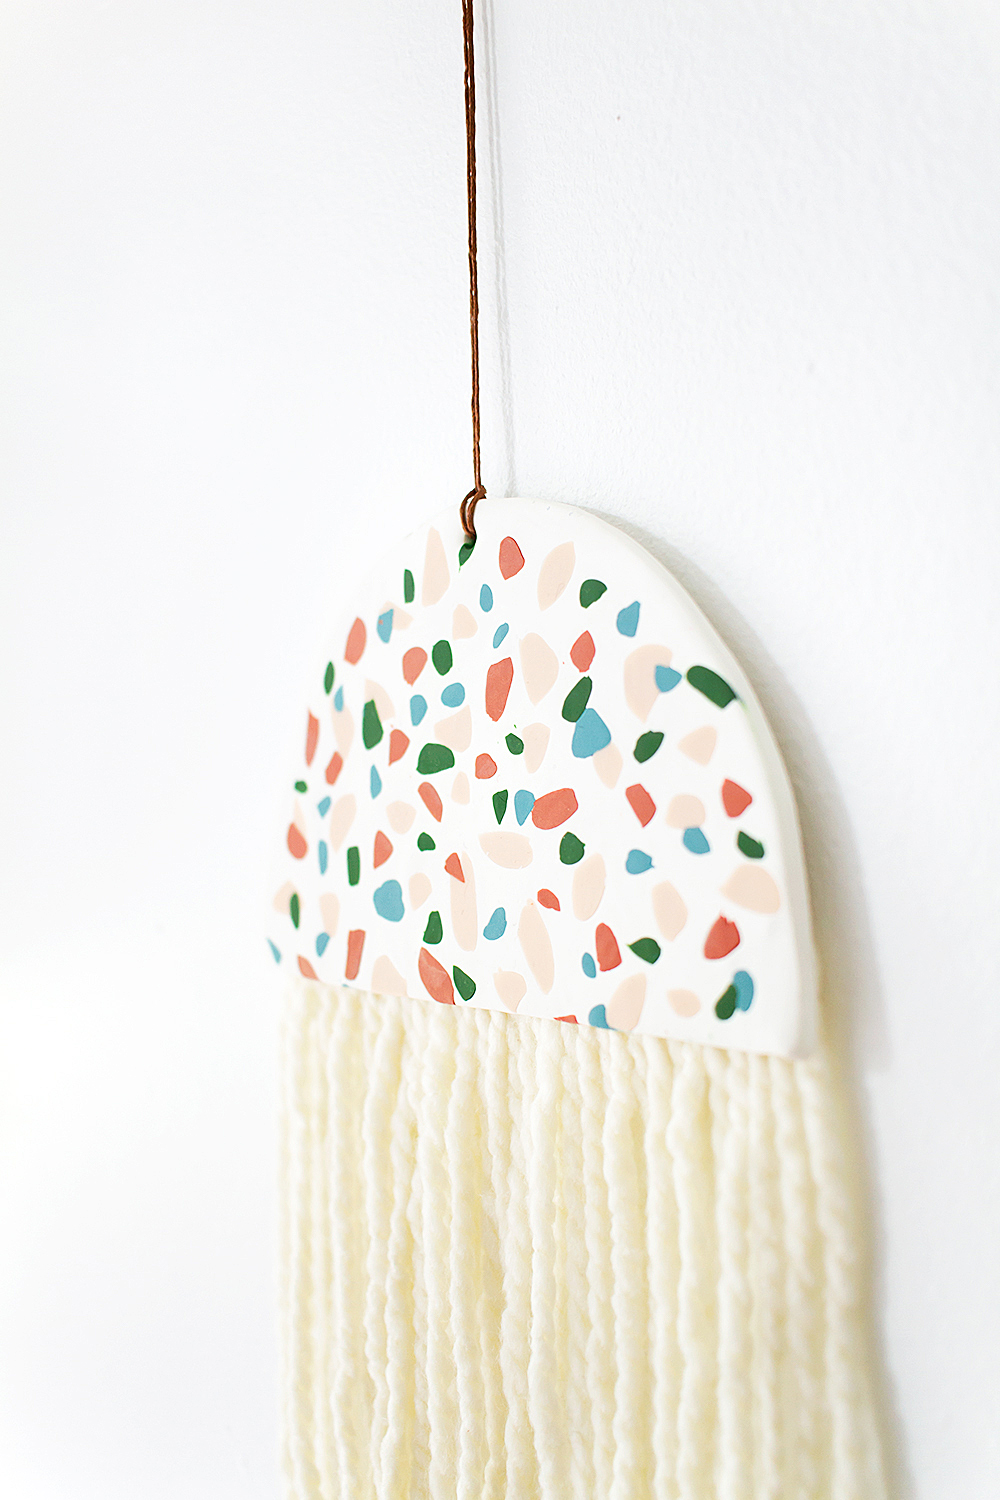
Step 6 — Once the tile has cooled, thread your cord through the hole and tie off.
And now, add the yarn fringe! Flip that bad boy over and use a hot glue gun to attach lengths of yarn along the whole edge. You can make the yarn as long as you want (I actually wish I had made mine a little longer!).
Step 7 — Last step I swear. Trim the yarn ends so they are even. Then step back and admire your terrazzo tile wall hanging!
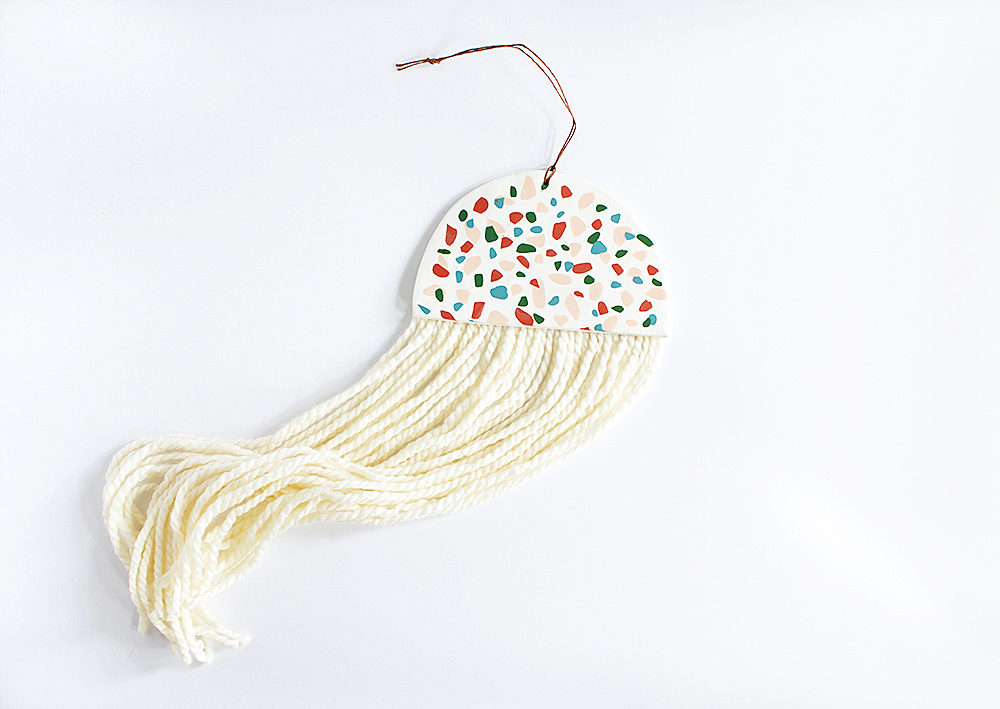
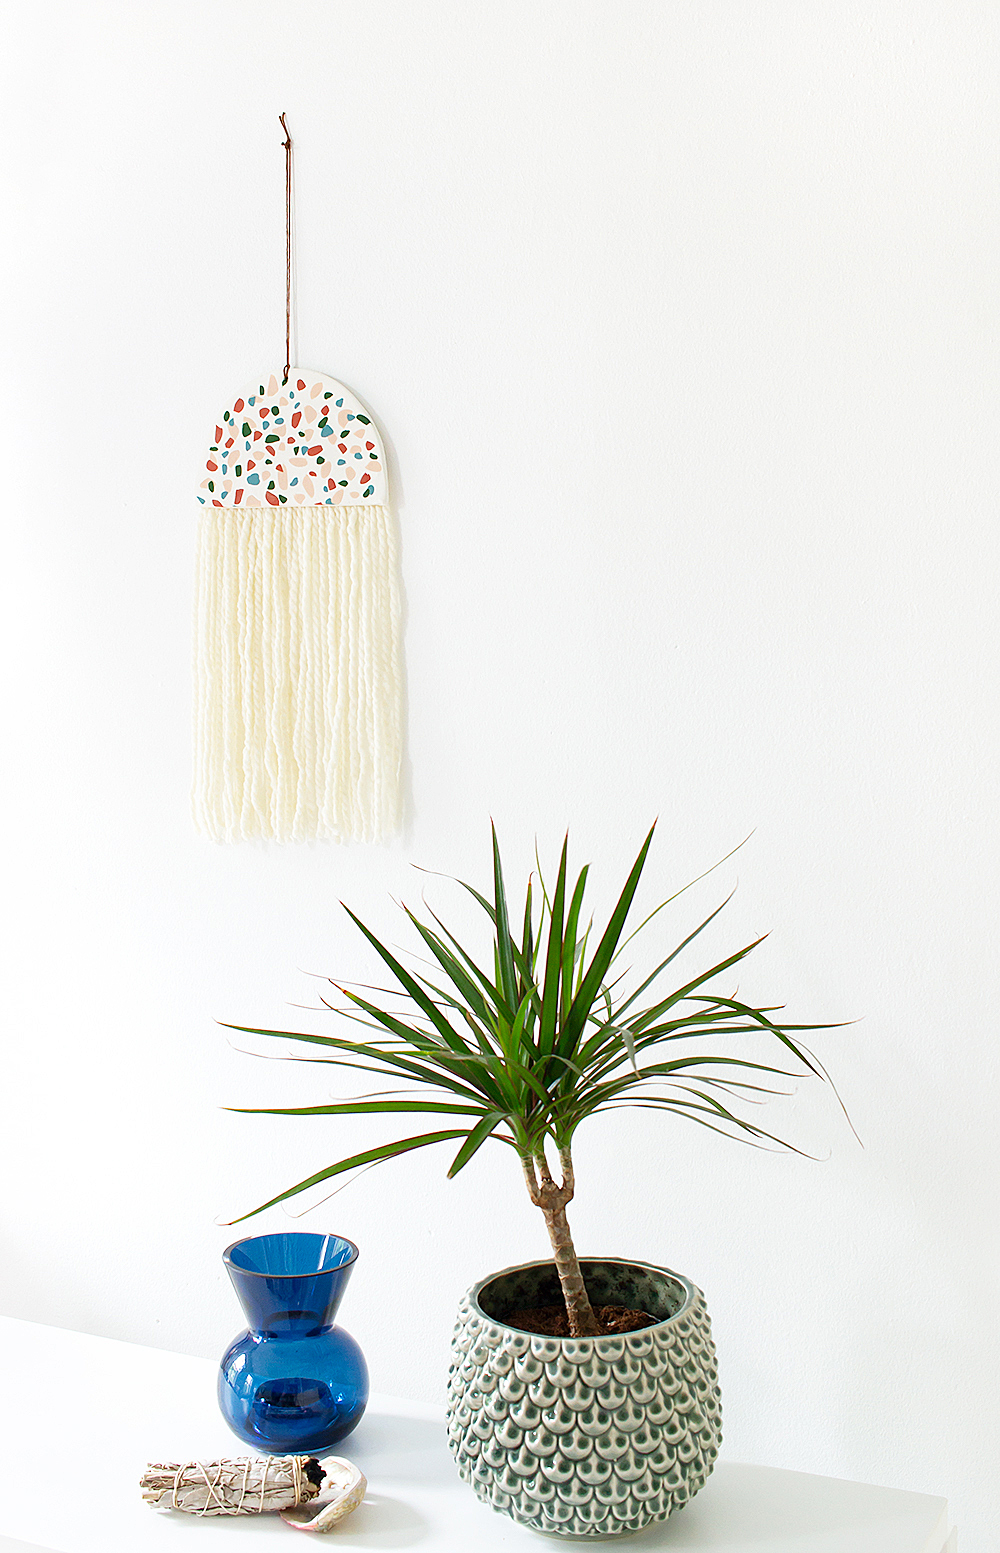
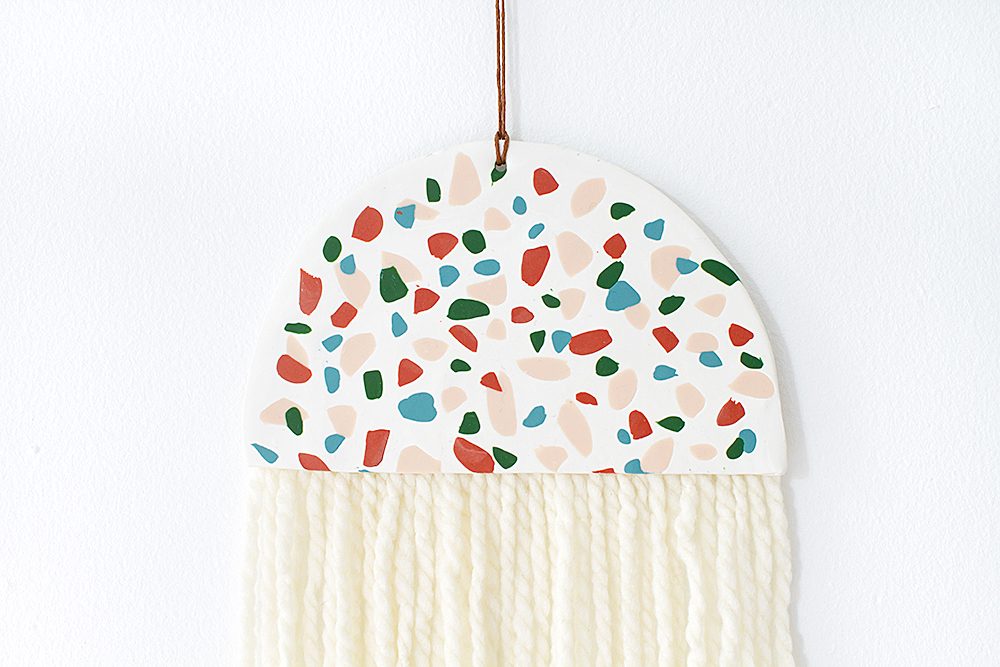
I just looooooove how the texture of the yarn combines with the colored terrazzo tile chips, don’t you?
Do you want to see more terrazzo tile projects? Annnnnd what are you excited to make right now?
from the archives:
+++ Craft Date: Because Crafting is Better with Friends
+++ 100 Gift Ideas you can DIY
THIS POST WAS CREATED IN PARTNERSHIP WITH JOANN, BUT ALL OPINIONS ARE REALLY, TRULY MY OWN! THANK YOU FOR SUPPORTING THE BRANDS THAT ALLOW ME TO KEEP CREATING FRESH AND FREE CONTENT FOR YOU!
Loving the colors you chose!
Thank you thank you, girl!! I’m so in love with this palette! xoxo
This is looking nice. I really liked this DIY terrazzo tile wall hanging. Thanks for sharing this post.
I appreciate that so much, thank you! xx