
Inside: display your favorite pics in a DIY clay rainbow photo holder, and find out how to participate in the Spring Make It Challenge!
When I was 12, my parents gave me my first camera.
It was a pink plastic Fuji point-and-shoot film camera (I’m dating myself here), and I loved it. That camera went with me everywhere and started off the collection of thousands of negatives and prints I would create from grade school through college.
And then came my DSLR and smartphone, AKA, the Death of Film Cameras. Just like that, I stopped printing pictures. My phone currently has 7,027 photos on it, and I have thousands more archived on my laptop and external hard drive. But hardly a print in sight!
Guys, I’m sick of taking pictures and never looking at them again (or getting sucked into the mindless smartphone scrolling when I do). Maybe it’s due to my recent discovery of modern journaling and scrapbooking styles, but I want to print photos again! Who’s with me??
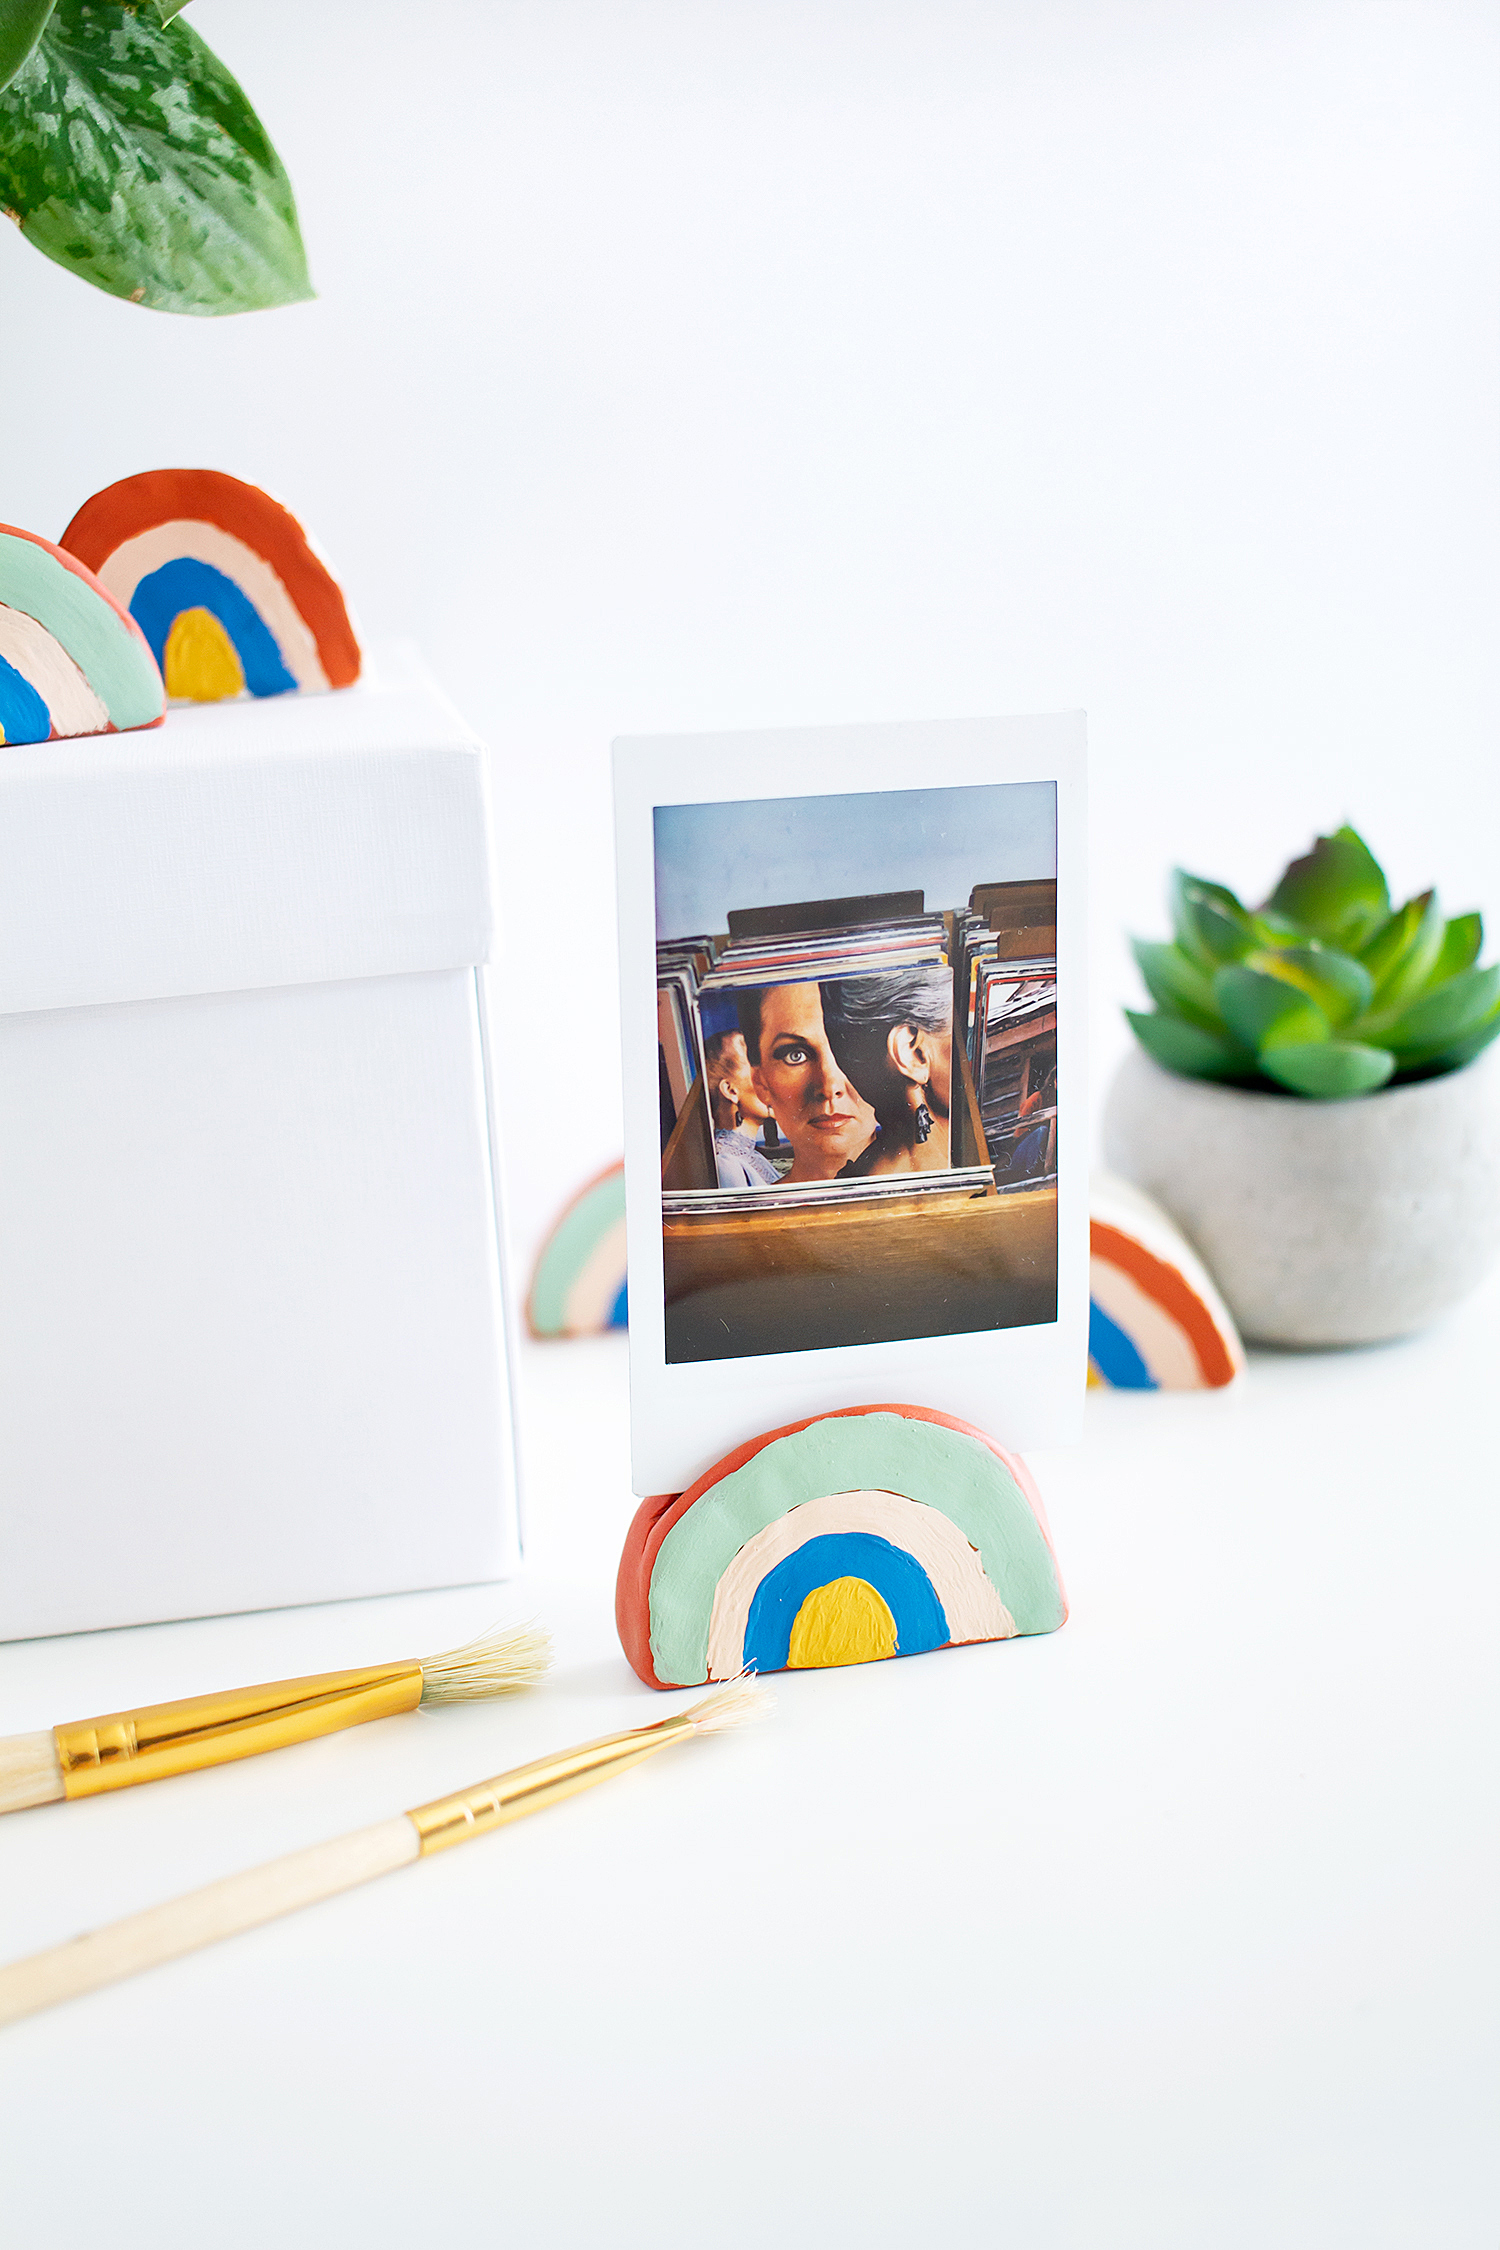
This FINALLY brings me to today’s DIY. If we’re going to have photo prints around, we’ve gotta have a cute way to display them.
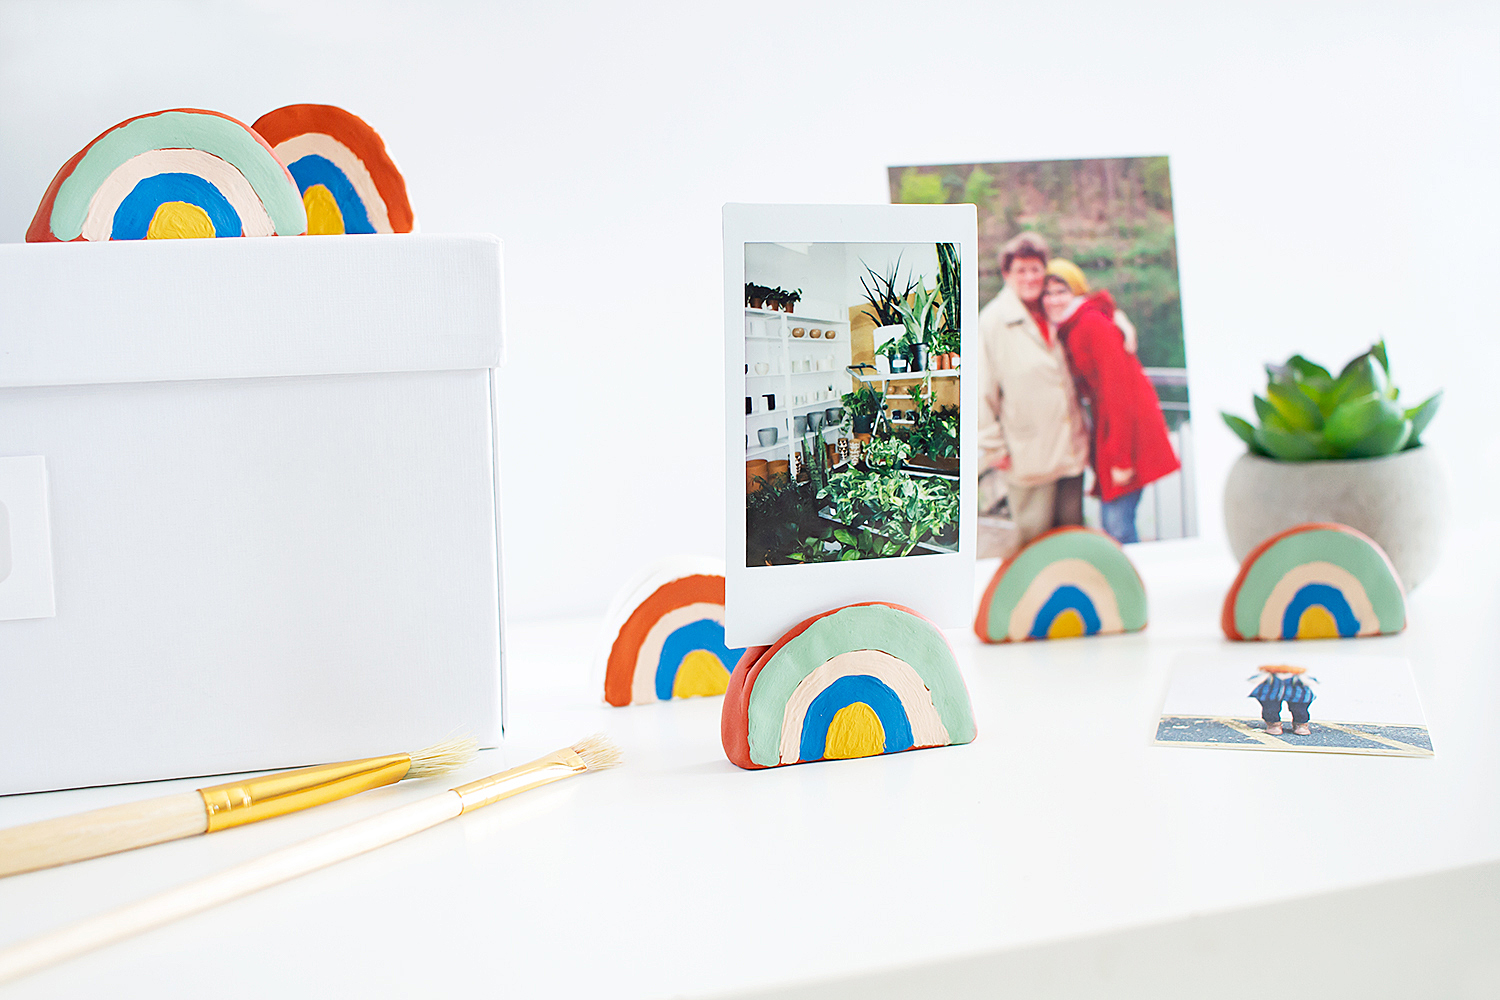
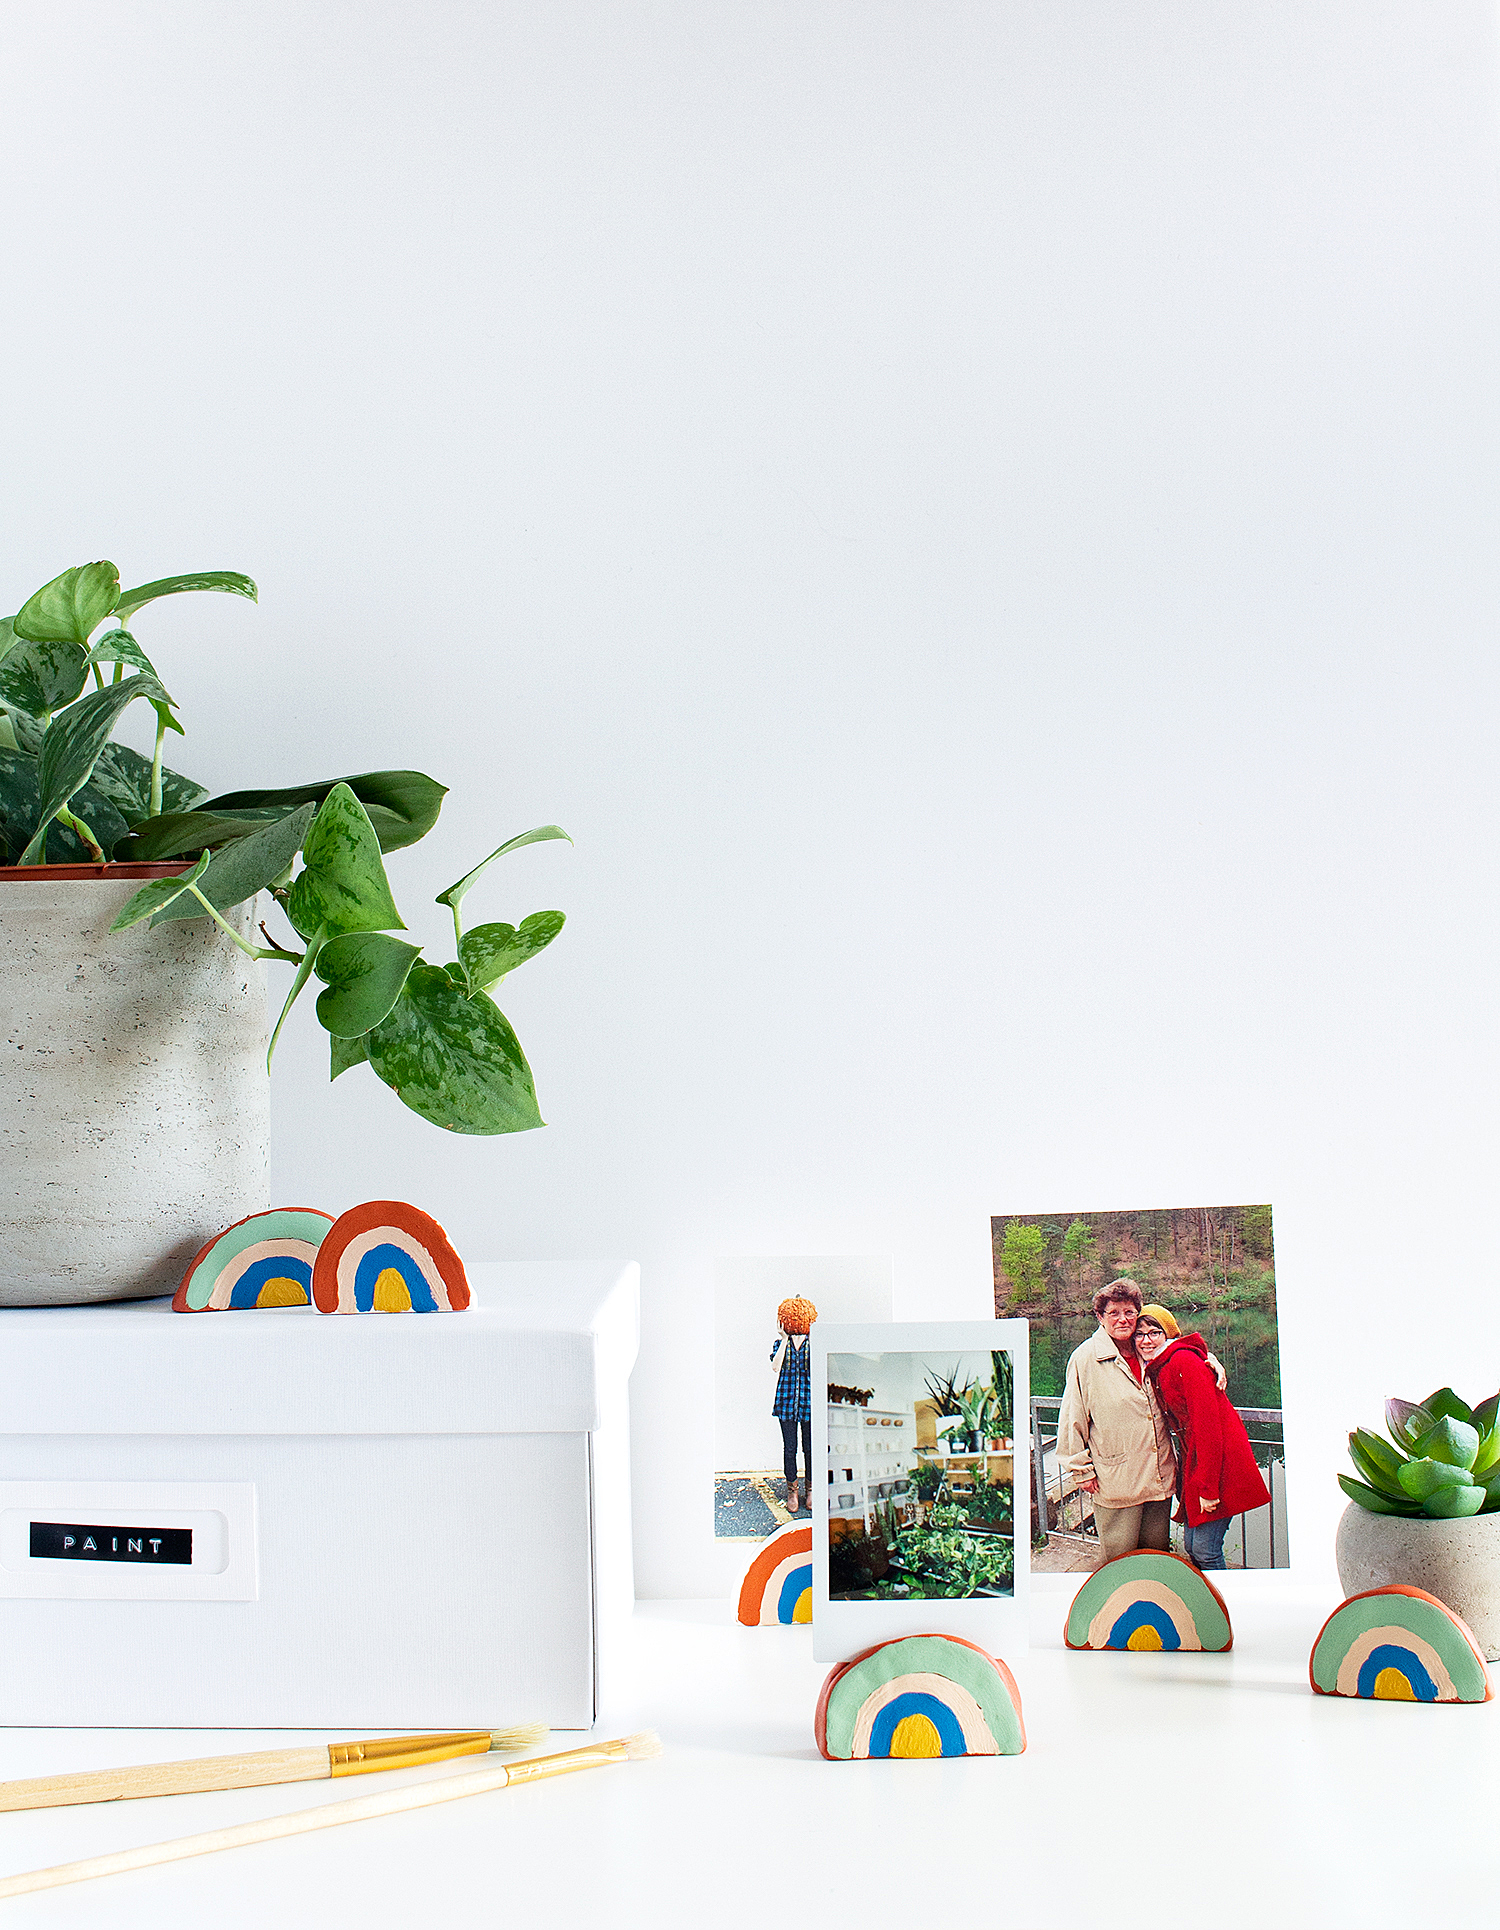
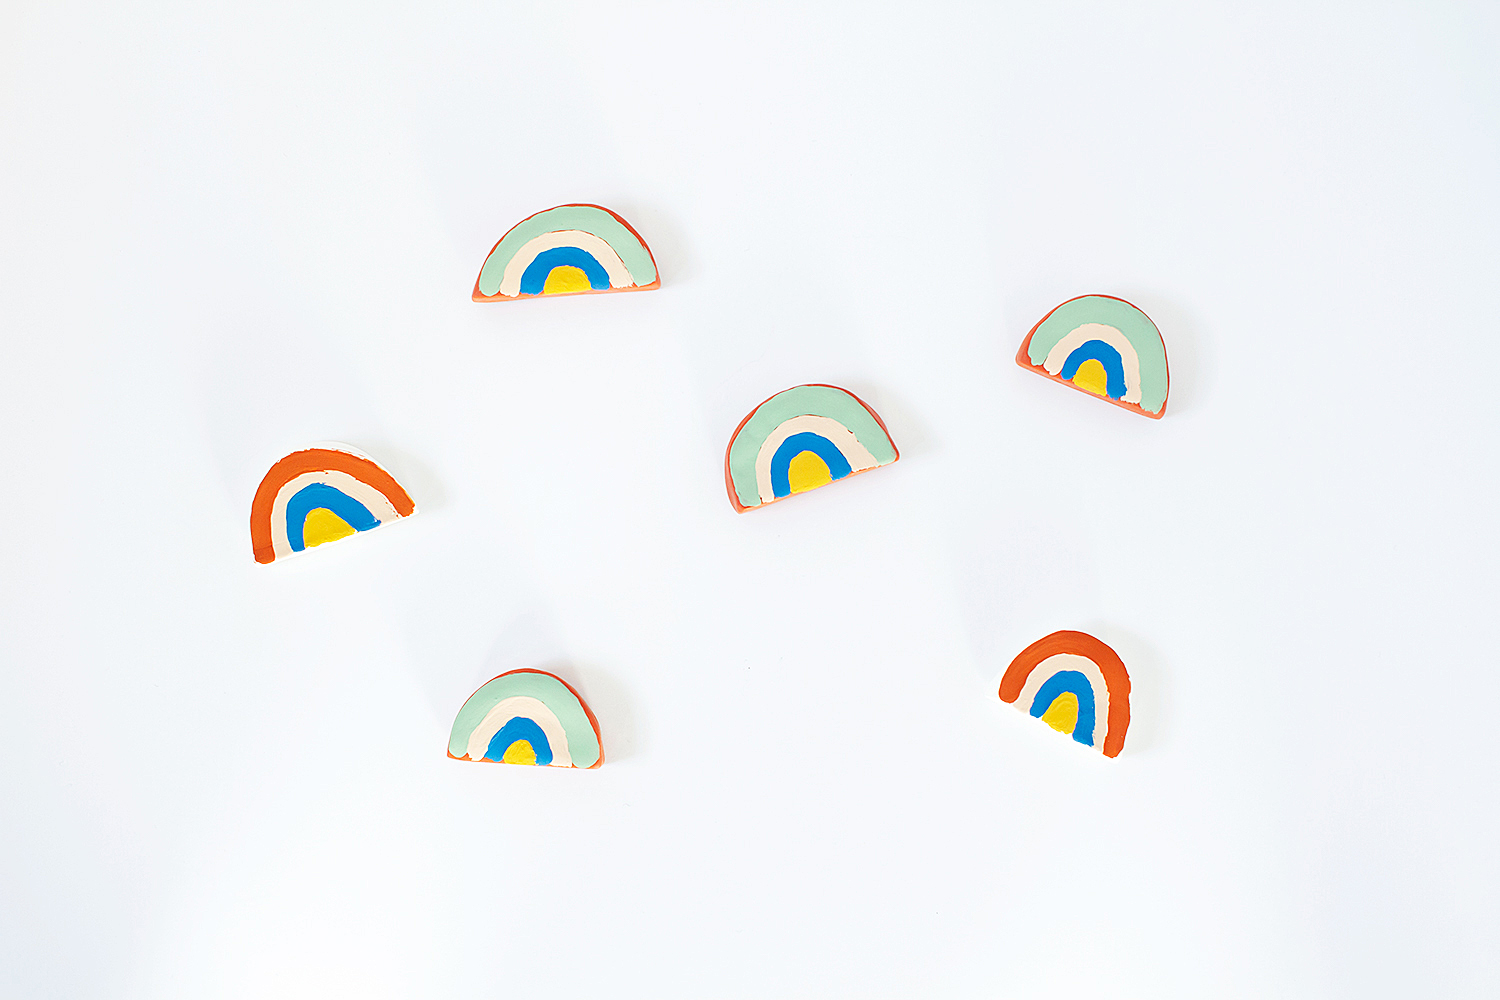
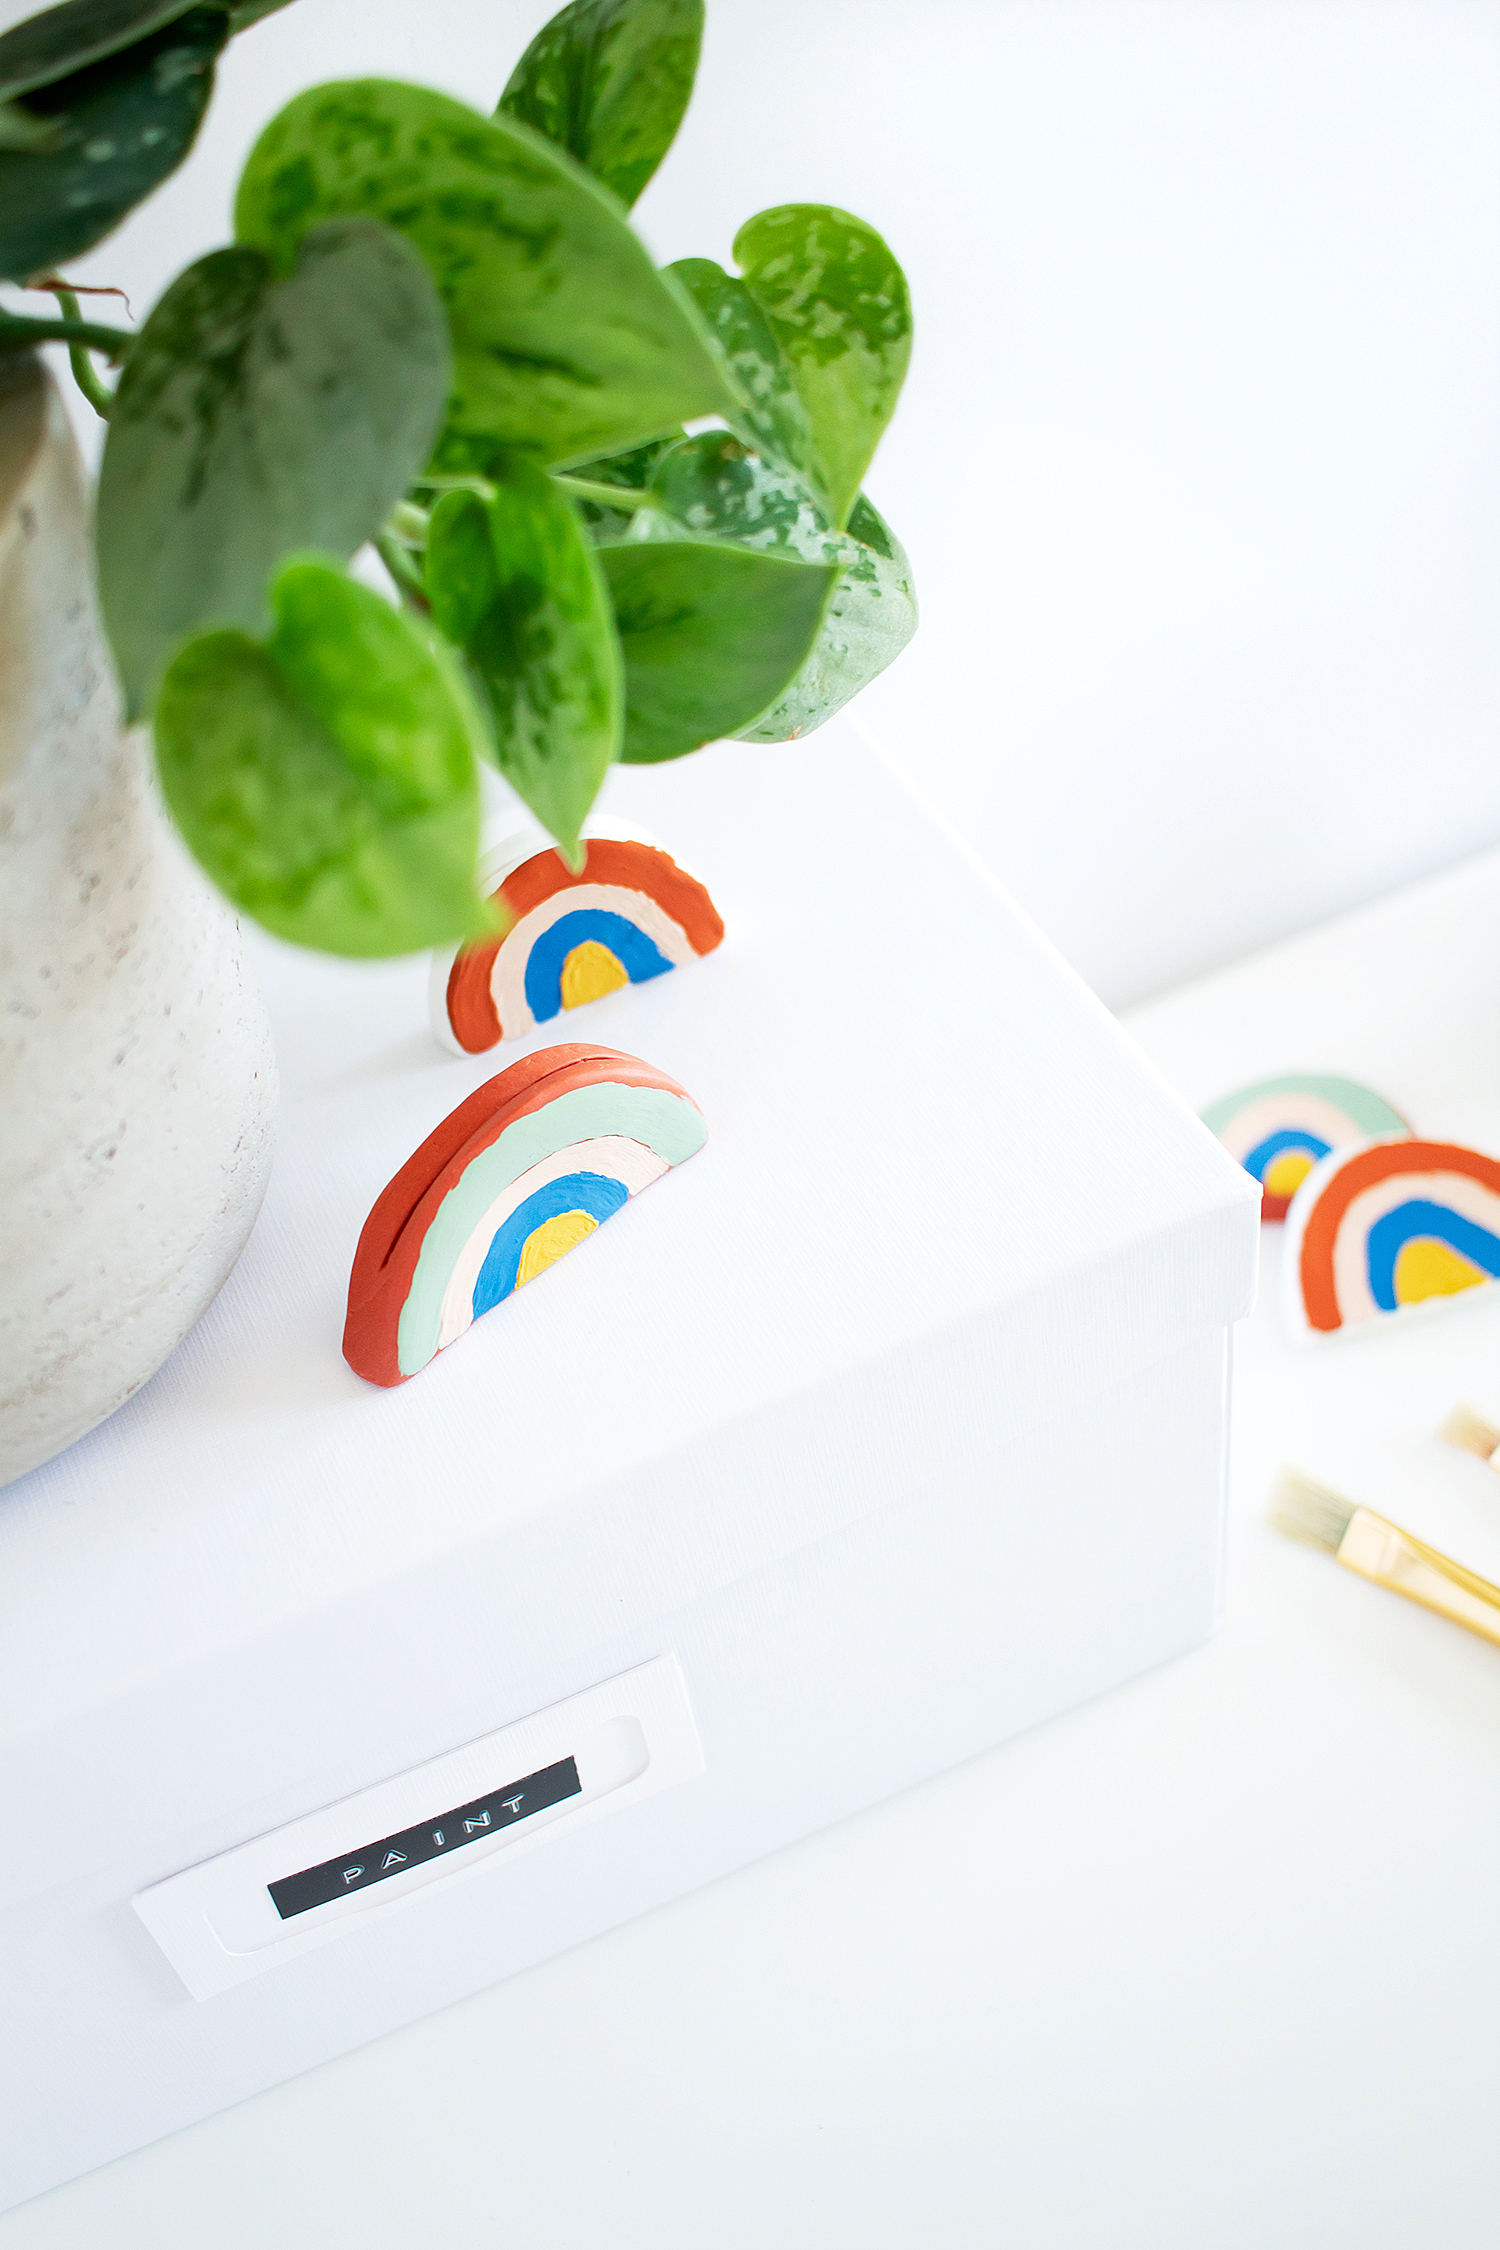
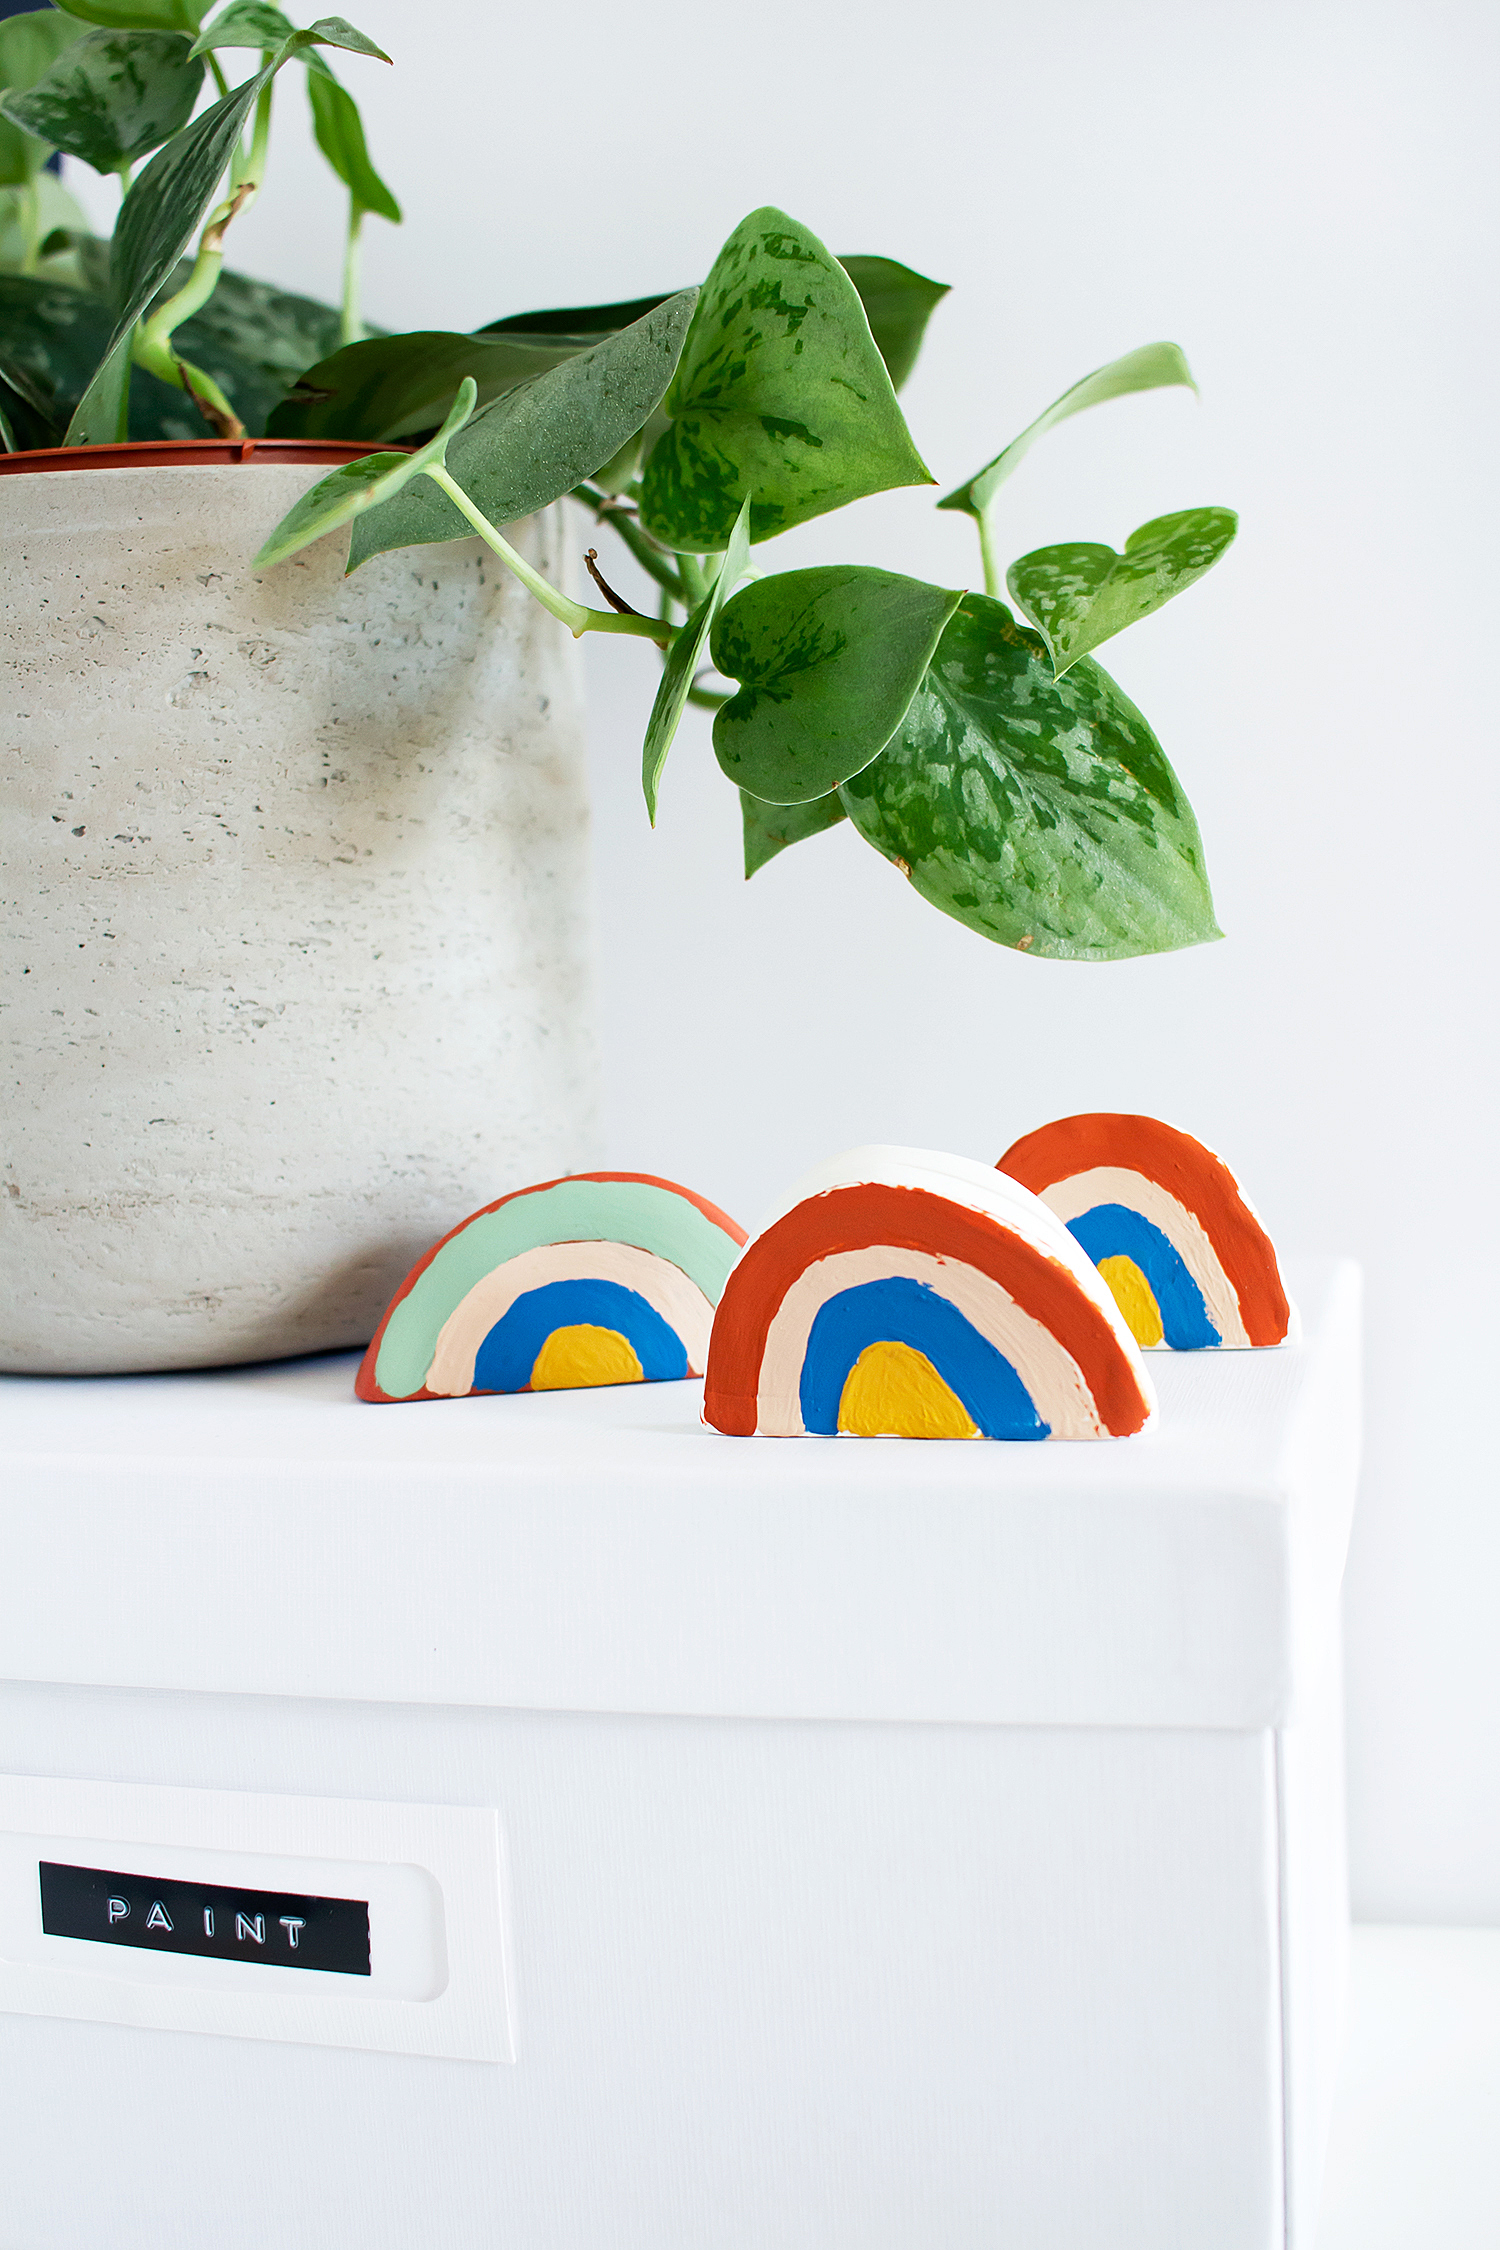
My DIY clay rainbow photo holder is the perfect solution to liberate your neglected photos from their digital prisons. It’s easy enough that you can make a whole batch, and cover your home in sweet little rainbows to show off all your favorite photographs.
And I’m super excited to announce that this project is part of the Spring Make It Challenge, hosted by Cat of Ctrl + Curate and Cristina from Spatial Dwelling!
This biannual event challenges makers and creatives to use the same material to come up with a unique craft. This time around, the material was “clay,” which is how the DIY clay rainbow photo holder was born. Check out all the bloggers who participated at the bottom of the post, and see how you can pay along too!
*THIS POST CONTAINS AFFILIATE LINKS. THIS MEANS IF YOU PURCHASE, I WILL EARN A SMALL COMMISSION AT NO EXTRA CHARGE TO YOU, WHICH IS PRETTY SWEET BECAUSE IT HELPS ME PAY BLOGGING BILLS, SO THANK YOU! I WILL ONLY LINK TO PRODUCTS I HAVE USED OR WOULD USE MYSELF, PINKY PROMISE. SEE MY FULL DISCLOSURE POLICY HERE.
DIY CLAY RAINBOW PHOTO HOLDER
Skill Level: Easy
Time: About 2 hours to make a handful, including baking and drying time.
WHAT YOU NEED:
+ oven-bake clay (I used Sculpey III in “white” and Sculpey Souffle in “cinnamon”. Each 1.7oz packet made 2 photo holders.)*
+ clay roller* (a bottle or jar would also work!)
+ parchment paper
+ craft paint* in 4-5 colors of your choice
+ paint brushes* (This set is similar to the one I have, I like it because it’s inexpensive and has beginner brushes for every paint type).
+ and, of course, an oven…
WHAT YOU DO:
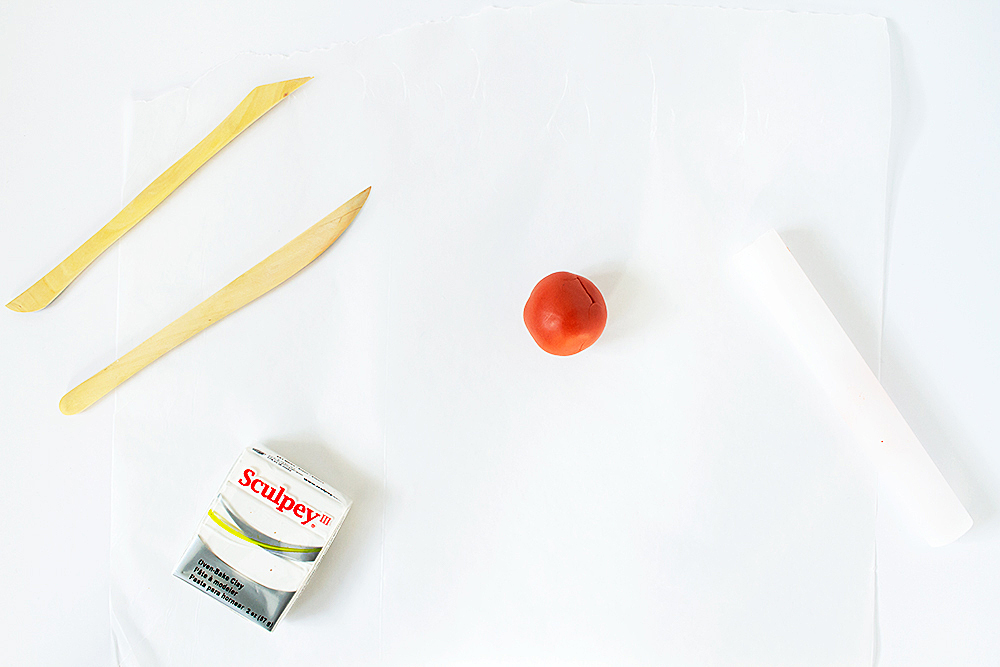
Step One: Break off half of the clay packet and roll it into a ball. You’ll need to warm the clay in your hands first by stretching, folding, and twisting it. The real clay pros call this “conditioning the clay.”
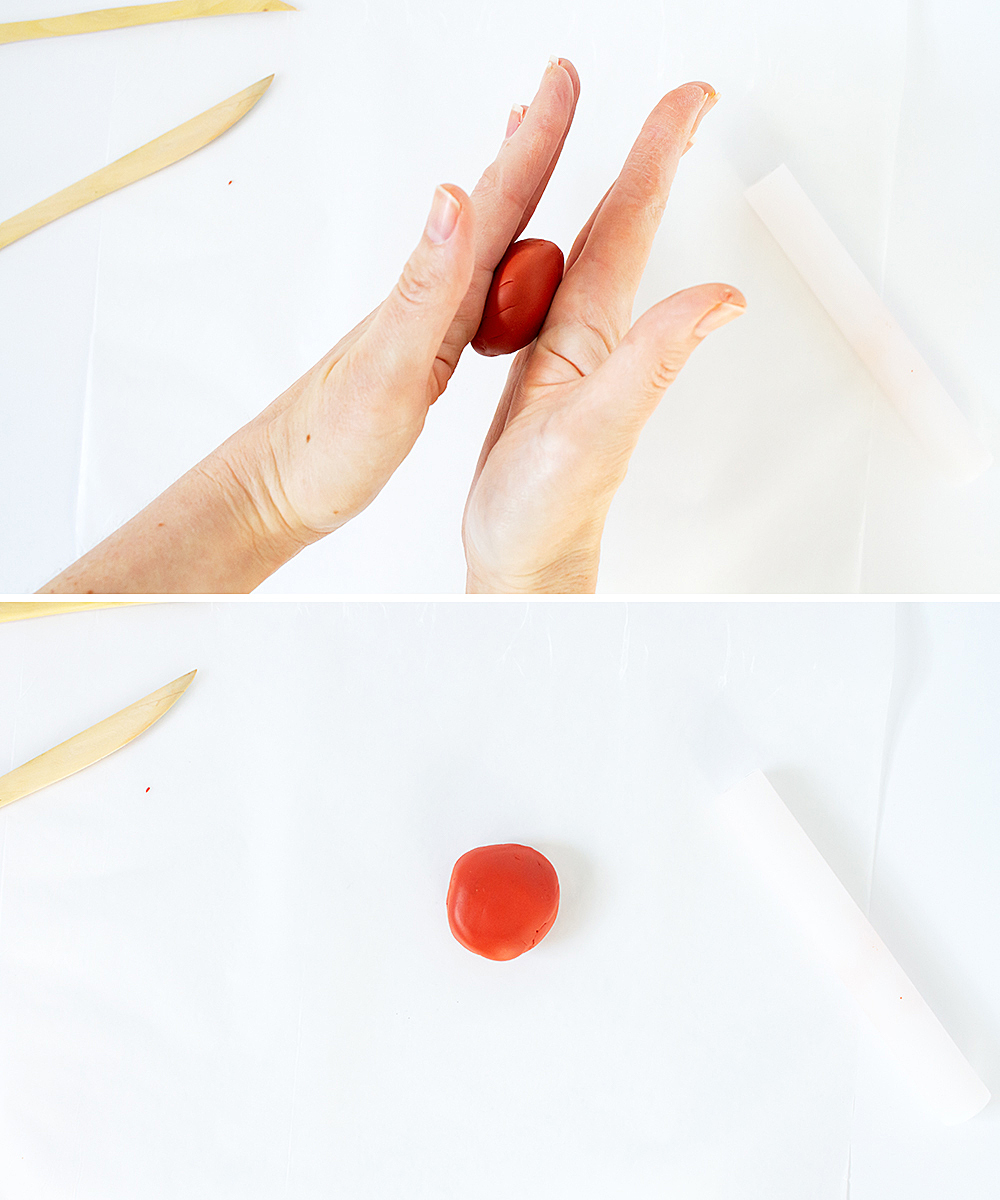
Step Two: Flatten the ball into a thick pancake by slapping it between your hands, like you’re playing patty cake.
Step Three: Roll the pancake out into a disc a little thicker than 1/4″. Sorry, I somehow forgot to take a picture of the rolling! And after purchasing a fancy roller just for photos, too.
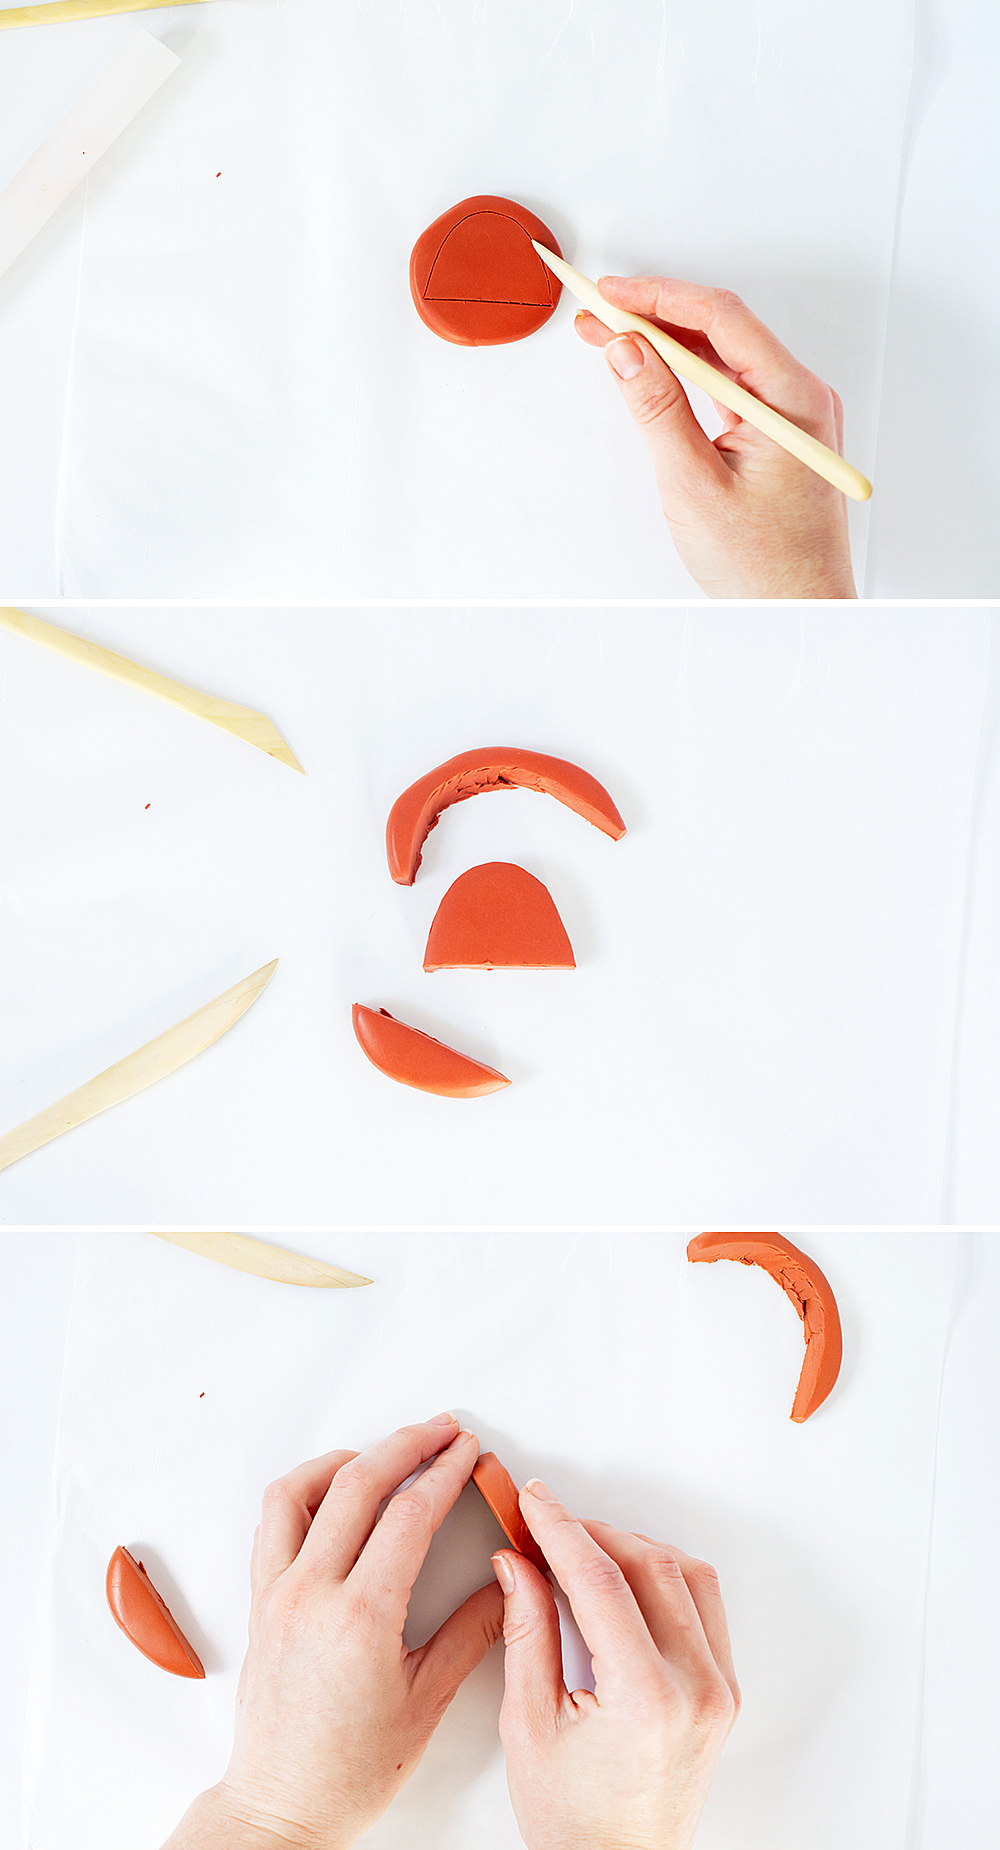
Step Four: Using a sharp clay tool, lightly draw an arch on the clay. Then, cut out the arch shape. Smooth all the rough edges with your fingers. Try to avoid touching the front or back of the piece too much, so you don’t get fingerprints or divots all over it. If you do, smooth them out with your fingertips.
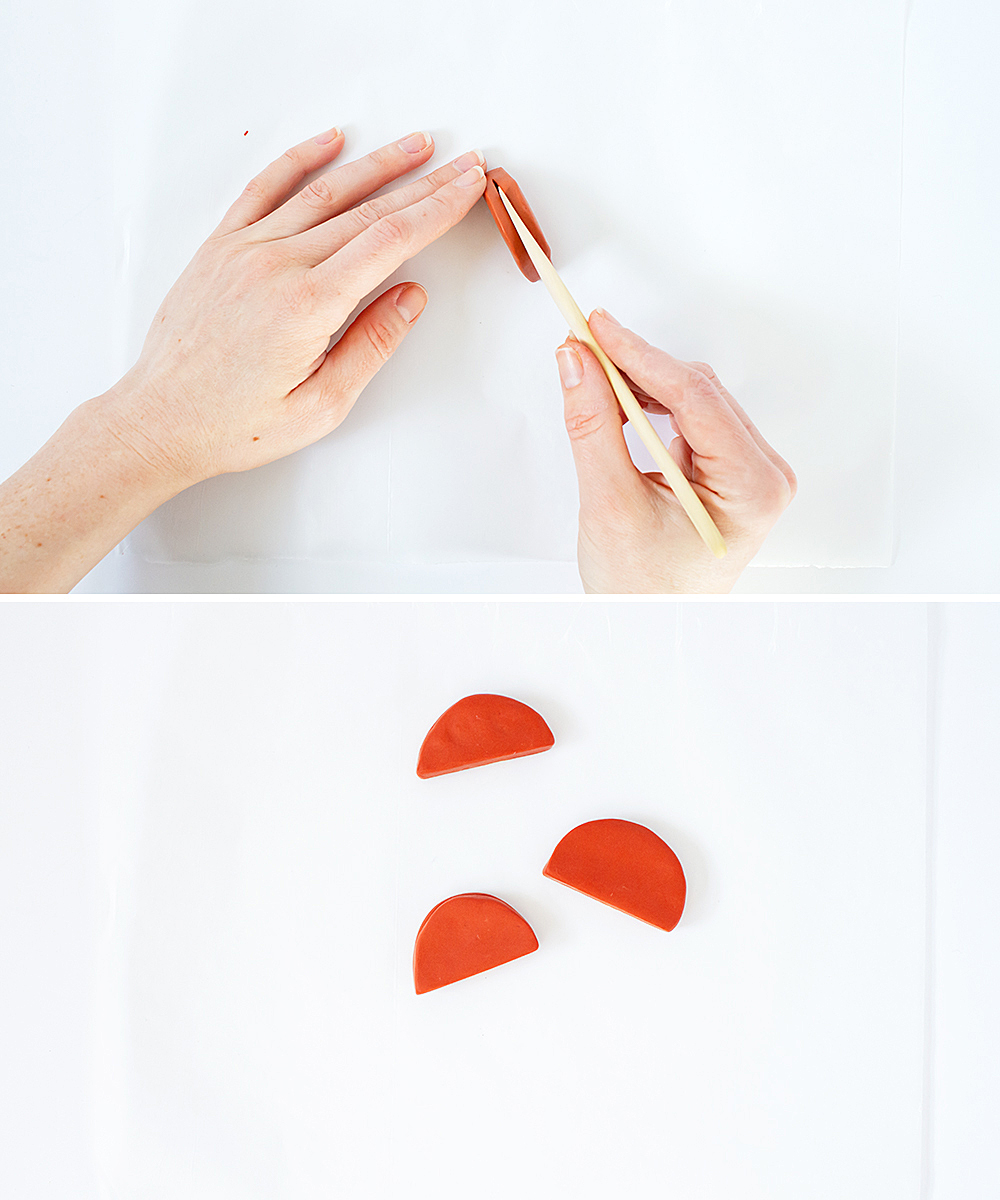
Step Five: Use a thin clay knife to slice into the top of the arch. This is where the photo will sit on the finished piece. It’s helpful to use a plastic gift card or credit card to widen the slot. When you’re happy with how your photo holder looks, make some more, then pop them in the oven!
+++ Always follow the baking instructions on your specific package, as they vary from brand to brand, and even among different varieties of the same brand. Here’s how to tell if your polymer clay is done.
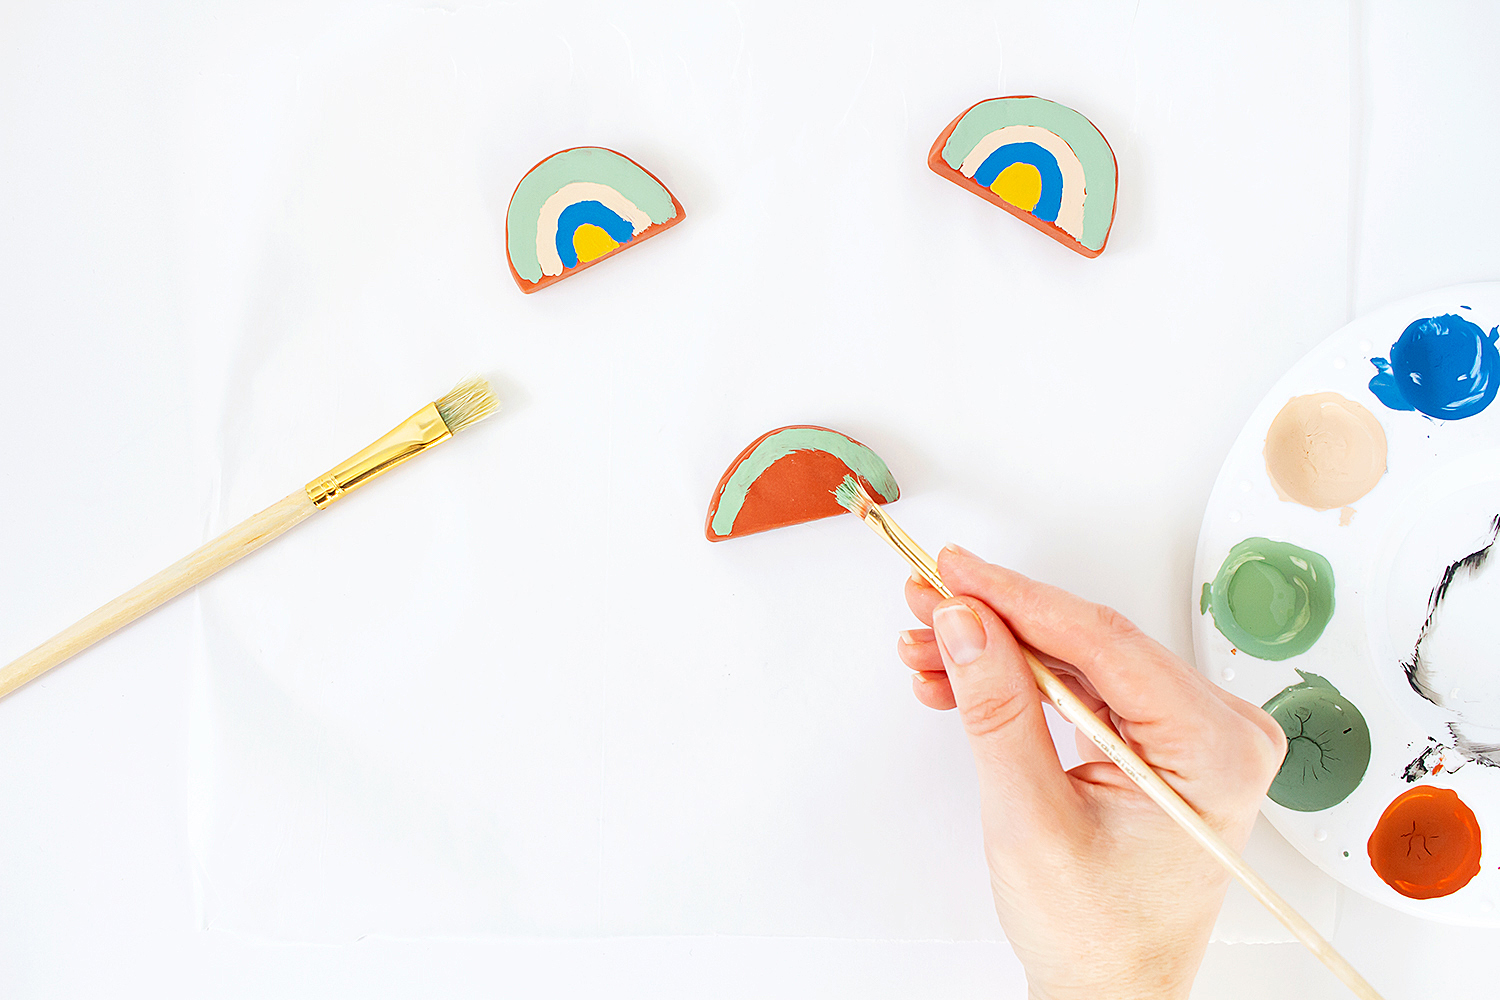
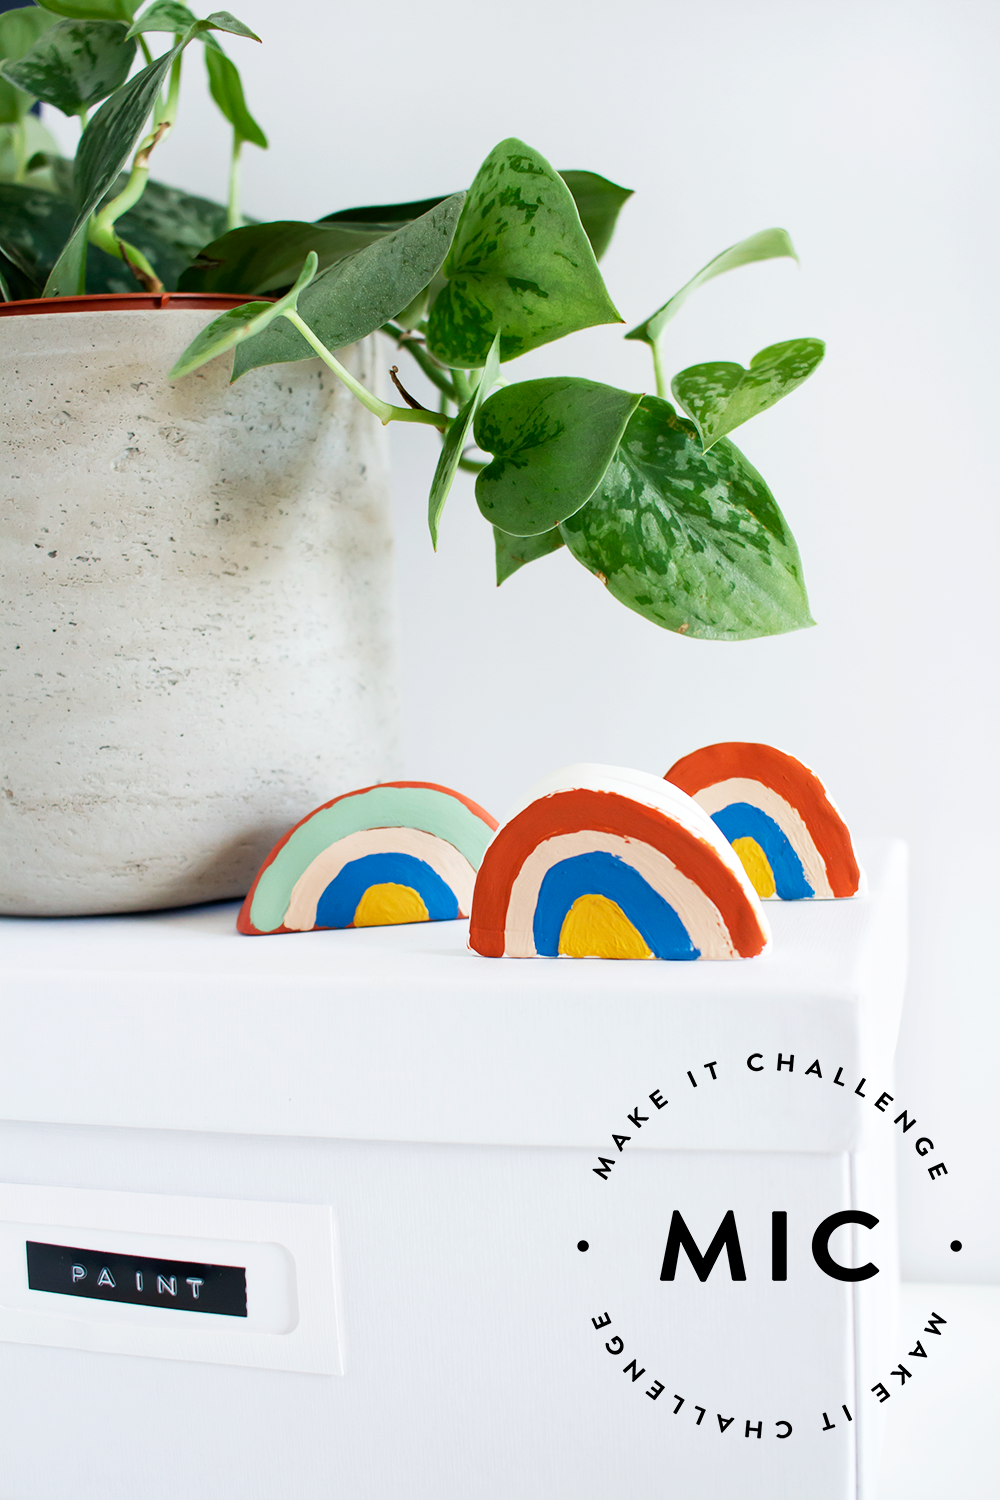
Step Six: After the photo holders have cooled, paint your rainbows! I’ve been loving this non-traditional rainbow color trend, so I went with sage, blush, gray-blue, and mustard. I mixed a little bit of gray paint into each color to make them more muted. My rainbows looked best with two coats of each color.
And you’re done!
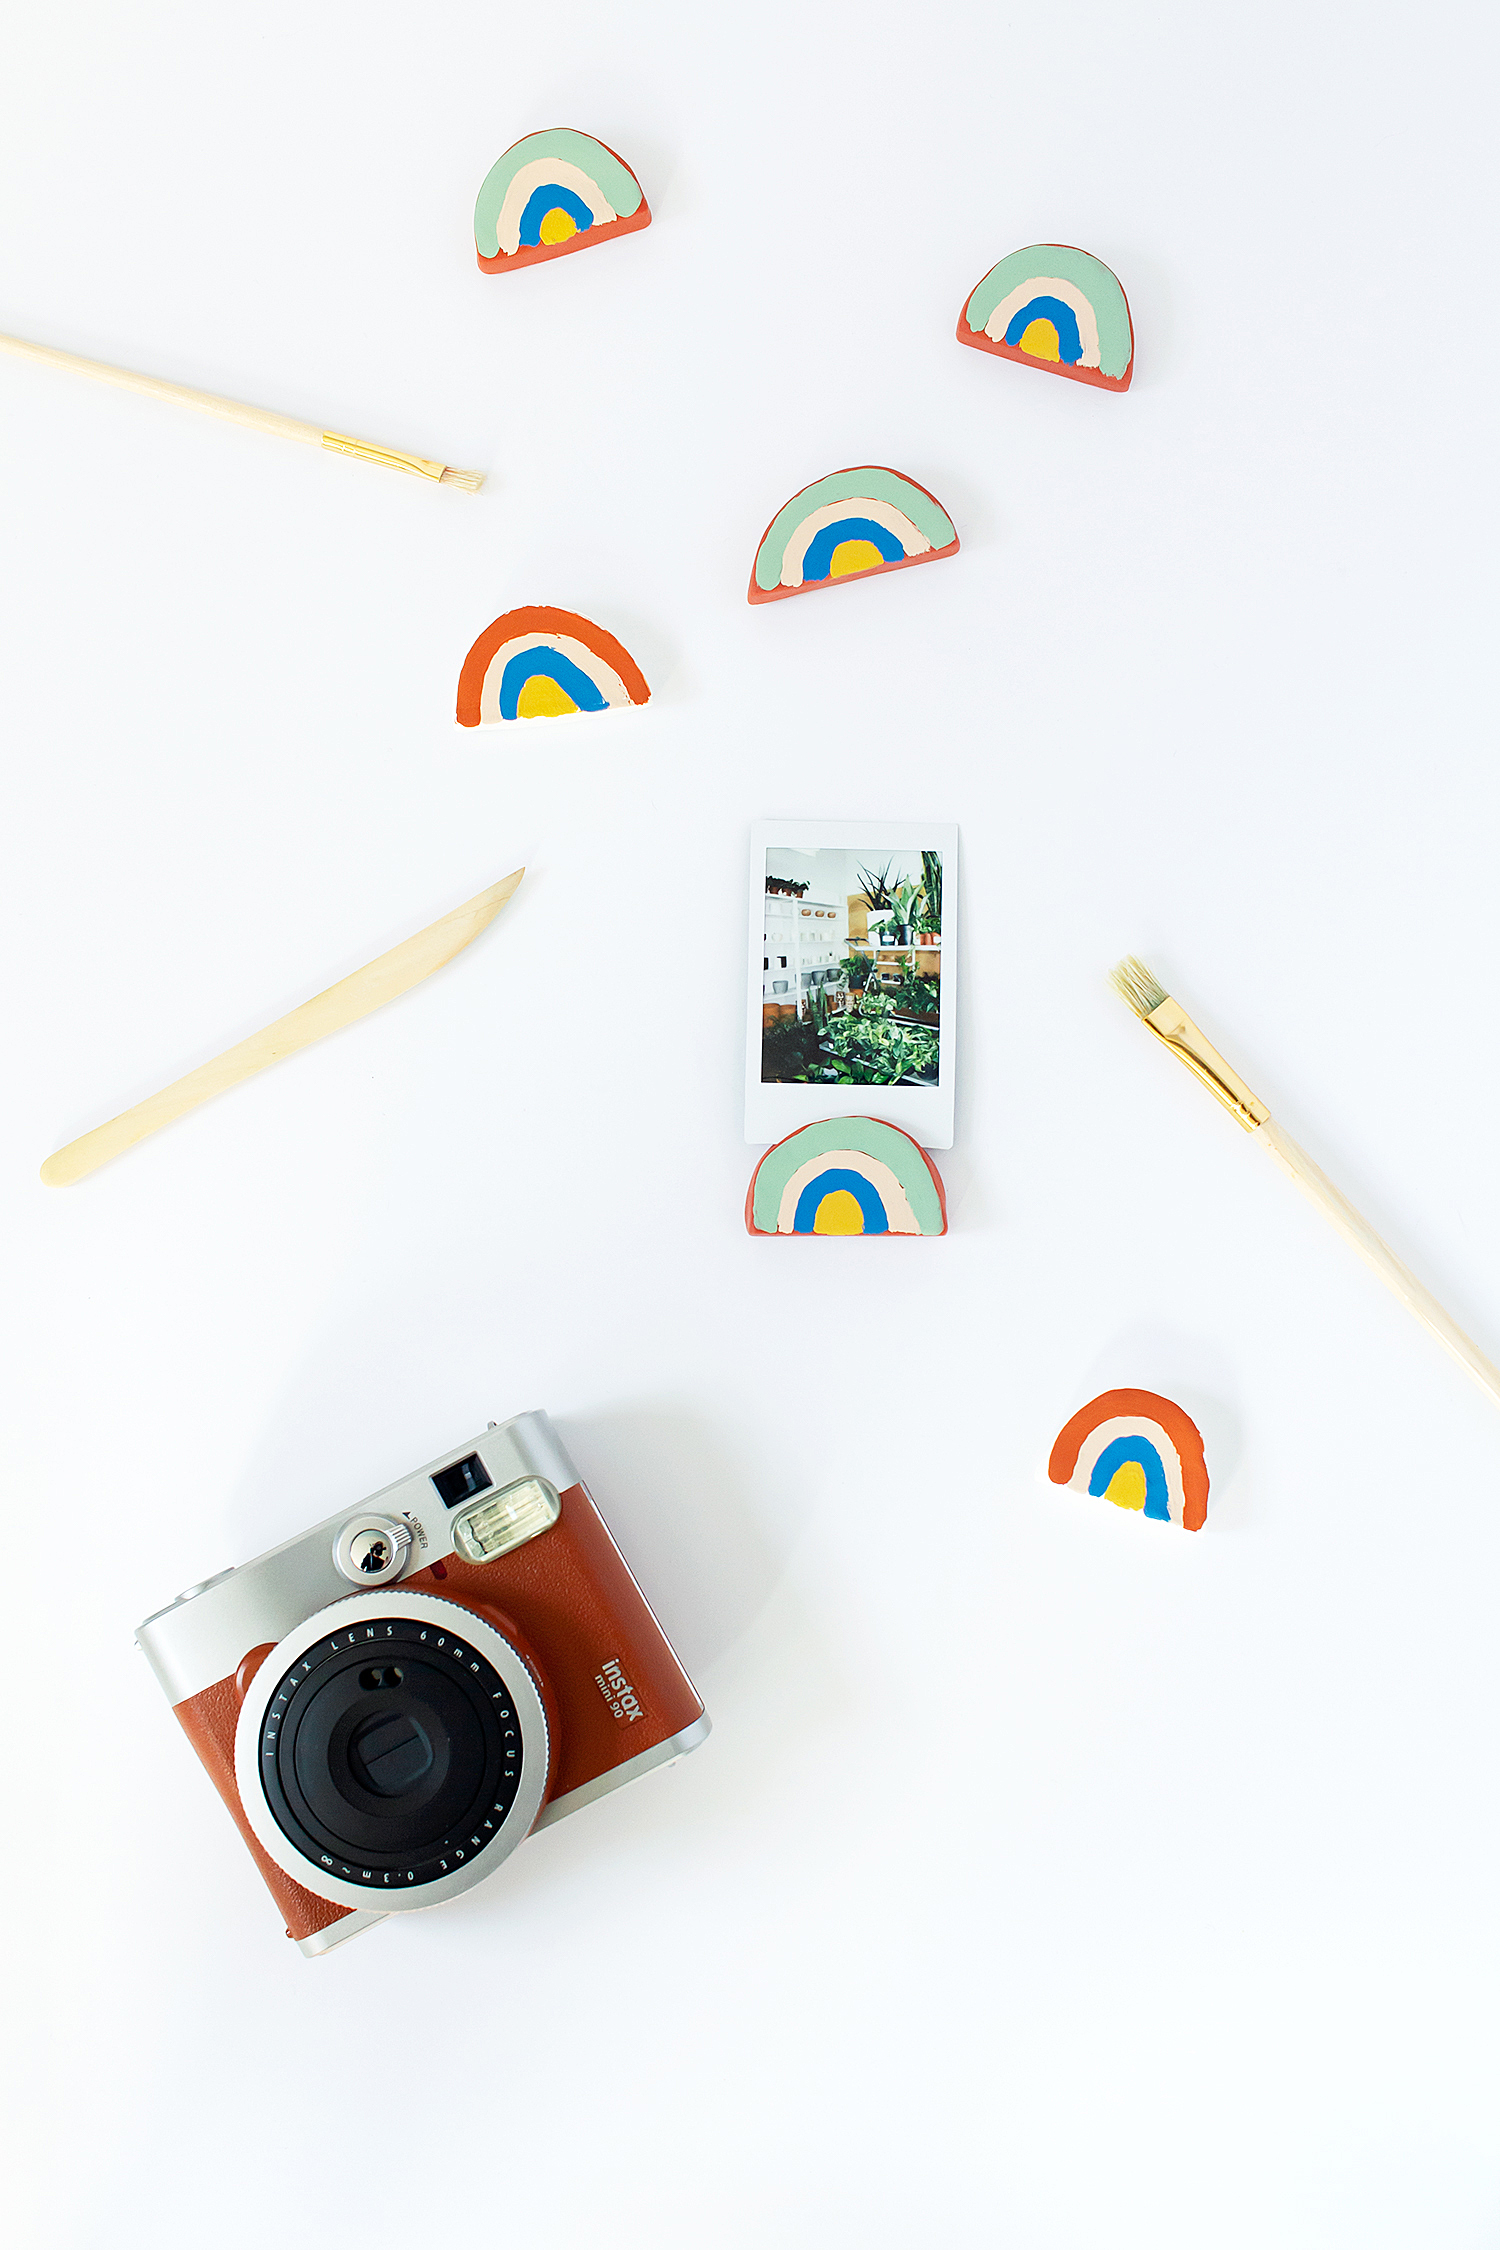
If you don’t know where to get your digital photos printed, I recommend trying Artifact Uprising or Social Print Studio. OR go analog with a Fujifilm Instax camera.* My bf gifted me this camera and it is MAGICAL to watch instant prints develop before your eyes, just like in the good old days. Fujifilm also has this wicked cool Instax Smart Phone Printer,* which converts your smartphone and Instagram shots into actual, real-life, analog prints!
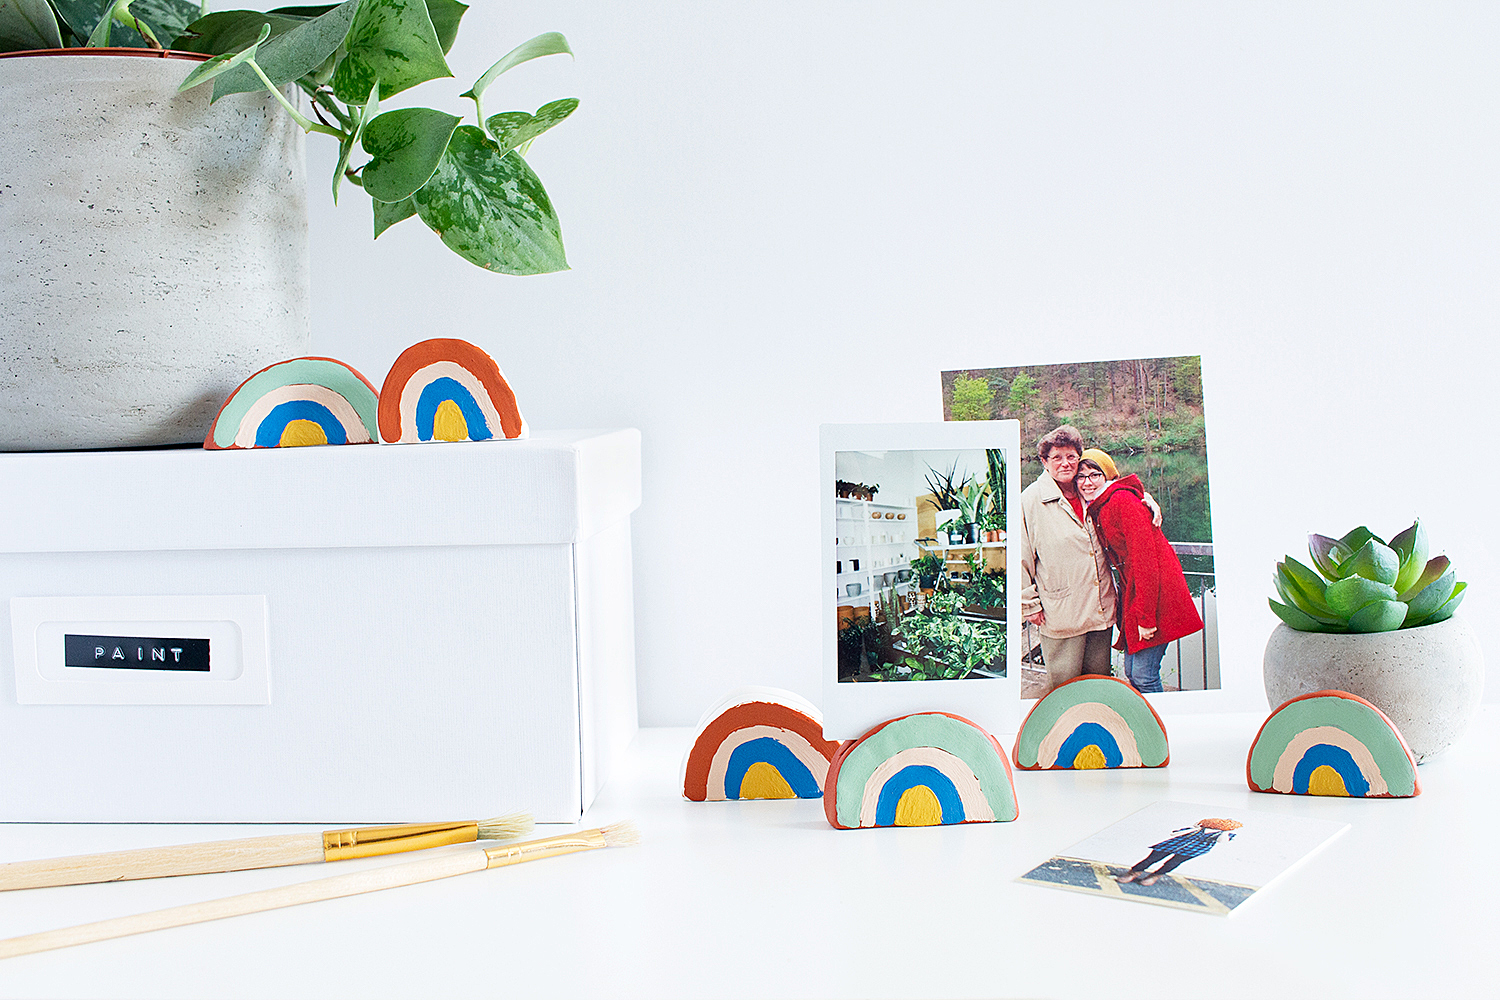
Enough camera geeking out, here’s more pictures of picture holders.
Spring 2019 Make It Challenge
And now for the Make It Challenge participants! You’re going to looooove these creative clay DIYs, I seriously almost died when I saw everyone’s submissions.
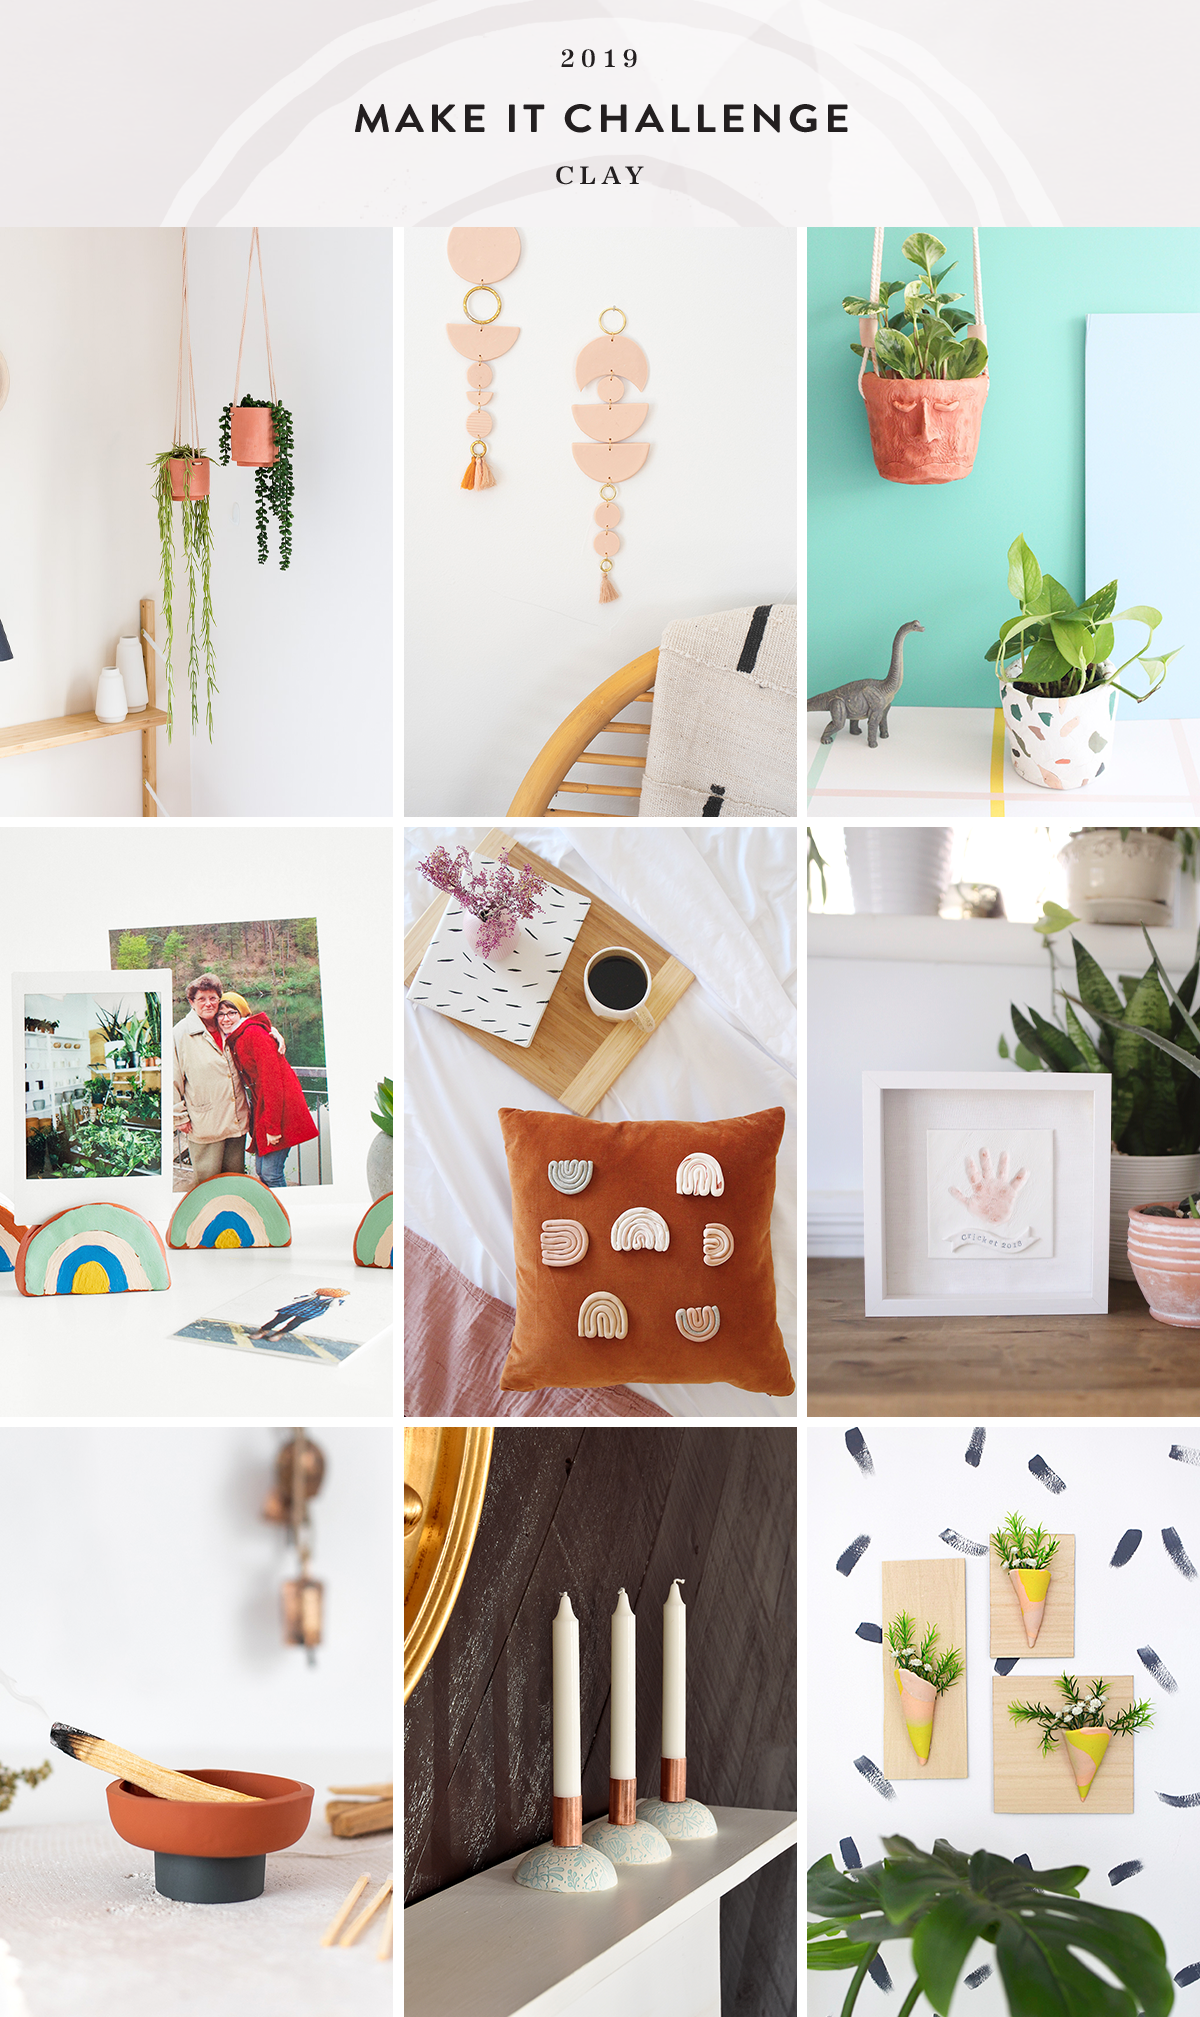
Palo Santo Holder and Match Striker by Ctrl + Curate | Clay Planters by Spatial Dwelling | Clay Handprint Keepsake Frame by Shrimp Salad Circus | Clay and Copper Candle Holders by Design Fixation | Clay Wall Hanging by Alice & Lois | Hanging Clay Vase by Delineate Your Dwelling | Clay Rainbow Beads by Bliss Makes | Terra Cotta Hanging Planters by Fall For DIY
Want to get in on the challenge fun? Show us your clay projects on Instagram by tagging #makeitchallenge, and follow @makeitchallengecommunity to keep up with all of the ideas!
You might also enjoy some of my past clay projects, like my terrazzo tile wall hanging, or this clay ring dish idea using a cookie cutter.
Are you inspired to start printing photos again? Or did you never stop? I’d love to hear your tricks for how to display your smartphone photos in the comments!
xx

*THIS POST CONTAINS AFFILIATE LINKS. THIS MEANS IF YOU PURCHASE, I WILL EARN A SMALL COMMISSION AT NO EXTRA CHARGE TO YOU, WHICH IS PRETTY SWEET BECAUSE IT HELPS ME PAY BLOGGING BILLS, SO THANK YOU! I WILL ONLY LINK TO PRODUCTS I HAVE USED OR WOULD USE MYSELF, PINKY PROMISE. SEE MY FULL DISCLOSURE POLICY HERE.
YESSSSS. My first camera was a $20, off-brand point and shoot that lasted 1 summer before my brother thought it was perfect for underwater shots haha… These photo holders are going to be more popular than the little acrylic frames that are everywhere now!
Brothers! Haha, that sounds like a wonderful first camera too! I have to go back and look at my “first photos,” I bet they are TERRIBLE! Thank you so much, Cat, that is so kind of you to say! xx
I love that you added a bit of gray to each color – it’s the perfect soft muted rainbow!! Pinned these cuties.
I’m digging the muted rainbow colors these days. Thank you, friend! xx